
Curtains get all the compliments, but it is the rod and hardware that quietly decide whether a window looks finished or forgotten — and good hardware is famously overpriced for what is, at heart, a pole and two brackets. The happy news is that curtain hardware is one of the easiest things in the house to make yourself: a branch, a length of copper pipe, a pair of drawer knobs, and a can of spray paint can do nearly everything a designer rod set does, for a small fraction of the cost. These ten tricks cover the rod itself, the brackets that hold it, the finials that finish it, and the holdbacks that complete the picture. Save your favorites, measure your window twice, and give your curtains the hardware they deserve.
In This Article
- 1. Turn a Fallen Branch into a Rustic Curtain Rod
- 2. Spray-Paint an Old Rod Matte Black or Aged Brass
- 3. Use a Copper Pipe Rod for a Warm Industrial Look
- 4. Make Finials from Wooden Drawer Knobs
- 5. Hang the Rod from Leather Strap Loops
- 6. Build Simple Wooden Brackets from Scrap Wood
- 7. Wrap a Dowel Rod in Rope for a Coastal Finish
- 8. Layer Sheers and Curtains on a DIY Double Rod
- 9. Mount the Rod to the Ceiling for Taller-Looking Windows
- 10. Turn Drawer Pulls into Elegant Curtain Holdbacks
1. Turn a Fallen Branch into a Rustic Curtain Rod
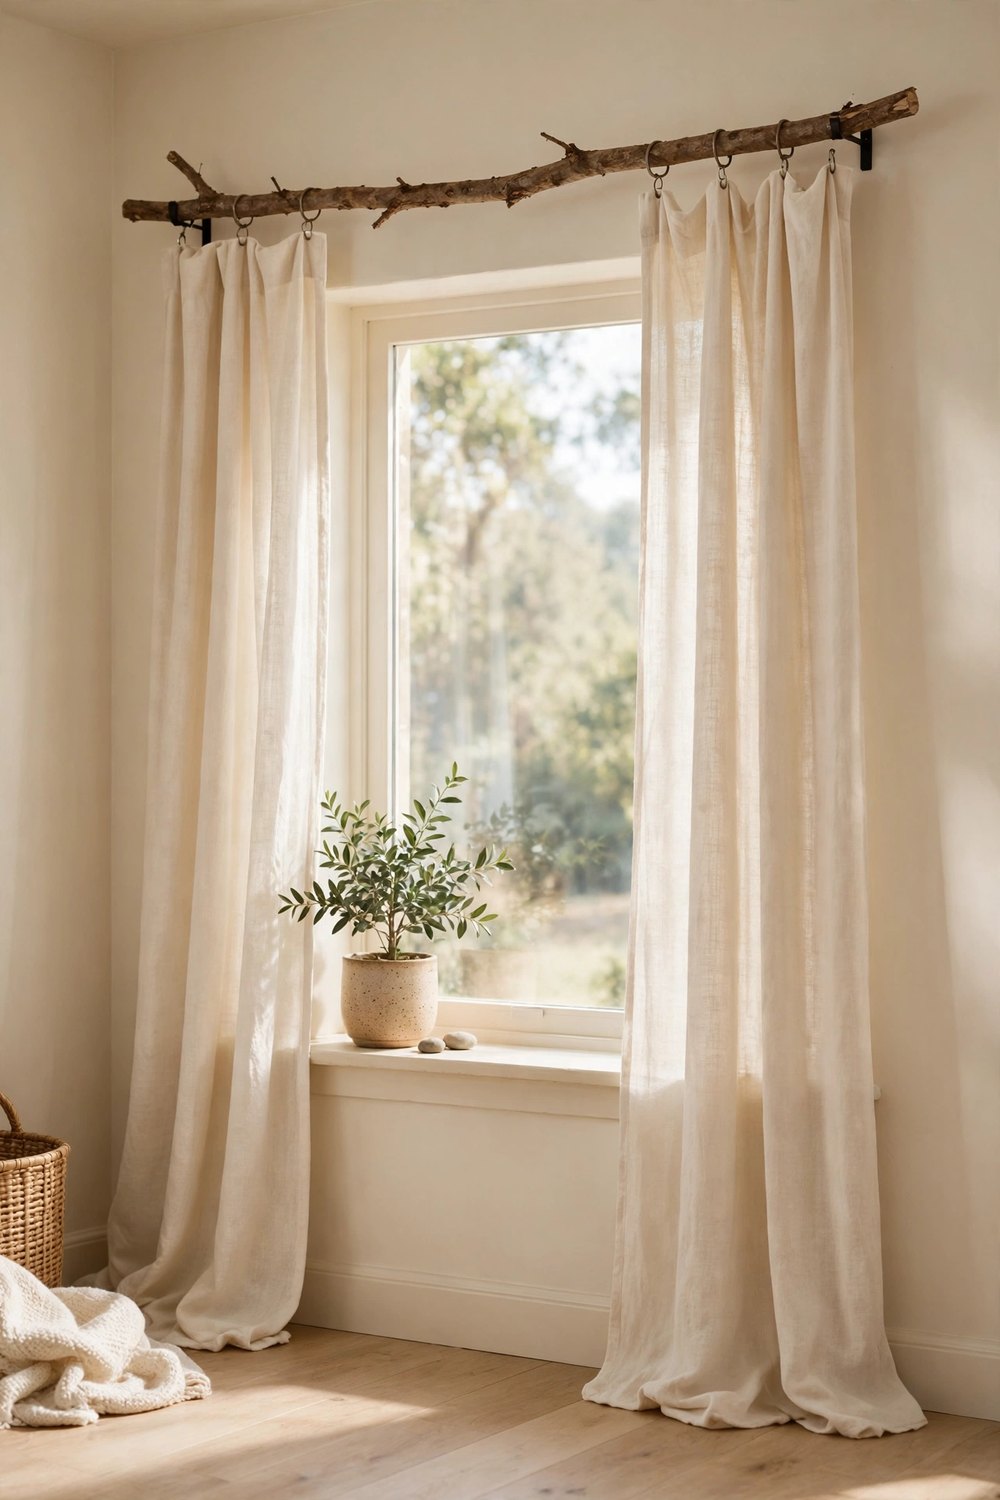
The most characterful curtain rod costs nothing at all — it is lying in the garden or the park after a windy week. Choose a branch that is straight enough to hang level, a little longer than your window is wide, and roughly the thickness of a broom handle; strip the bark if it is loose, sand any rough spots smooth, and let it dry indoors for a few days before hanging. Thread the curtains on with clip rings or simple tab tops, which glide over the knots and curves better than tight rod pockets. The slight bends and natural taper are exactly the charm here, and no shop-bought rod will ever match its story.
2. Spray-Paint an Old Rod Matte Black or Aged Brass
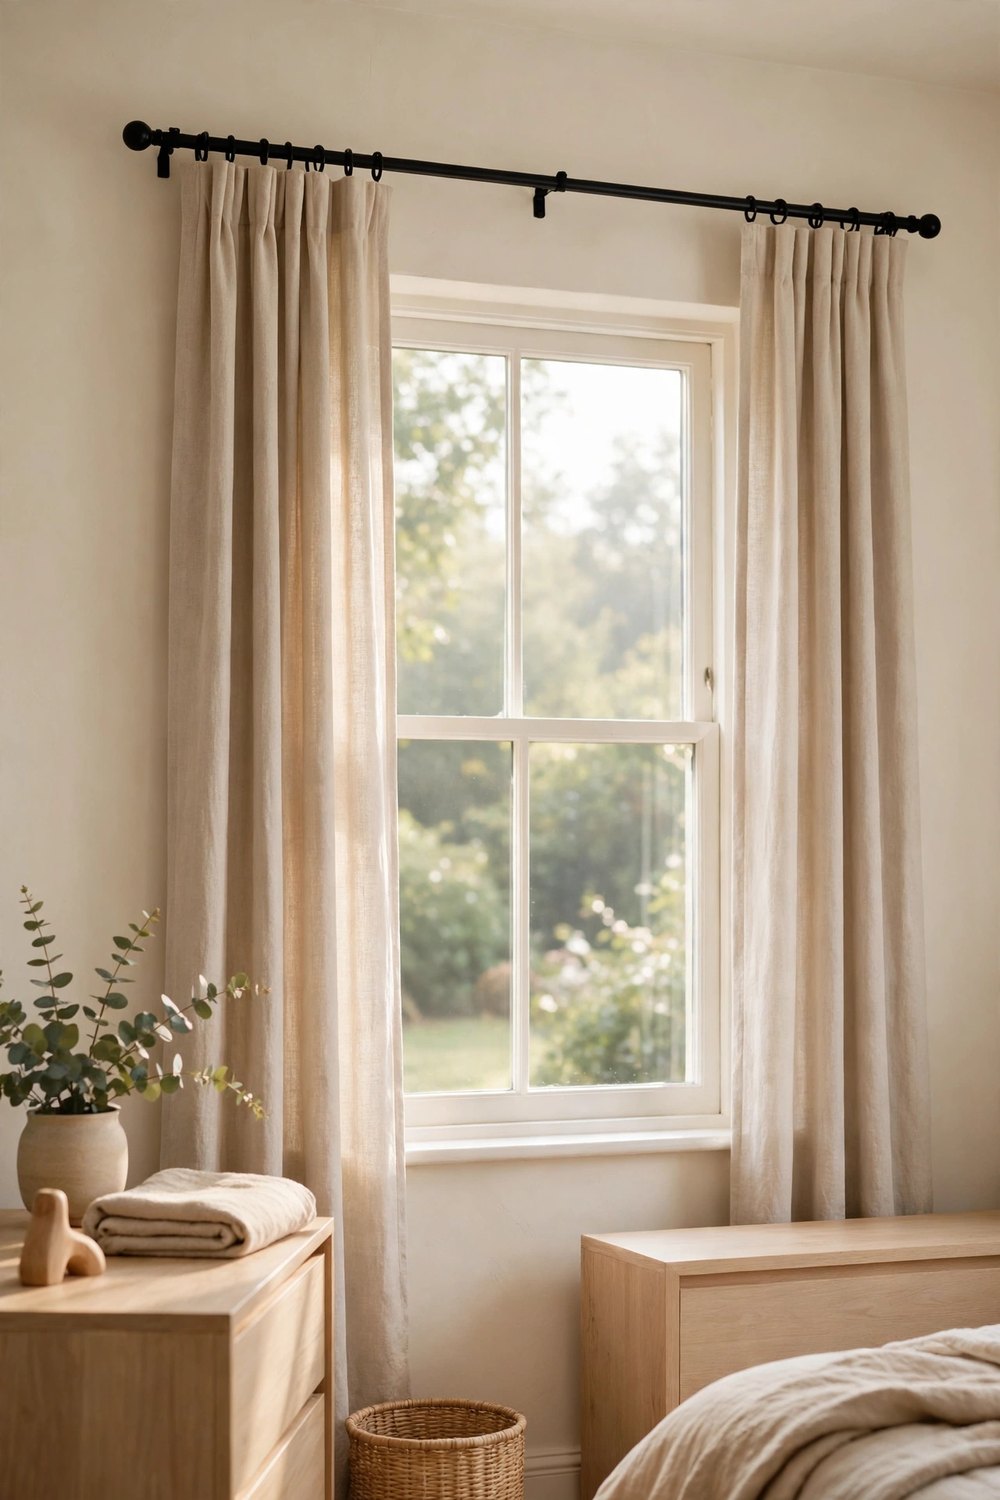
Before you replace a dated rod, try painting it — a shiny chrome or faux-gold rod from a decade ago turns convincingly modern with one can of spray paint. Remove the rod and finials, wash them with soapy water, scuff glossy surfaces lightly with fine sandpaper so the paint grips, and apply two or three mist coats of matte black, oil-rubbed bronze, or aged brass spray paint, letting each coat dry fully. The same treatment rescues mismatched brackets and rings so the whole set reads as one. A few dollars of paint buys you what looks like a brand-new hardware set, and the finish lasts for years if you let it cure a full day before rehanging.
3. Use a Copper Pipe Rod for a Warm Industrial Look
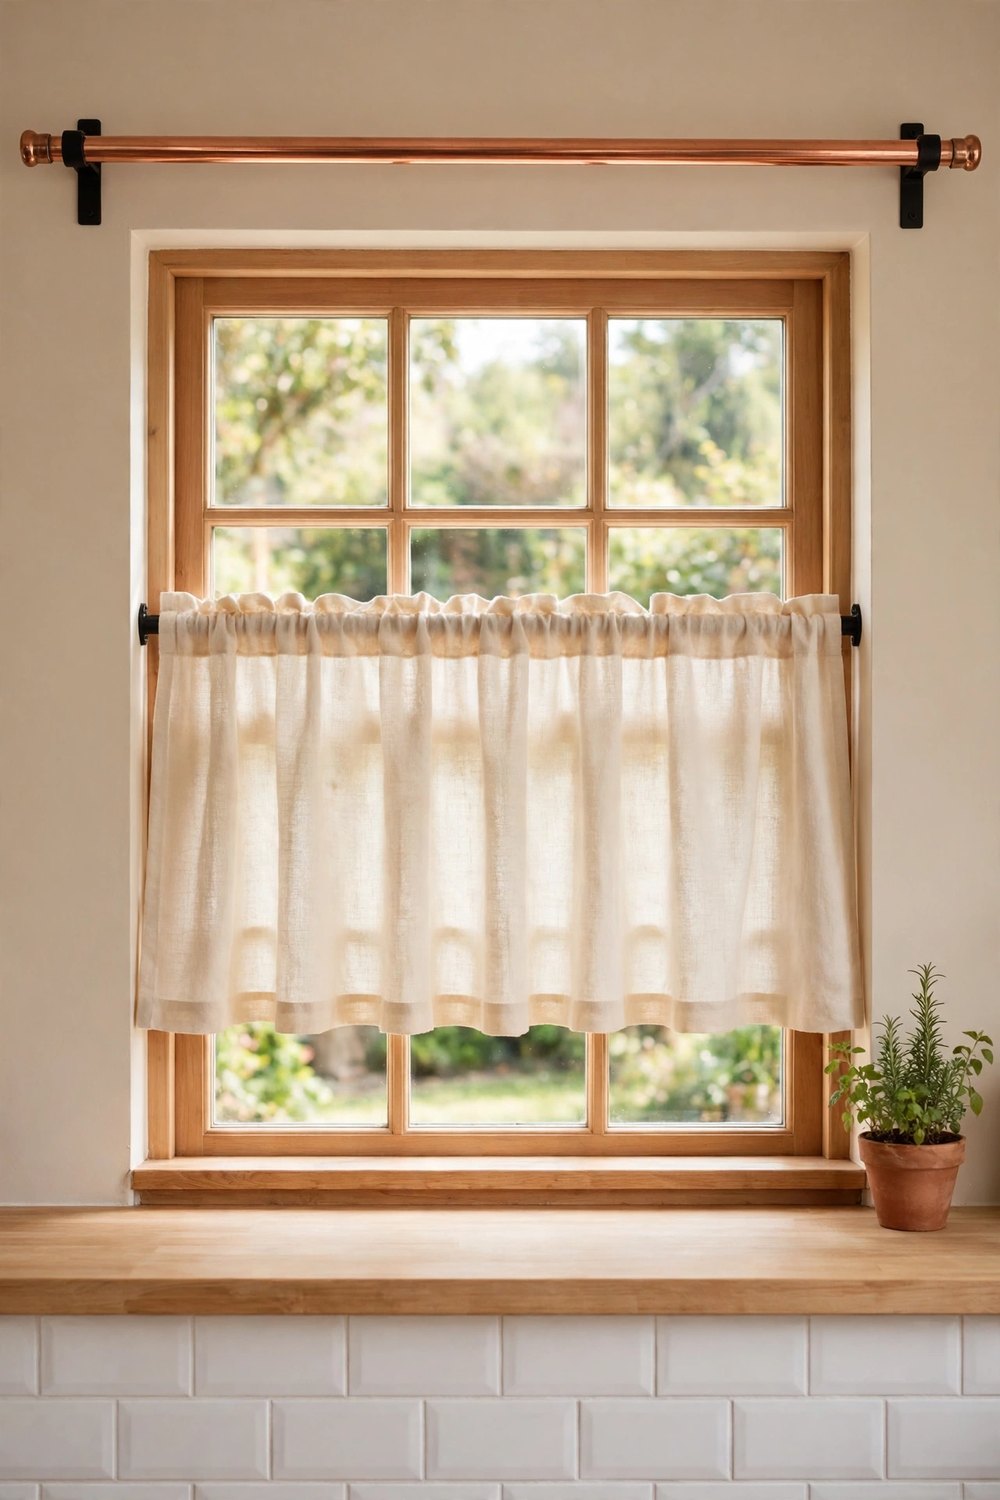
A length of standard copper plumbing pipe makes a curtain rod with real warmth and weight — and it costs far less than the “designer copper” versions in decor stores. Ask the hardware store to cut the pipe to size, cap the ends with matching copper end caps or simple pipe fittings, and hang it from plain black or brass brackets for contrast. The copper starts bright and slowly deepens to a rich, lived-in patina; if you prefer it bright, a quick rub with a lemon half keeps it glowing. It suits kitchens and calm industrial-leaning rooms beautifully, and any leftover offcut becomes a matching towel rail.
4. Make Finials from Wooden Drawer Knobs
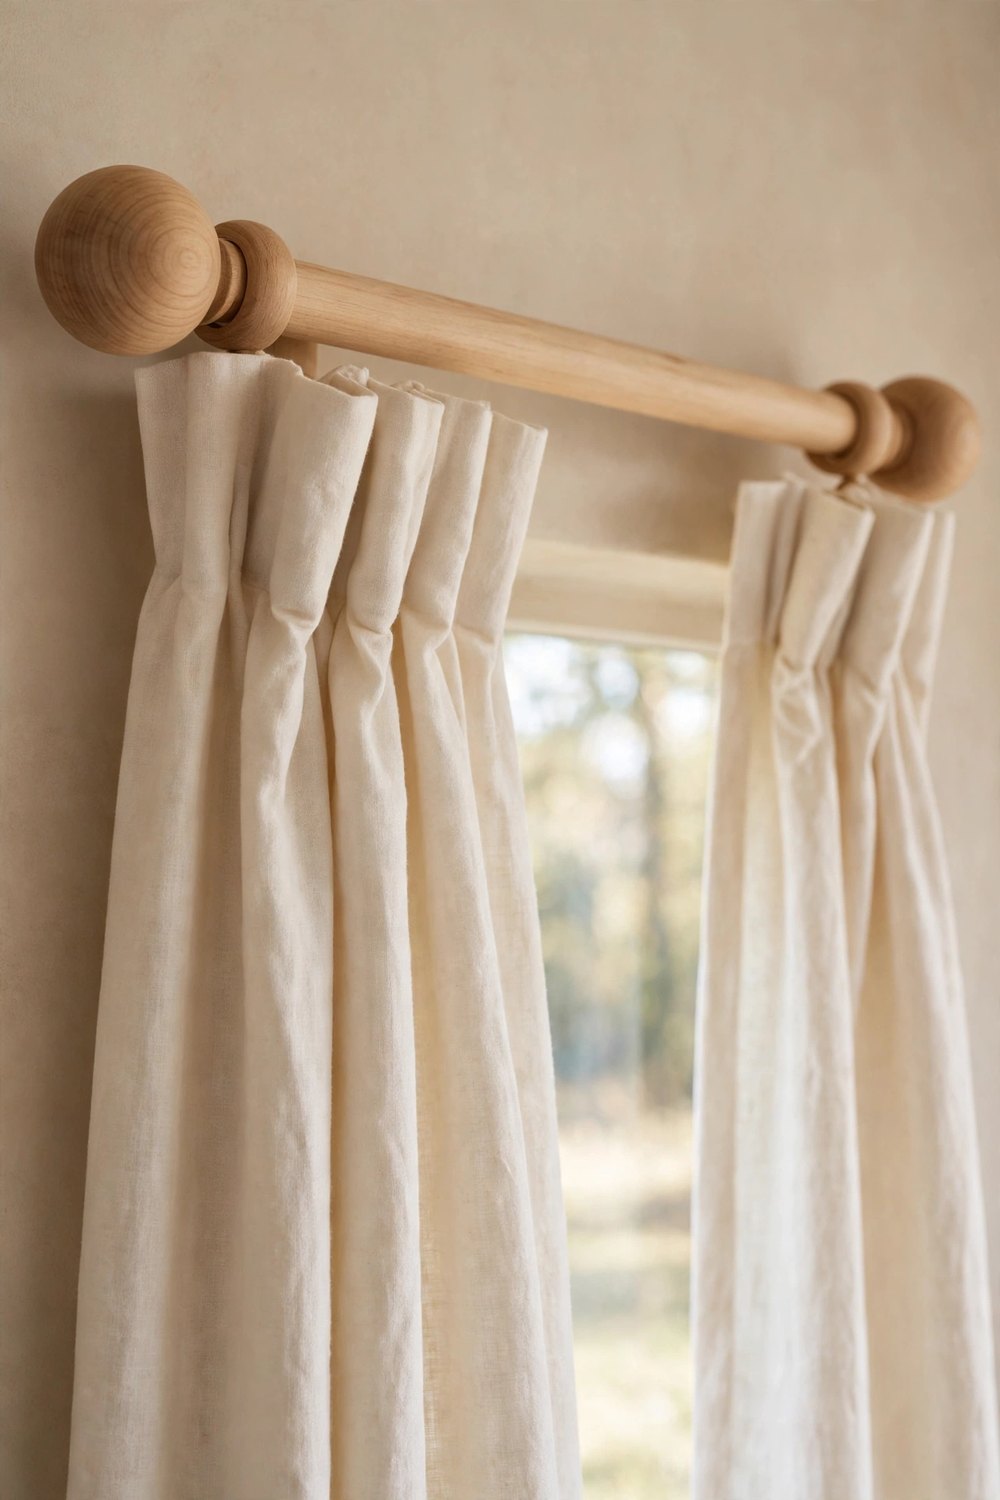
Finials — the decorative ends of a rod — are where hardware sets get expensive, and wooden drawer knobs do the same job for pennies. Choose oversized knobs in a shape you love, drill a pilot hole in the back of each if needed, and screw them onto the rod’s end bolts or fix them with strong epoxy onto plain rod ends. Paint or stain the knobs to match the rod, or leave them in a contrasting natural wood so the ends read as deliberate punctuation. Thrift stores and clearance bins are full of beautiful odd knobs, and the swap takes ten minutes whenever you want a new look.
5. Hang the Rod from Leather Strap Loops
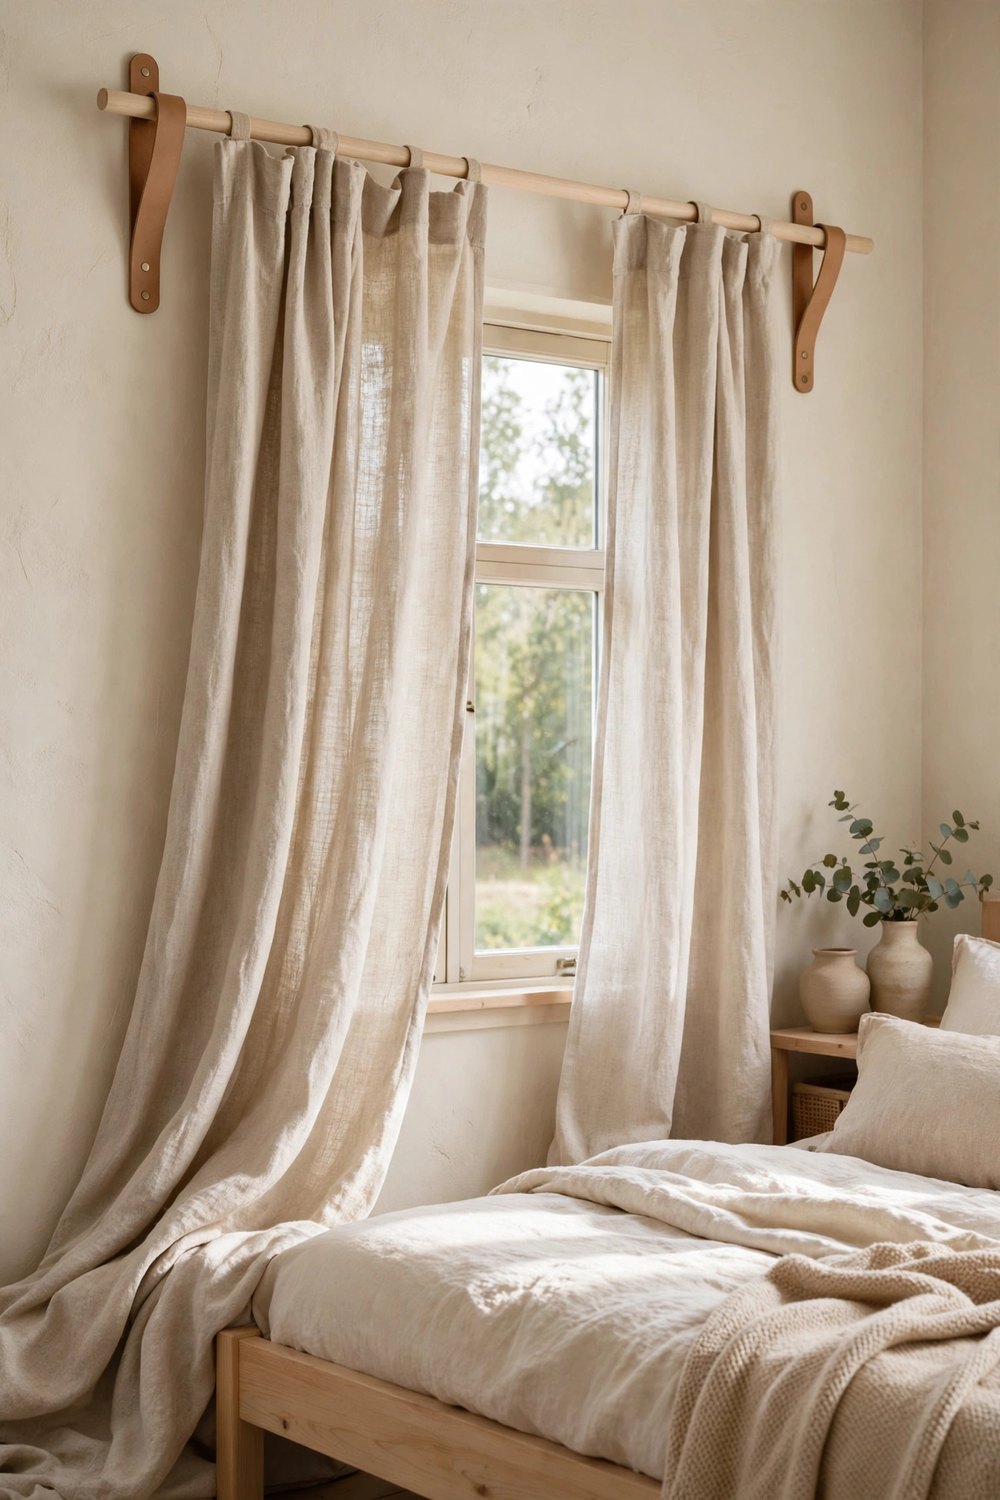
For a soft, Scandinavian feel, skip metal brackets entirely and hang the rod from loops of leather strap. Cut two lengths of sturdy leather belt or craft strap, fold each into a loop sized to cradle your rod, and fix the ends to the wall with a screw through both layers, hidden by the fold. The rod simply rests in the loops, which makes removing curtains for washing wonderfully easy — just lift the rod out. Vegetable-tan leather ages to a warm honey tone and pairs beautifully with a pale wooden dowel rod and linen curtains, all for the price of one craft-store strap.
6. Build Simple Wooden Brackets from Scrap Wood
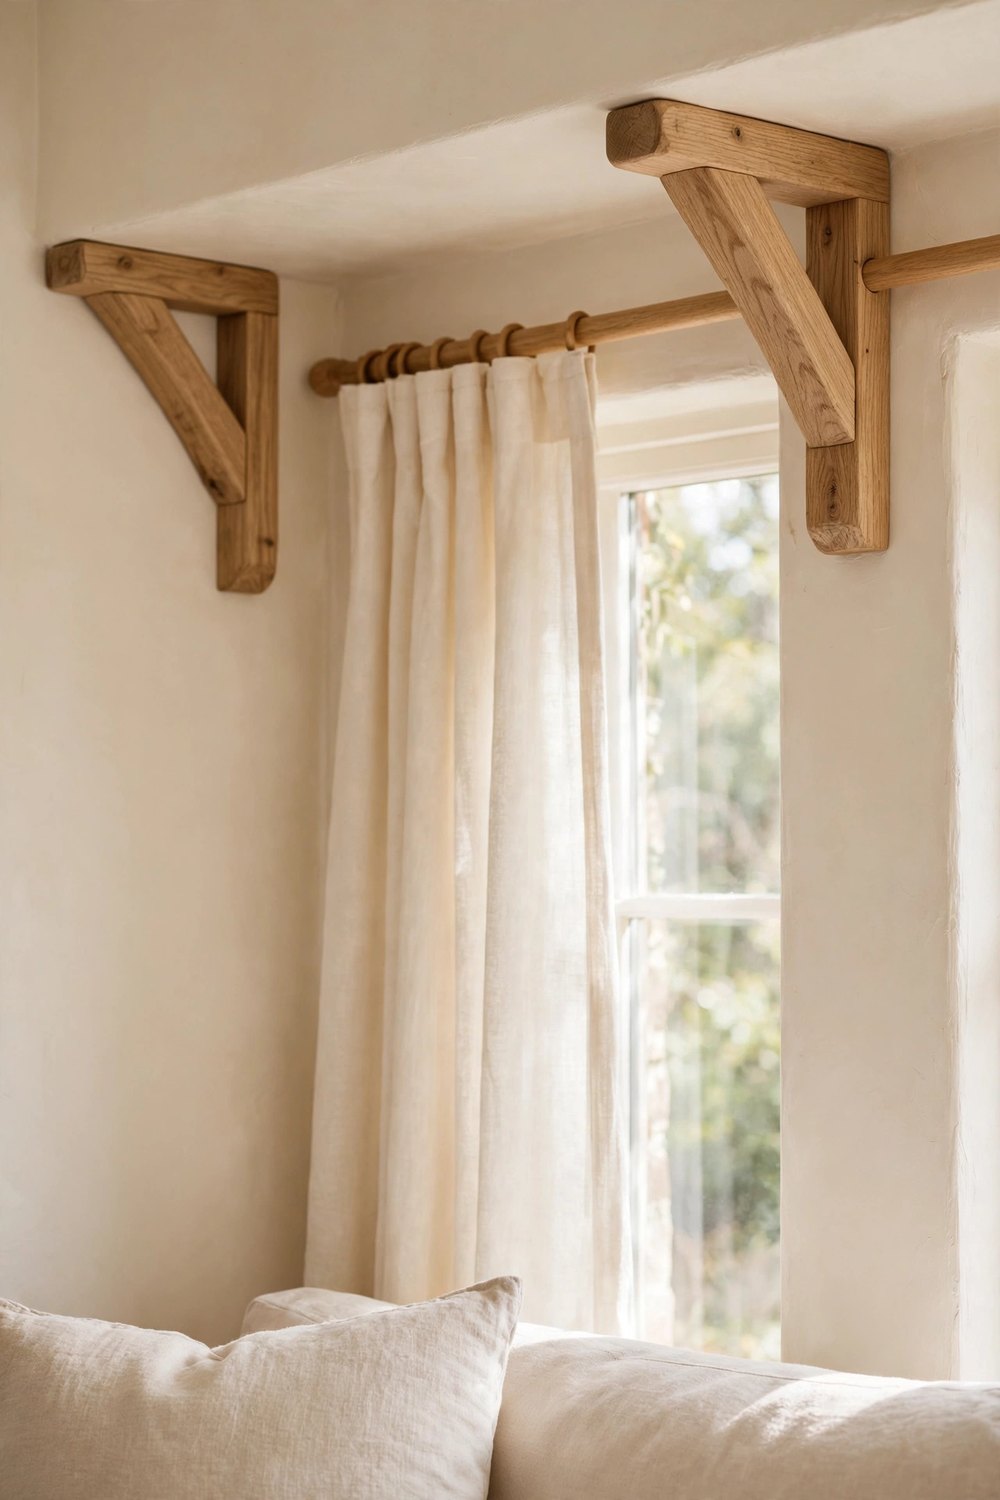
If you can cut a straight line, you can make curtain brackets that look like they came from an artisan workshop. From a piece of scrap pine or oak, cut two small blocks and shape a simple L or a notched cradle at the top of each to hold the rod, then sand everything smooth and finish with the same stain or paint as your rod. Mount them with screws into studs or proper wall plugs — brackets carry real weight, so this is the one step never to shortcut. A pair costs almost nothing from offcuts, and making them to the exact projection you need means your curtains hang at exactly the right distance from the wall.
7. Wrap a Dowel Rod in Rope for a Coastal Finish
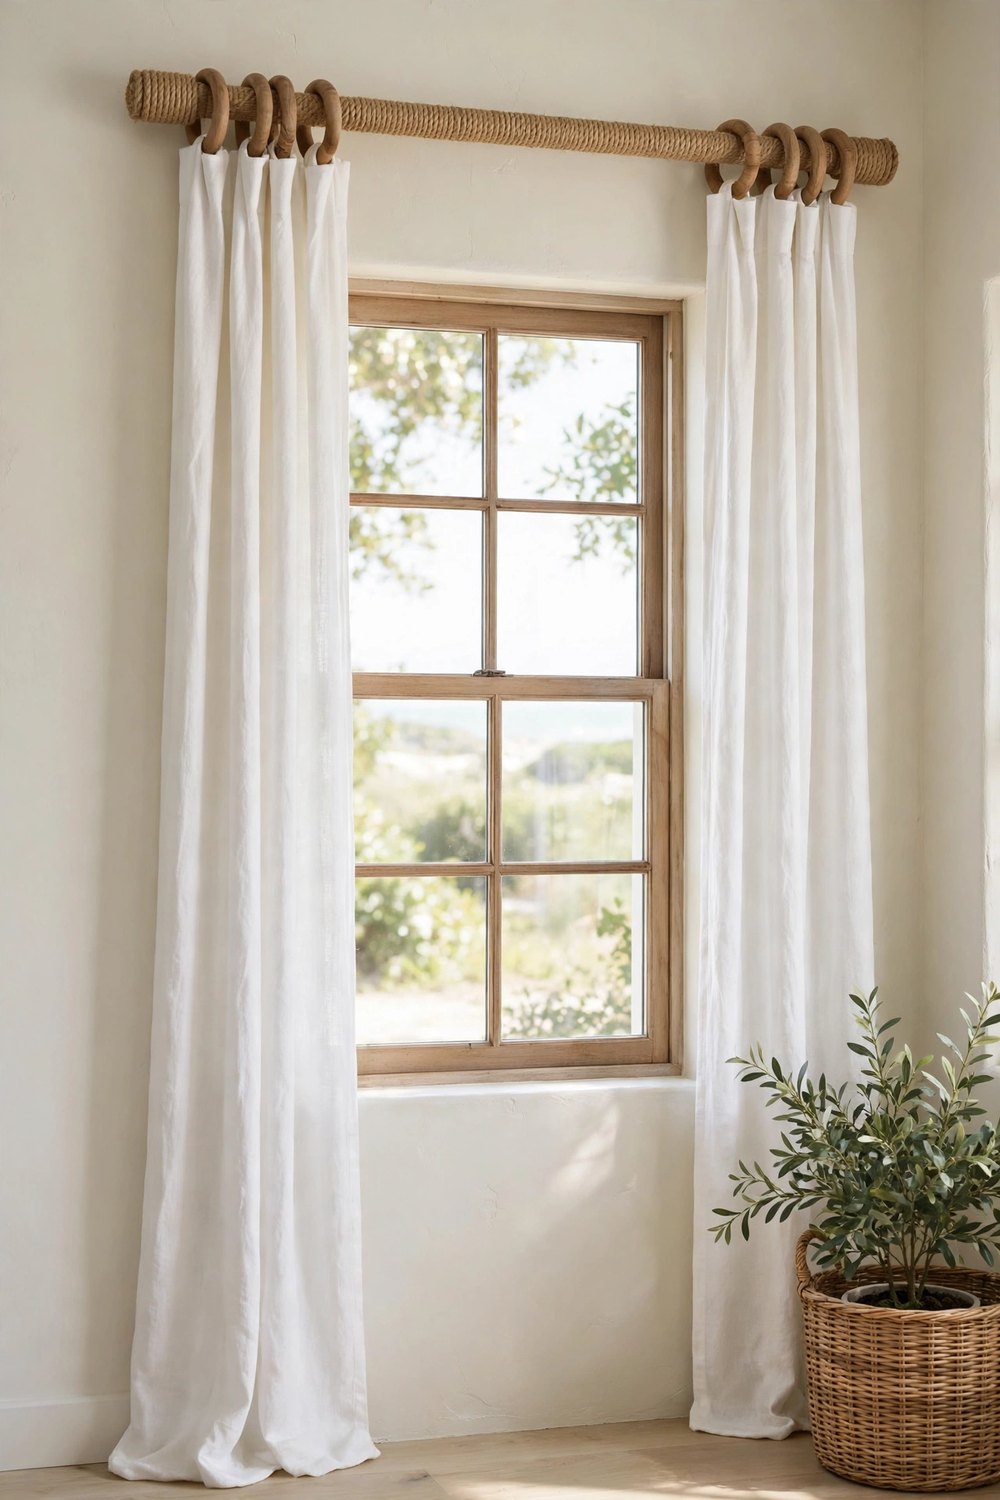
A plain wooden dowel becomes a coastal, textural rod with nothing but a glue gun and a roll of natural rope or jute twine. Run a thin line of hot glue along the dowel in short sections and wind the rope tightly around it, keeping each coil snug against the last, until the whole rod is covered; tuck and glue the ends neatly at the tips. Hang curtains from large wooden or metal rings so they slide without fraying the rope, and pair the finished rod with white or sandy linen panels. The materials cost a few dollars, the wrapping takes one relaxed evening, and the result looks like a boutique beach-house fitting.
8. Layer Sheers and Curtains on a DIY Double Rod
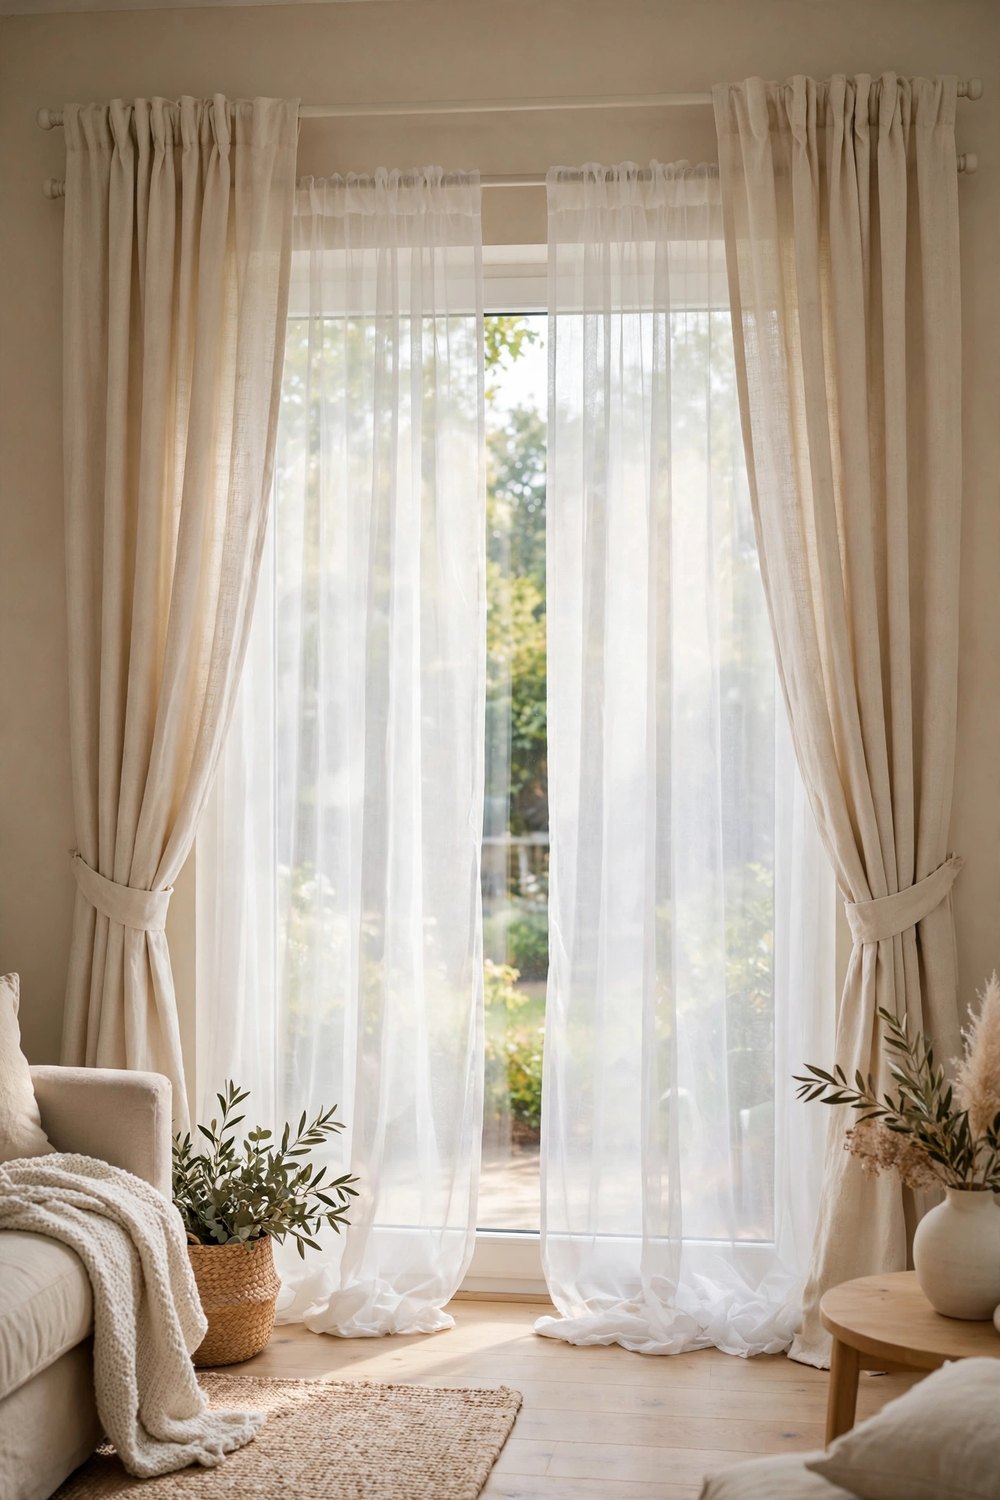
Layered curtains — sheers for the day, heavier panels for the night — usually mean buying a double rod set, but you can fake one with two single rods you already own. Mount the sheer rod on standard brackets close to the wall, then hang the main rod a few inches in front of it and a little higher, using deeper brackets or simple wooden spacer blocks behind the bracket plates. The stepped arrangement actually looks more tailored than most bought double rods, because each layer gets its own clean line. It is the perfect use for the spare rod in the garage, and the layered light in the room is worth every minute of measuring.
9. Mount the Rod to the Ceiling for Taller-Looking Windows
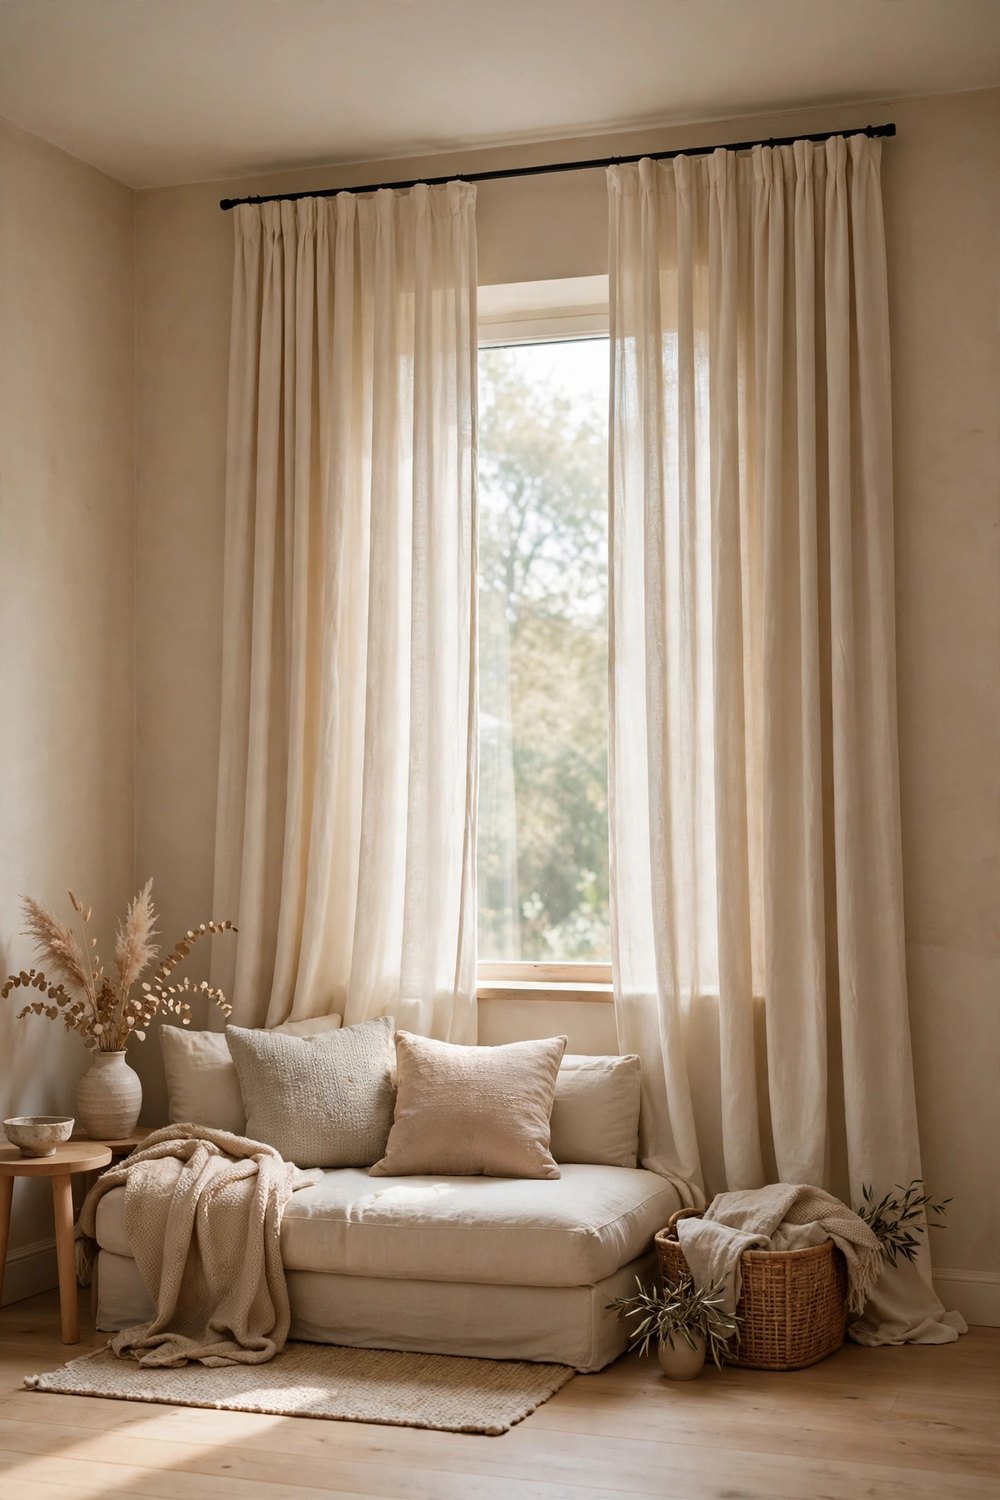
Here is the hardware trick designers use in every low-ceilinged room: fix the rod to the ceiling, or as close to it as your brackets allow, instead of just above the window frame. Curtains that fall the full height of the wall make the window — and the whole room — read dramatically taller, and the empty strip of wall above the frame disappears. Ceiling-mount brackets and simple L-brackets both work; just be sure to fix into joists or use proper ceiling anchors, since the rod and curtains hang entirely from them. It costs no more than a normal hang, uses the curtains you already have, and changes the proportions of the room more than any other idea on this list.
10. Turn Drawer Pulls into Elegant Curtain Holdbacks
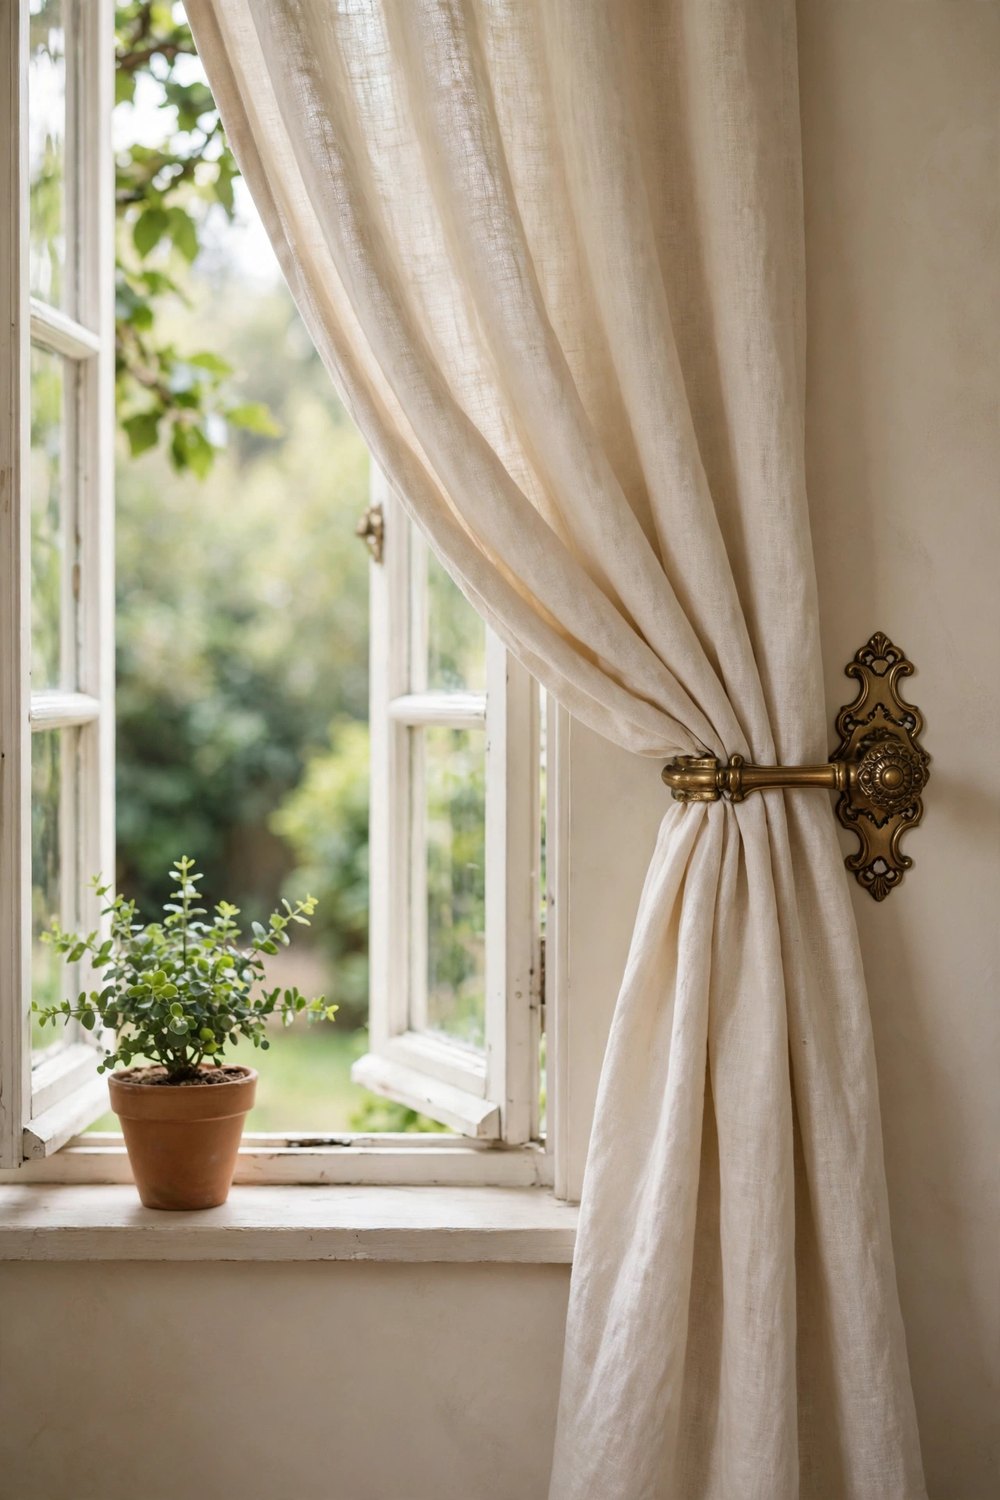
Holdbacks keep curtains swept open in that graceful curve, and a pair of handsome drawer pulls or spare door knobs makes them for almost nothing. Choose pulls with a real stem or a knob on a rosette, fix each one to the wall at the side of the window — into a stud or with a strong anchor, at about two-thirds of the curtain’s height — and simply loop the curtain behind it. Ornate vintage pulls look like purpose-made holdbacks, plain wooden knobs suit a calm room, and the whole pair usually costs less than a single bought holdback. Finish the look with a tassel or a loop of the same leather strap from the rod loops, and the window reads dressed from finial to hem.
Good curtain hardware is mostly confidence and a few honest materials — the right pole, brackets that hold it firmly, ends that finish it properly, and holdbacks that give the fabric its shape. Start with the free or nearly-free wins: paint the rod you have, mount it higher, add knob finials. The windows will look professionally dressed, and nobody will guess the whole set cost less than lunch. Save this list to your Pinterest board so it is handy before your next project weekend — and follow DecorNesti for a new cozy project list every week.



Leave a Reply