
18 Downspout Landscaping Ideas That Hide the Ugly Parts
Look, we get it. You can spend a whole weekend on your flower beds and your front walk, and then one plain white pipe running down the corner of the house undoes half the effect. Downspouts are necessary, nobody argues with that, but they rarely look like they were part of the plan. The good news is that the area around a downspout is actually one of the easiest spots in the yard to improve, because water already gathers there and plants, stone, and simple covers can all work with that instead of against it.
The trick with downspout landscaping ideas is remembering the job comes first. Whatever you add still has to move water away from the foundation, stay clear enough to clean, and hold up through heavy rain. A pretty cover that traps water against the siding is worse than an ugly pipe, so every idea here keeps drainage in mind. Most of them also hide the splash zone at the bottom, which is usually the messiest part, with bare soil, scattered mulch, and a stain creeping down the wall.
Below you will find eighteen ideas, from a five minute pebble trick to a full dry creek bed you build over a weekend. Some suit a front corner everyone sees from the street, and others are perfect for that forgotten side yard spout. Pick the one that matches your house, your budget, and how much digging you honestly feel like doing, and that plain pipe can quietly disappear into the planting.
In This Article
- Copper Rain Chain Into a River Rock Basin
- Dry Creek Bed That Carries Water Away
- River Rock Bed With a Gentle Slope
- Splash Block Hidden Under Smooth Pebbles
- Decorative Stone Splash Pad
- Rain Barrel Dressed With a Planter Top
- Wooden Trellis Screen in Front of the Pipe
- Stacked Stone Wrap Around the Base
- Evergreen Shrubs That Soften the Corner
- Ornamental Grasses That Hide the Bottom
- Tiered Planter Boxes Beside the Downspout
- Flower Bed With Tall Blooms in Front
- Climbing Vine on a Small Obelisk
- Underground Extension With a Pop Up Emitter
- Stepping Stone Path Over the Drain Line
- Mulched Bed That Absorbs the Splash Zone
- Painted Downspout That Blends With Planting
- Birdbath Basin Where the Water Lands
Stone, Rock, and Water Features That Do the Heavy Lifting
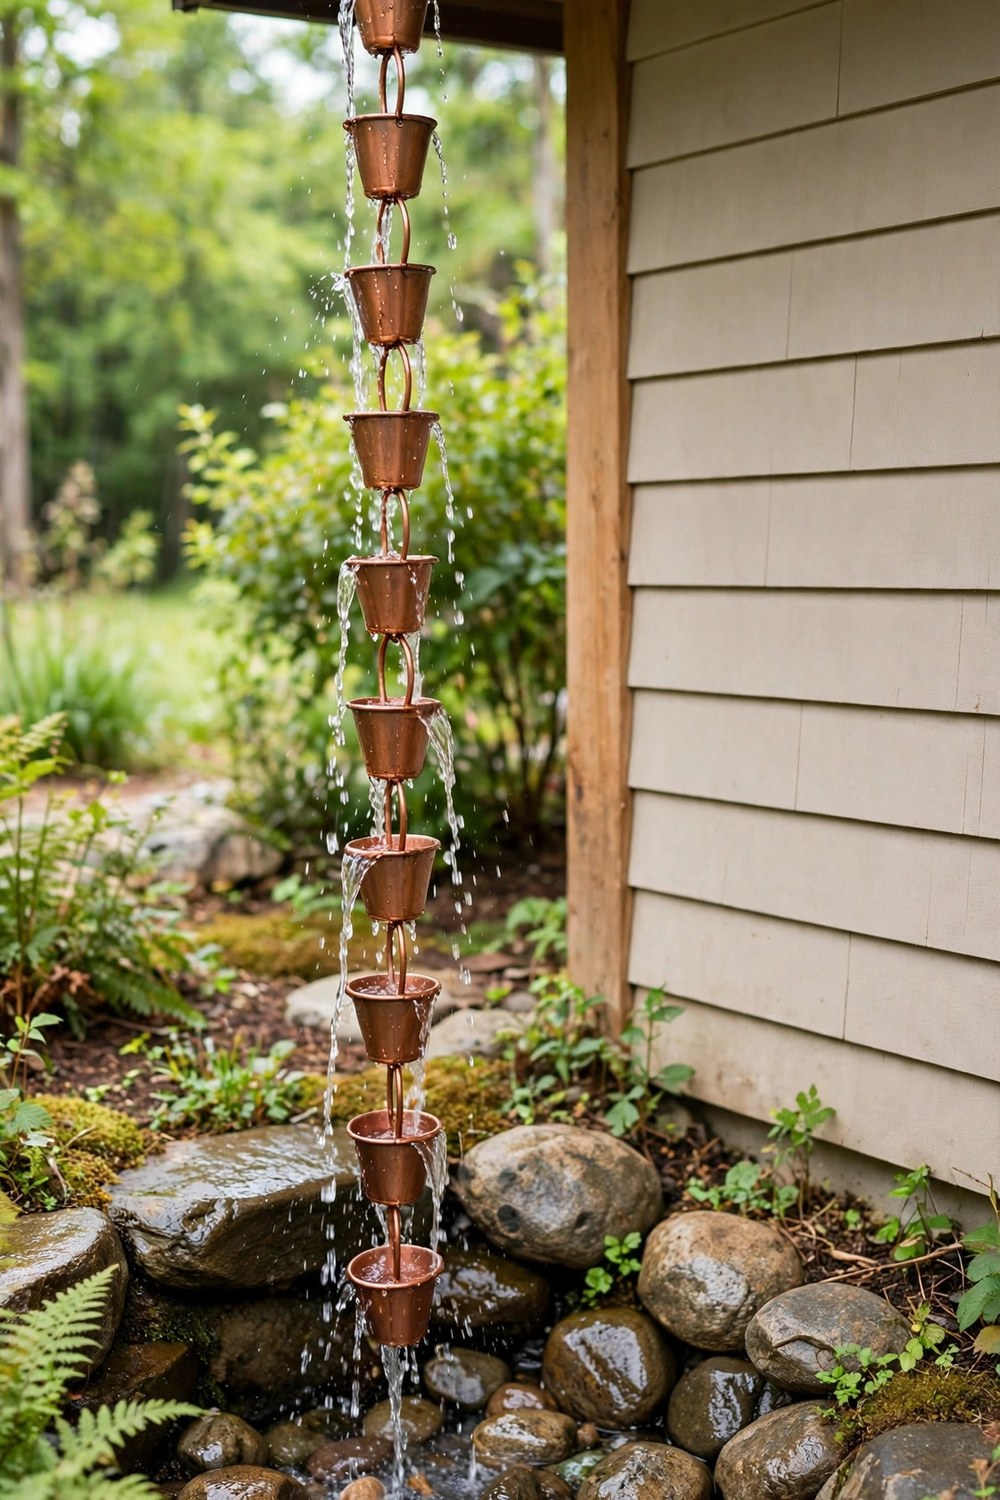
1. Copper Rain Chain Into a River Rock Basin
A rain chain replaces the closed pipe with a line of linked copper cups, so water becomes something you actually watch instead of something you hide. Remove the lower section of downspout, hang the chain from the gutter outlet, and anchor it in a shallow basin filled with river rock. The basin should sit on soil that slopes gently away from the foundation, and a buried extension underneath can carry overflow farther out on wet weeks. Copper usually weathers to a soft brown and then a pale green, which blends beautifully with planting. Keep the basin wide enough to catch splashes in windy rain, and clear leaves from the cups each fall so the chain keeps guiding water down instead of flinging it sideways onto the siding. It is also one of the few options that looks just as good in winter as it does in summer.
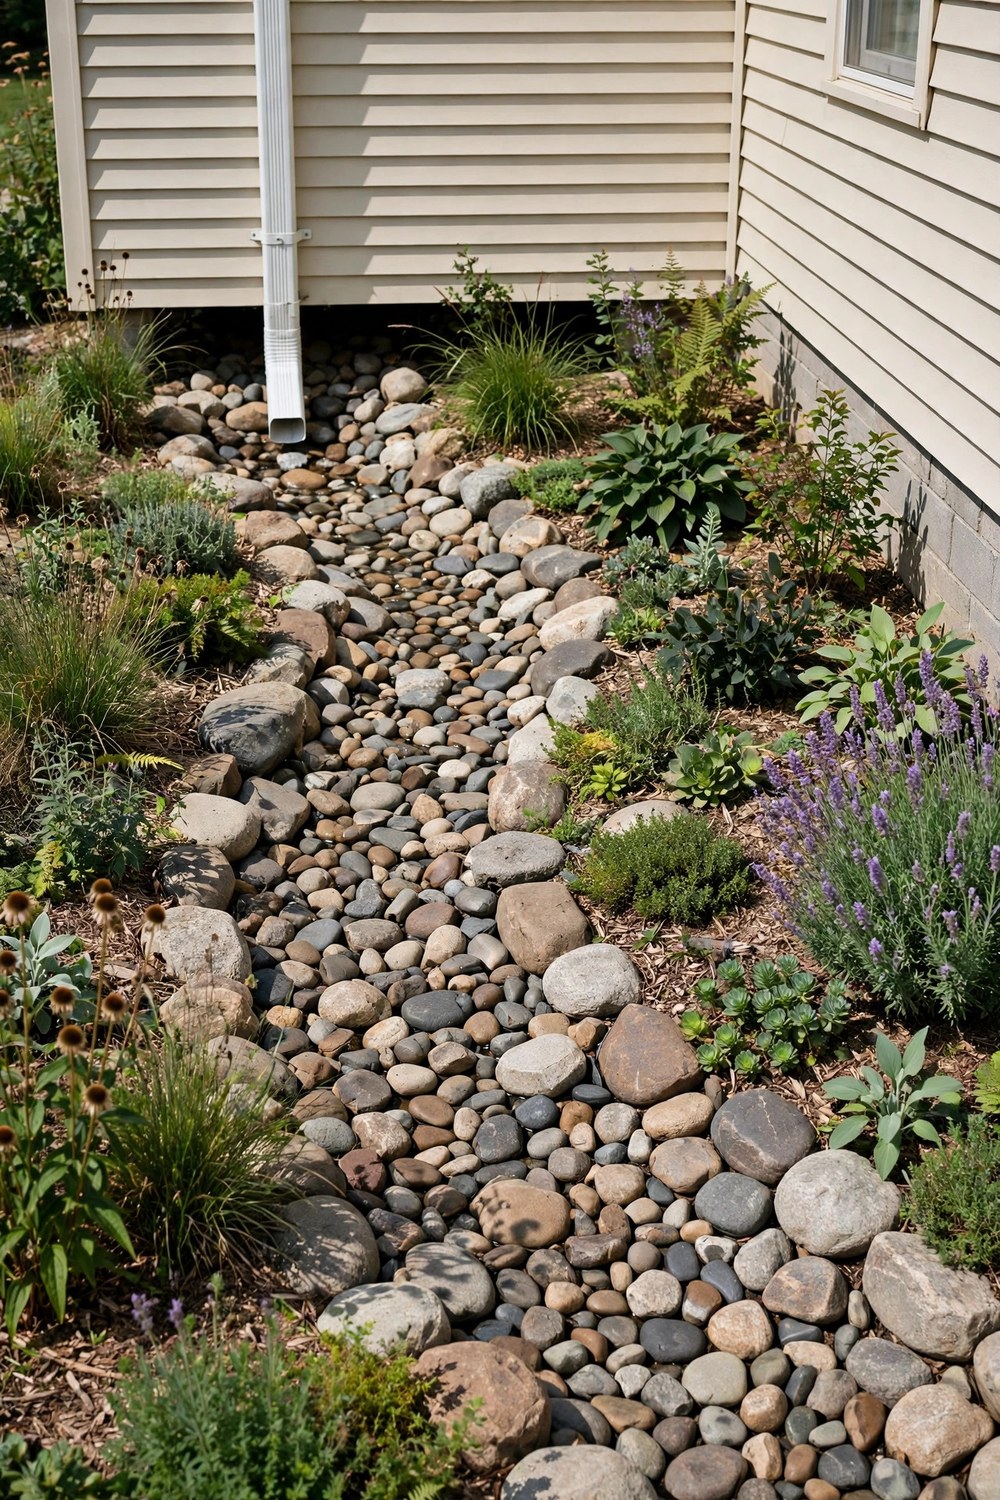
2. Dry Creek Bed That Carries Water Away
A dry creek bed turns the downspout outlet into the start of a small, stony stream that only runs when it rains. Dig a shallow swale leading away from the house, line it with landscape fabric, and fill it with mixed river rock, larger boulders at the edges, and smaller stone in the middle where water travels. The bed needs a steady, gentle fall the whole way, because water that pools halfway will usually just soak in beside your planting. Finish the creek at a spot where runoff can spread out safely, well away from the foundation and any walkway. On dry days it reads as a deliberate design feature, and it handles a surprising amount of roof water without looking like drainage at all. Add a few plants along the banks and the line between drainage and garden bed disappears almost completely over time.
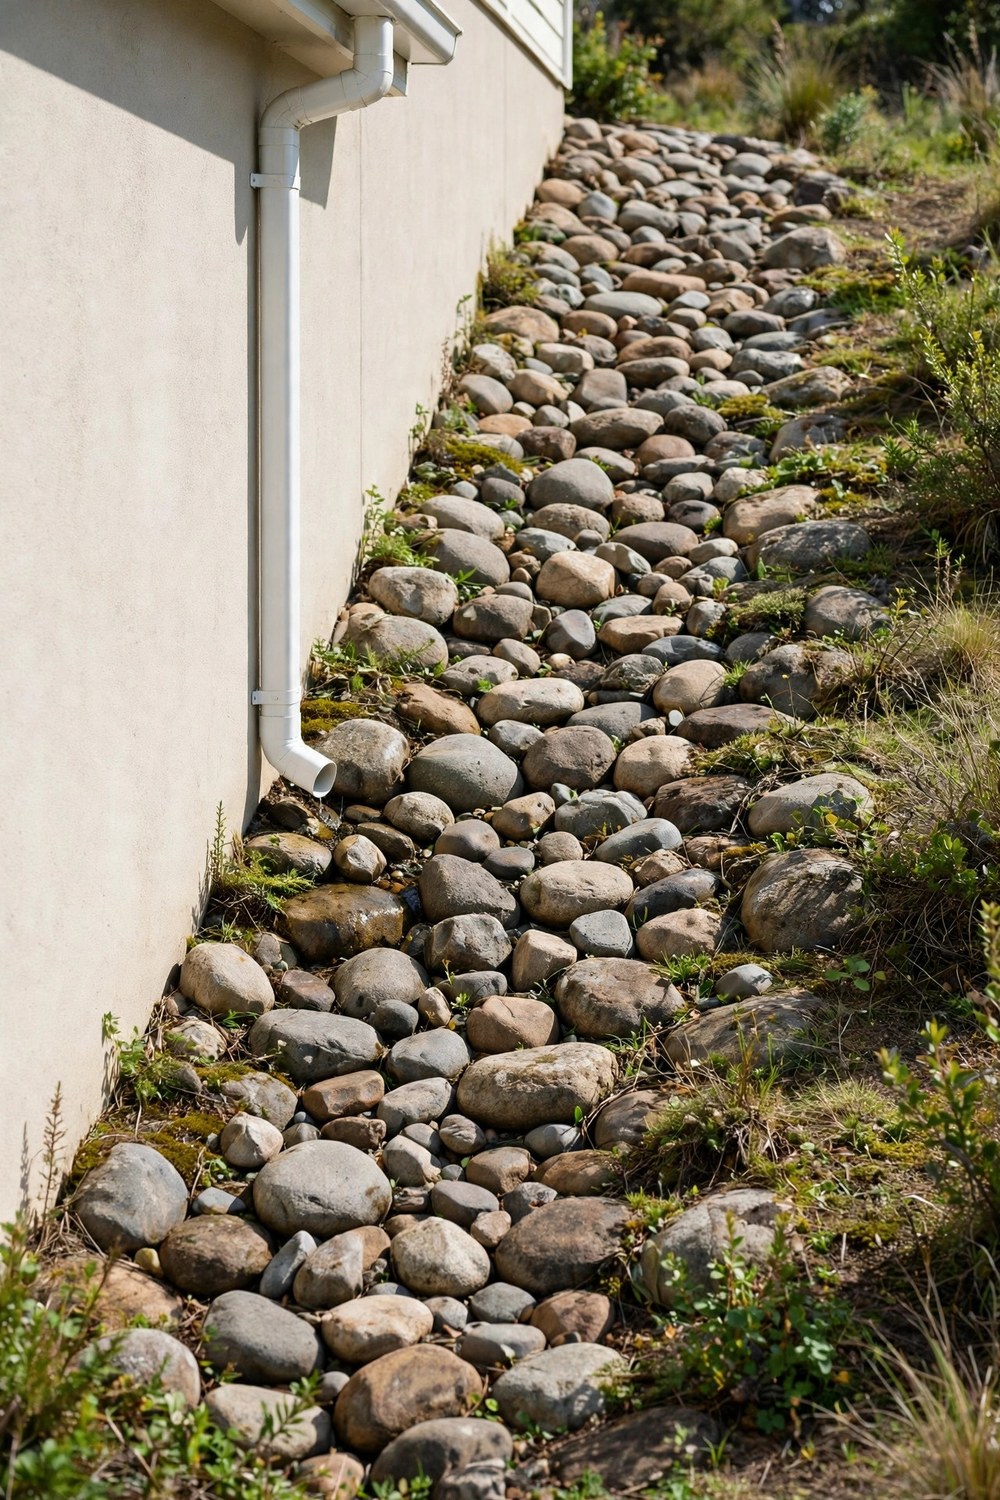
3. River Rock Bed With a Gentle Slope
Sometimes the simplest fix is the best one, and a plain bed of river rock under the spout hides the splash zone completely. Pull back the mulch, grade the soil so it falls away from the wall, lay fabric to slow weeds, and cover the area with smooth stones two to three inches across. The rock stops rain from blasting bare soil onto your siding, and it never floats away the way bark mulch typically does in a downpour. Edge the bed with brick, metal, or larger stones so the rock stays put and the shape looks intentional. Leave the elbow of the downspout accessible above the stones, because you will want to clear it out now and then without moving the whole bed. Rinse the stones with a hose once or twice a year and they will keep looking fresh with very little effort.
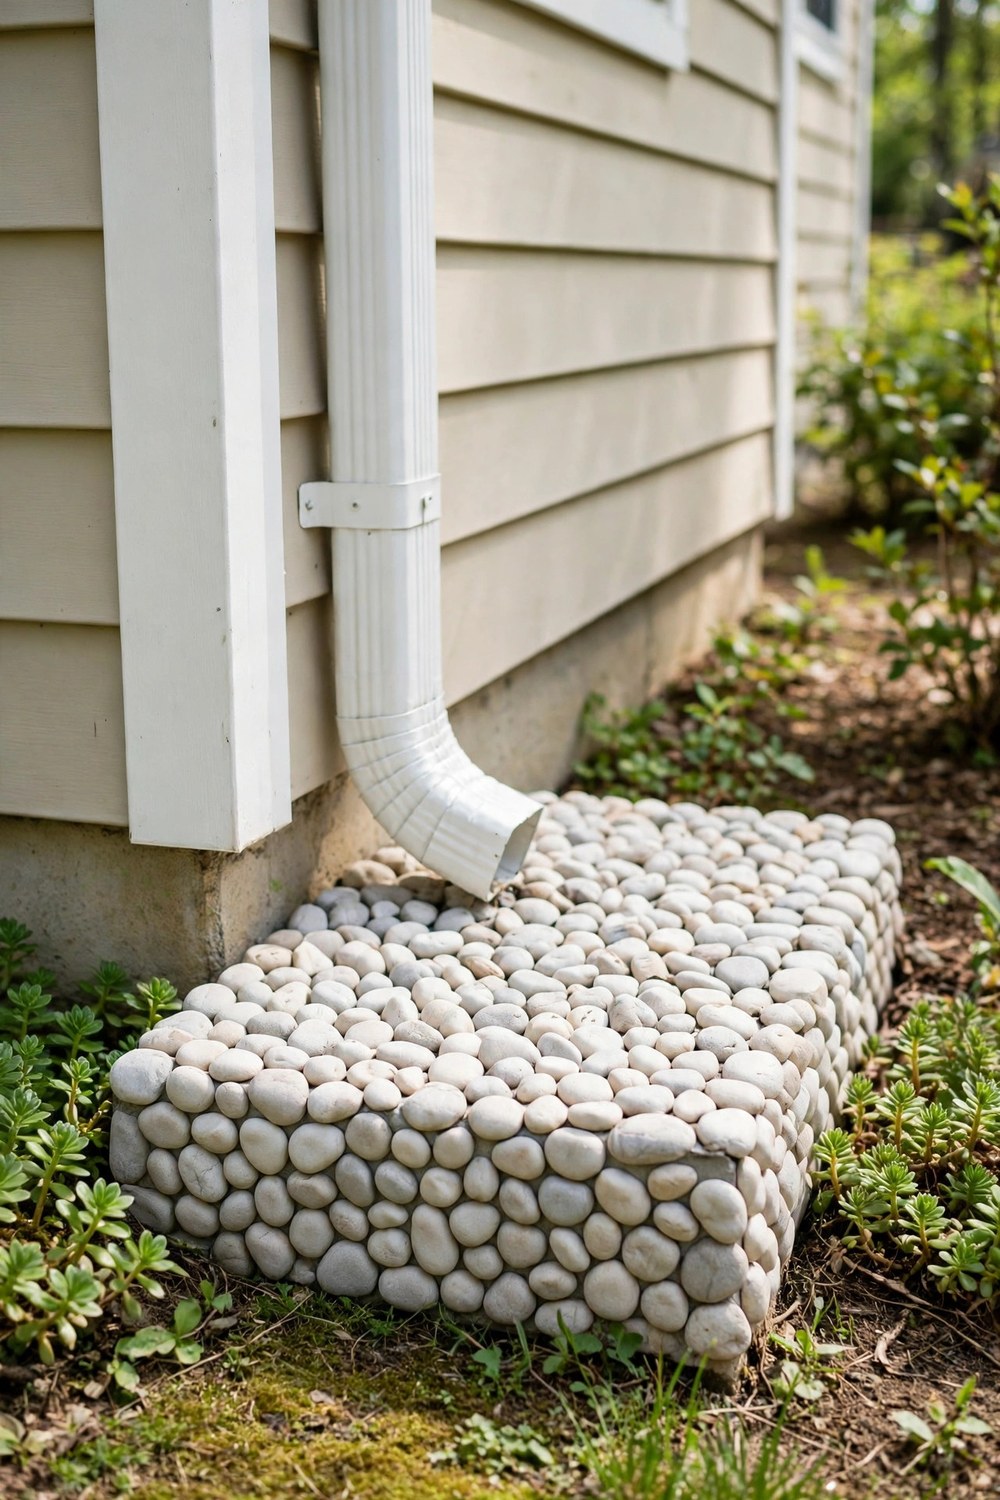
4. Splash Block Hidden Under Smooth Pebbles
A splash block does an honest job, but that slab of grey concrete is nobody favorite garden feature. Keep the block, because it spreads water out and protects the soil, then disguise it with a layer of smooth pebbles in a tone that matches your other stone. Set the block on level, compacted soil with its channel pointing away from the house, and check that the far end sits slightly lower so water keeps moving. Pebbles usually stay in place if you choose a chunkier size and keep the layer shallow. After the first heavy rain, go out and look. If pebbles have scattered, the flow is stronger than you thought, and a bigger stone mix or a short extension will calm things down. A small border of bricks around the whole arrangement keeps everything looking tidy when you view it from the street.
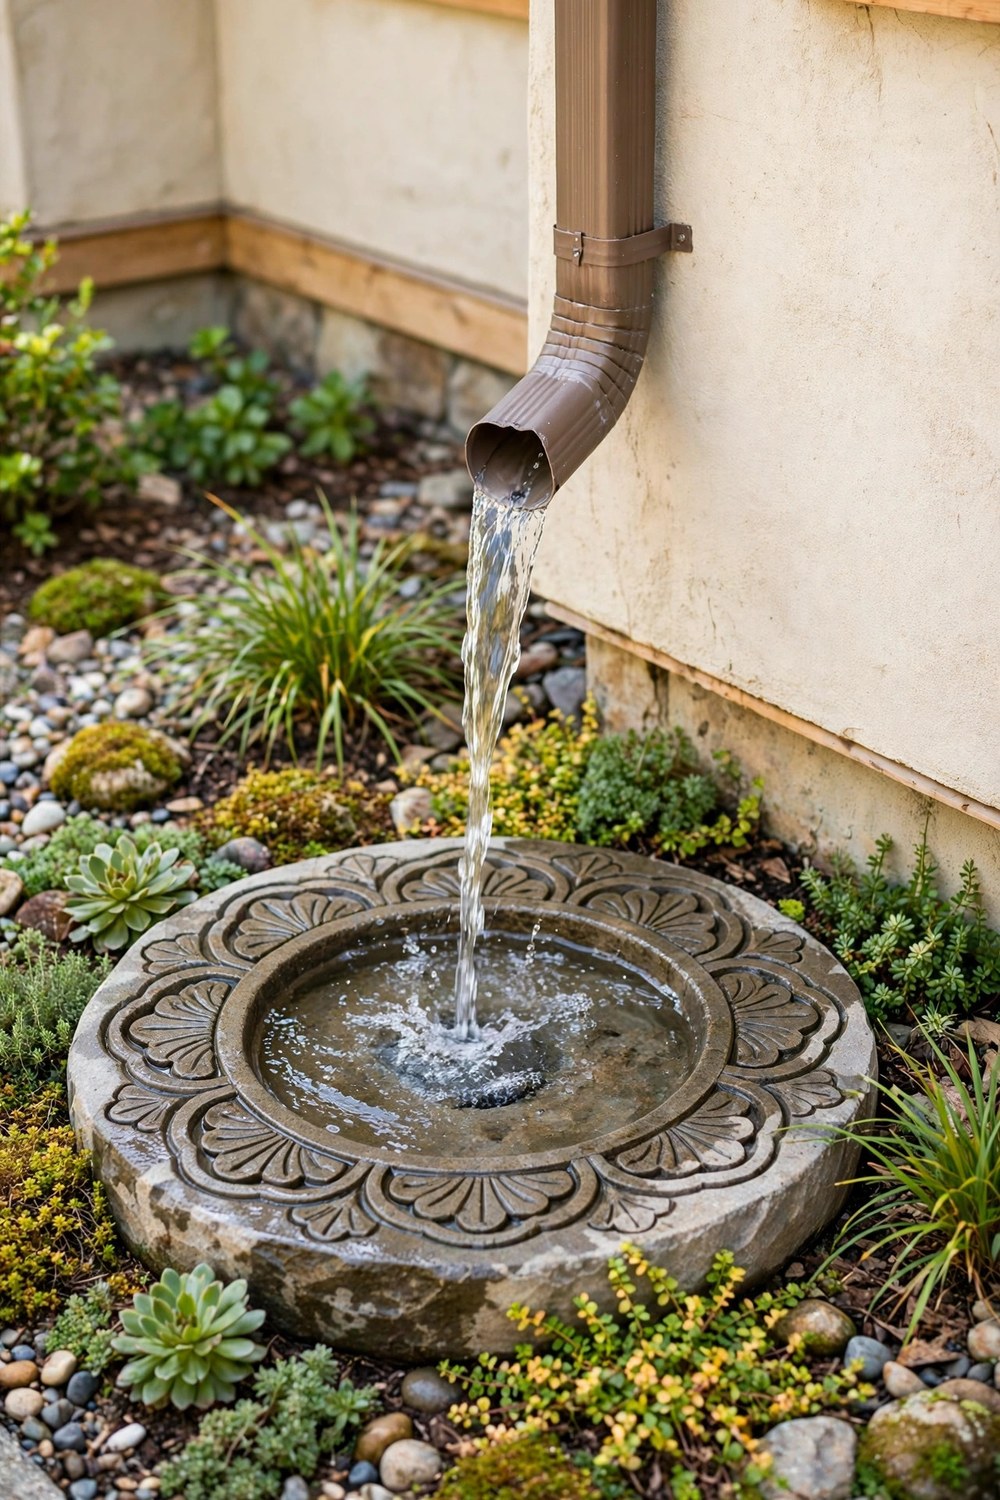
5. Decorative Stone Splash Pad
If you like the splash block idea but want it to look like decor, swap the plain slab for a decorative stone pad with a carved channel or a leaf pattern. These pads do the same work, spreading the stream and softening its landing, but they read as a garden ornament at the base of the wall. Place the pad on a firm, level bed of sand so it does not rock or tilt back toward the house over time. Angle it carefully, because even a nice pad fails if it sends water toward the foundation. Pair it with low planting on both sides and a few matching stones, and the whole corner starts to look planned instead of patched together over the years. Choose a color that already appears in your house trim or other stonework and the pad will feel like it belongs.
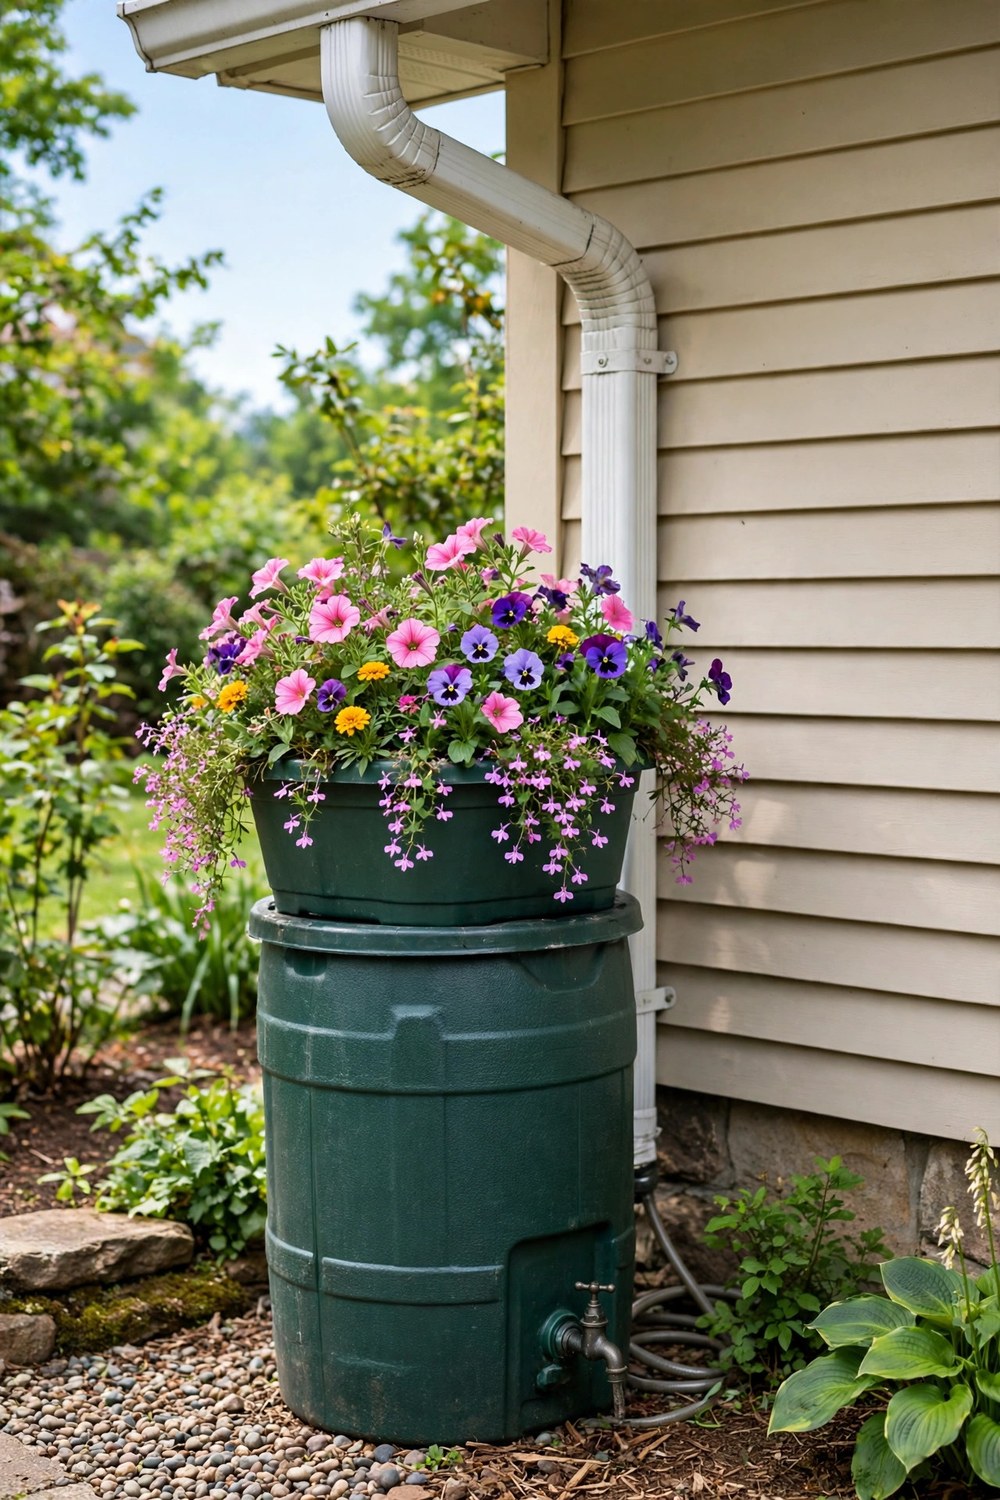
6. Rain Barrel Dressed With a Planter Top
A rain barrel hides the bottom of the downspout, stores water for dry weeks, and gives you a surface you can plant. Choose a barrel with a planter top, fill that shallow bowl with trailing flowers or herbs, and suddenly the barrel looks like a pot that happens to be tall. Shorten the downspout so it ends above the barrel inlet, fit a screen to keep out debris and mosquitoes, and run the overflow hose well away from the foundation. That overflow step matters, because a full barrel in a storm will spill right where you least want it. Set the barrel on pavers or gravel so it sits level and the spigot stays easy to reach with a watering can. In winter, drain it before hard freezes arrive in your area, then reconnect it when spring rains return again.
Screens, Wraps, and Covers for the Pipe Itself
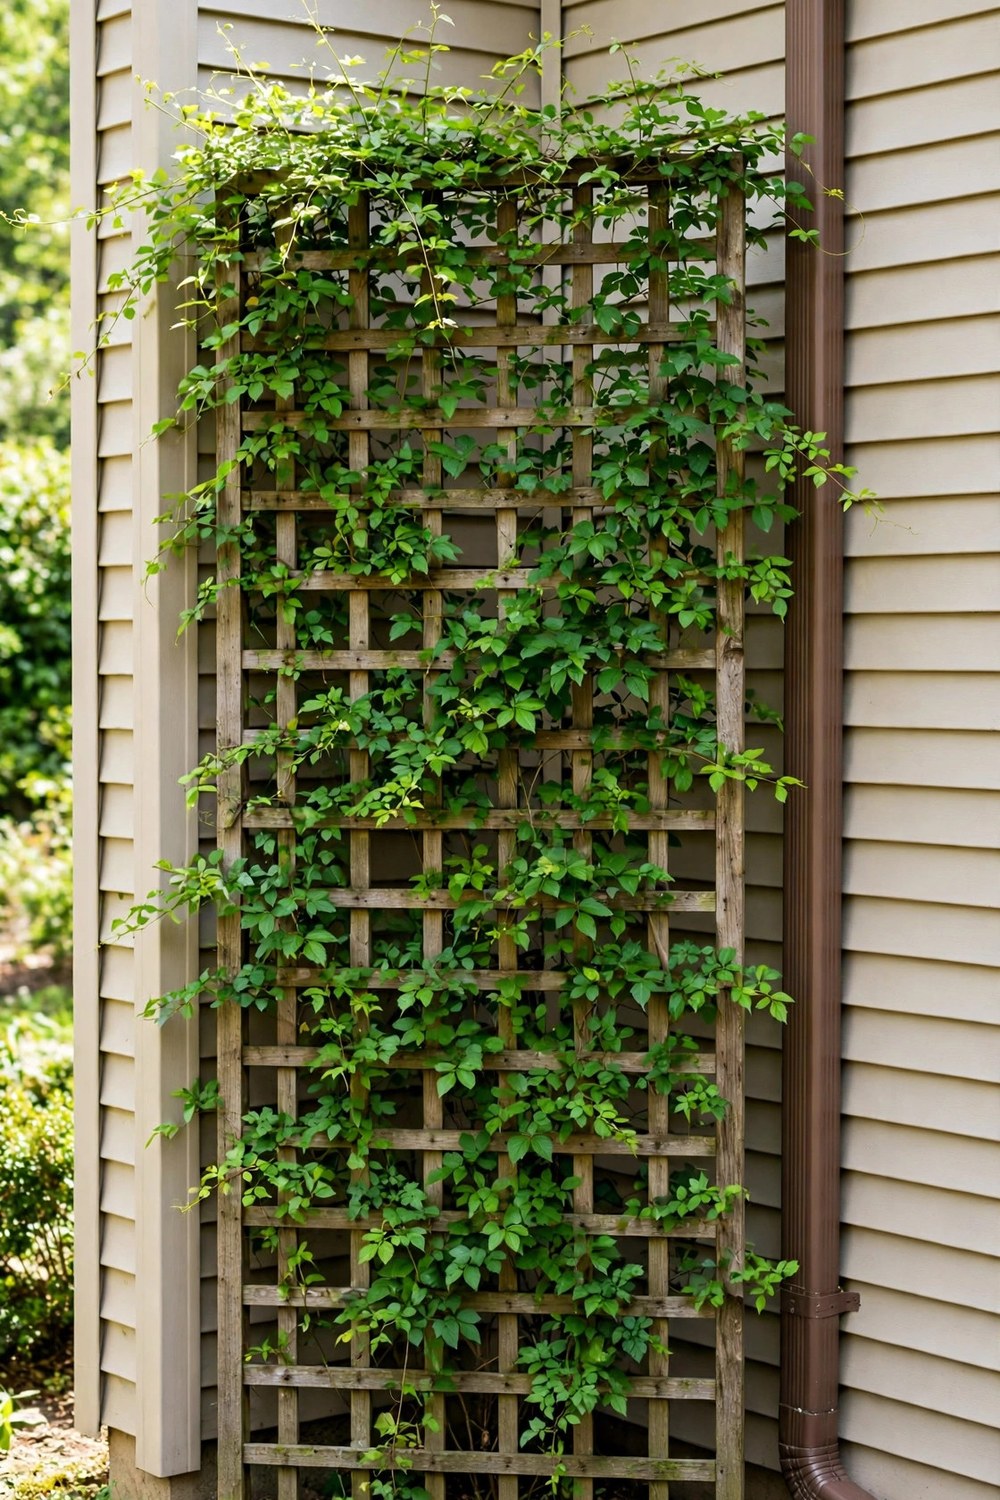
7. Wooden Trellis Screen in Front of the Pipe
A slim trellis panel placed a few inches in front of the downspout hides the pipe from the street while still letting you get behind it for cleaning. Sink two short posts, attach a lattice or slatted panel, and train a light climber up it, or leave the wood bare if your house suits a cleaner look. Cedar and treated pine usually hold up well outdoors, and a coat of exterior stain that matches your trim ties it into the house. Keep the panel narrower than the corner planting so it feels like part of the bed, not a fence. That small gap behind it also protects the pipe, because vines gripping the metal directly can trap moisture and make repainting a miserable job later. You can also hang a small lantern or seasonal wreath from the panel, which makes the screen feel even more intentional.
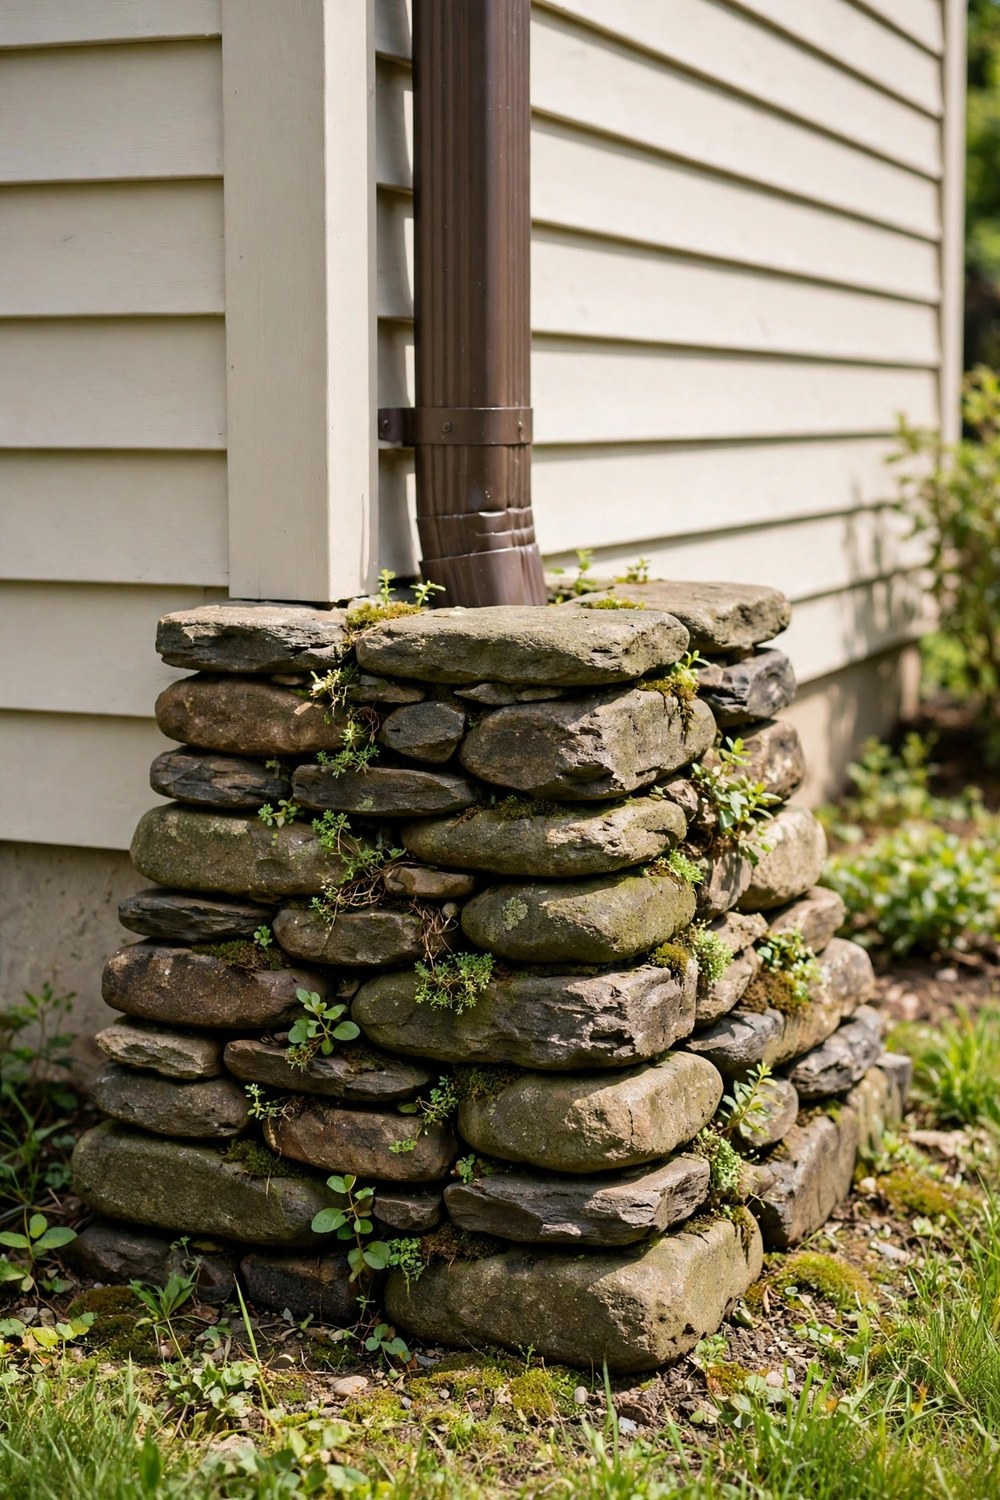
8. Stacked Stone Wrap Around the Base
The bottom elbow of a downspout is usually the ugliest part, all joints and splash stains, so wrap just that section in a low stack of stone. Dry stack flat stones in a small square or curve around the base, leaving the outlet opening clear and easy to reach. The stones hide the hardware, weigh the area down visually, and echo any rock you have used elsewhere in the bed. Build on a level gravel footing so the stack does not lean after a wet winter, and keep the height modest, usually below the first joint. Tuck a few small, tough plants between the stones at the edges, and check after storms that leaves are not damming up behind the wrap and holding water against the wall. If a stone shifts, lift it out, level the gravel beneath it, and set it back in place in minutes.
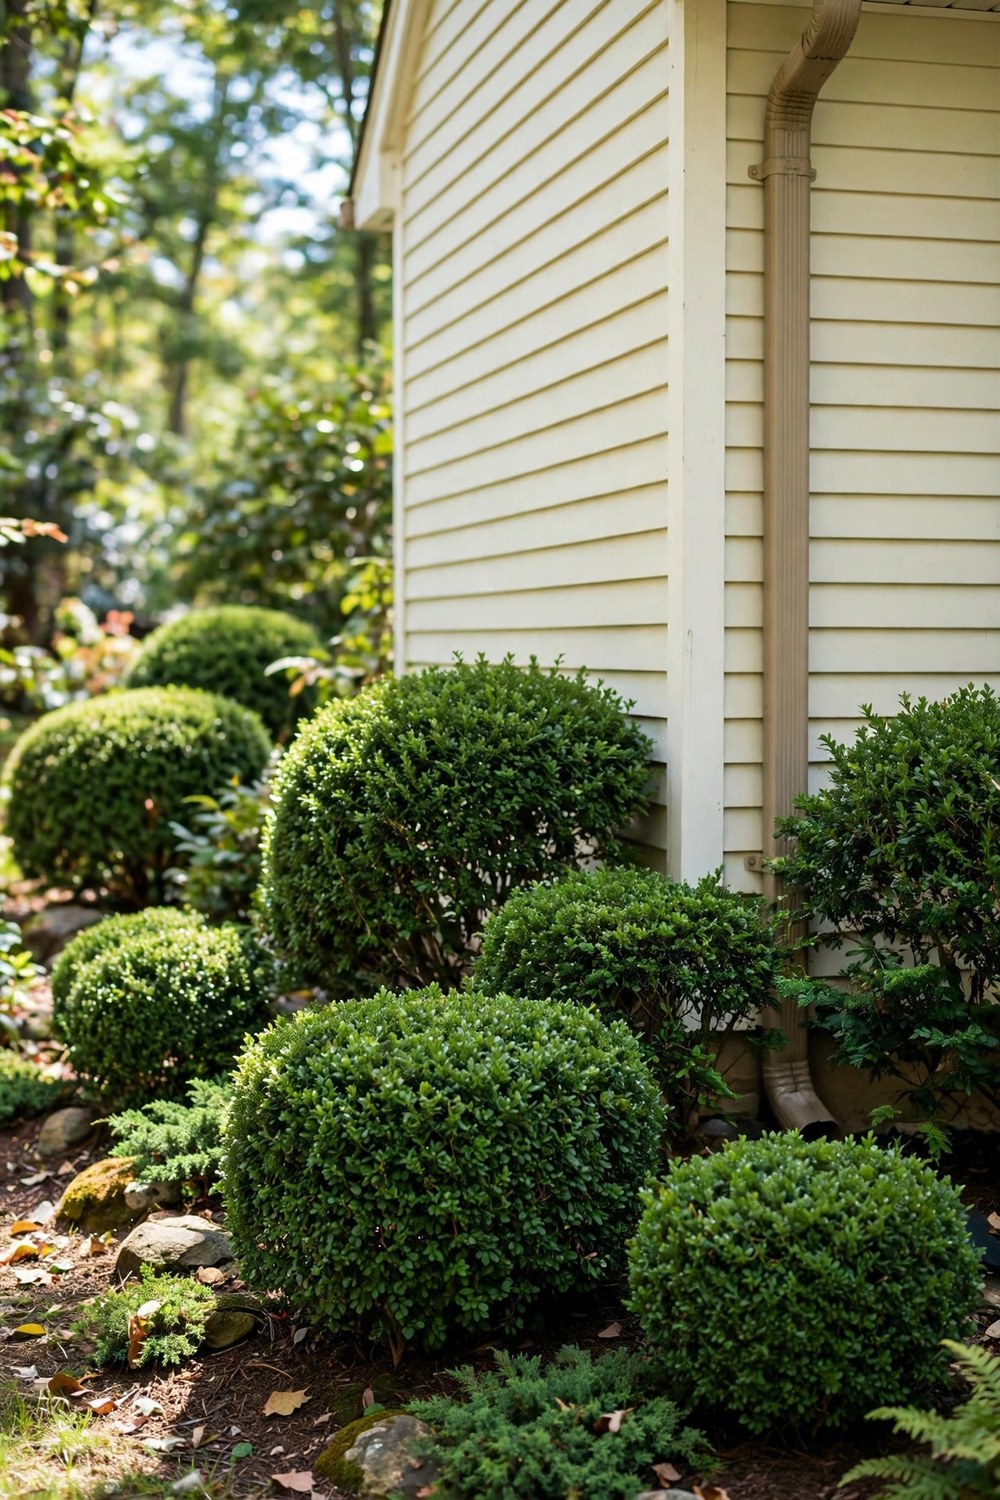
9. Evergreen Shrubs That Soften the Corner
A well placed evergreen does not hide the downspout so much as make you stop noticing it, because your eye lands on soft green instead of white metal. Choose a compact shrub that will mature at roughly the height of the spout lower half, and plant it far enough from the wall that air still moves behind it. That spacing matters for the siding as much as the plant, since damp, still corners invite mildew. Boxwood, inkberry, and compact hollies typically behave well in this role. Water the new shrub from a can for its first season rather than relying on roof runoff, which arrives in floods and then not at all. Prune lightly once a year so the corner stays full without swallowing the pipe completely. A layer of mulch under the shrub, kept away from the trunk, finishes the corner and slows weeds through the season.
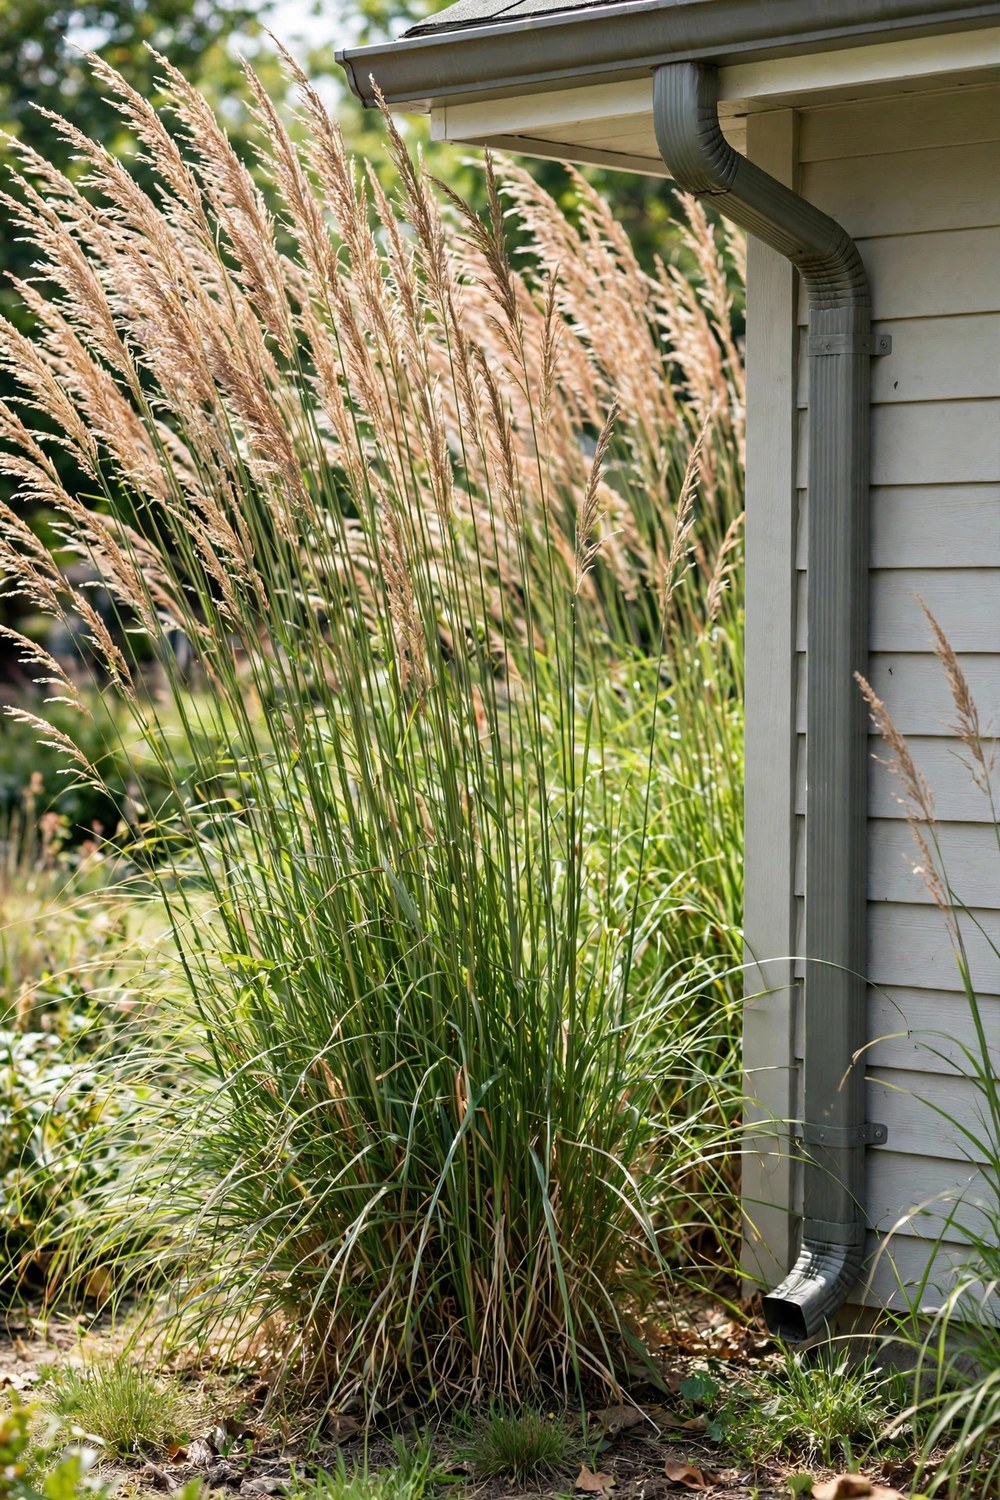
10. Ornamental Grasses That Hide the Bottom
Ornamental grasses are forgiving camouflage, because their arching blades cover the base of the pipe for most of the year and move enough to draw the eye. Plant a clump slightly in front of and beside the downspout, not directly under the outlet, since even tough grasses dislike sitting in a constant drip line. Fountain grass and maiden grass usually give you height without a huge footprint, and their winter plumes keep the corner from looking bare. Cut the clump back in early spring before new growth starts, and divide it every few years if it starts crowding the wall. Pair the grass with a simple rock splash area underneath, and you get softness on top with practical, mud free drainage doing the work below. Their seed heads also feed small birds in fall, which gives this simple screen a little extra life and movement.
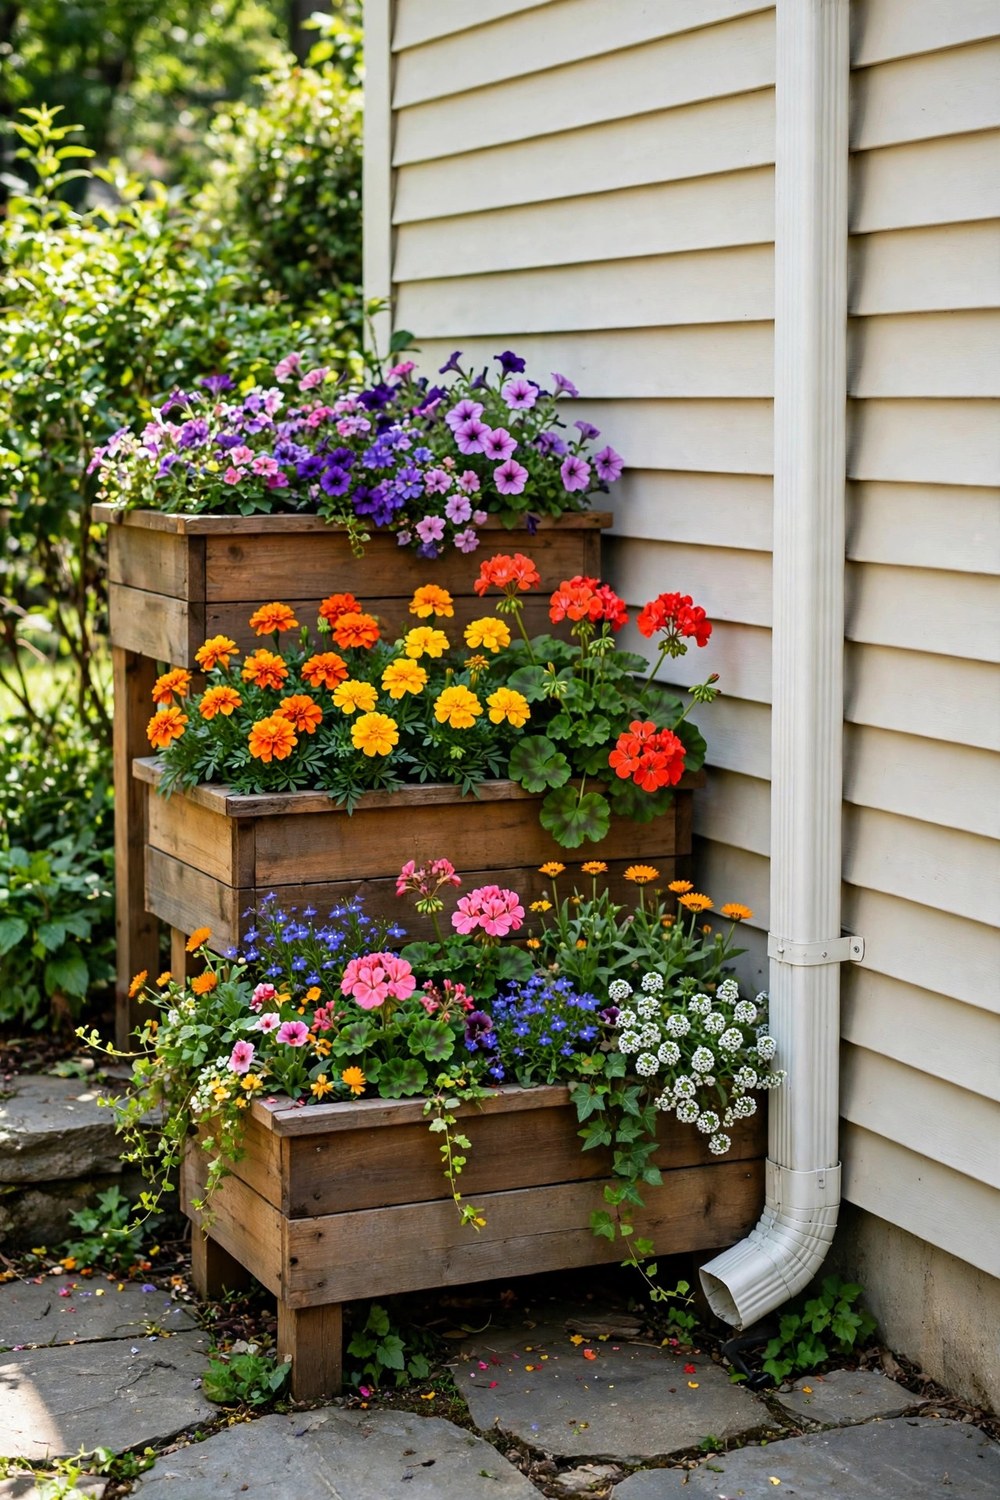
11. Tiered Planter Boxes Beside the Downspout
Tiered planters turn a flat wall into a small vertical garden, and the eye goes straight to the flowers instead of the pipe. Stack boxes or use a stepped stand beside the downspout, leaving a clear gap so water and air can still move behind the lowest tier. Fill them with bright, shallow rooted flowers that do not need deep soil, and refresh the planting each season so the display always looks cared for. Keep the planters just off the wall on small feet, because a box sitting flat against siding traps damp and stains. Their size also makes them easy to move when you need to clean the elbow or check the outlet. A few trailing stems hanging over the front edges add softness, and a simple wooden finish ties the whole arrangement to decks, fences, and other outdoor woodwork nearby.
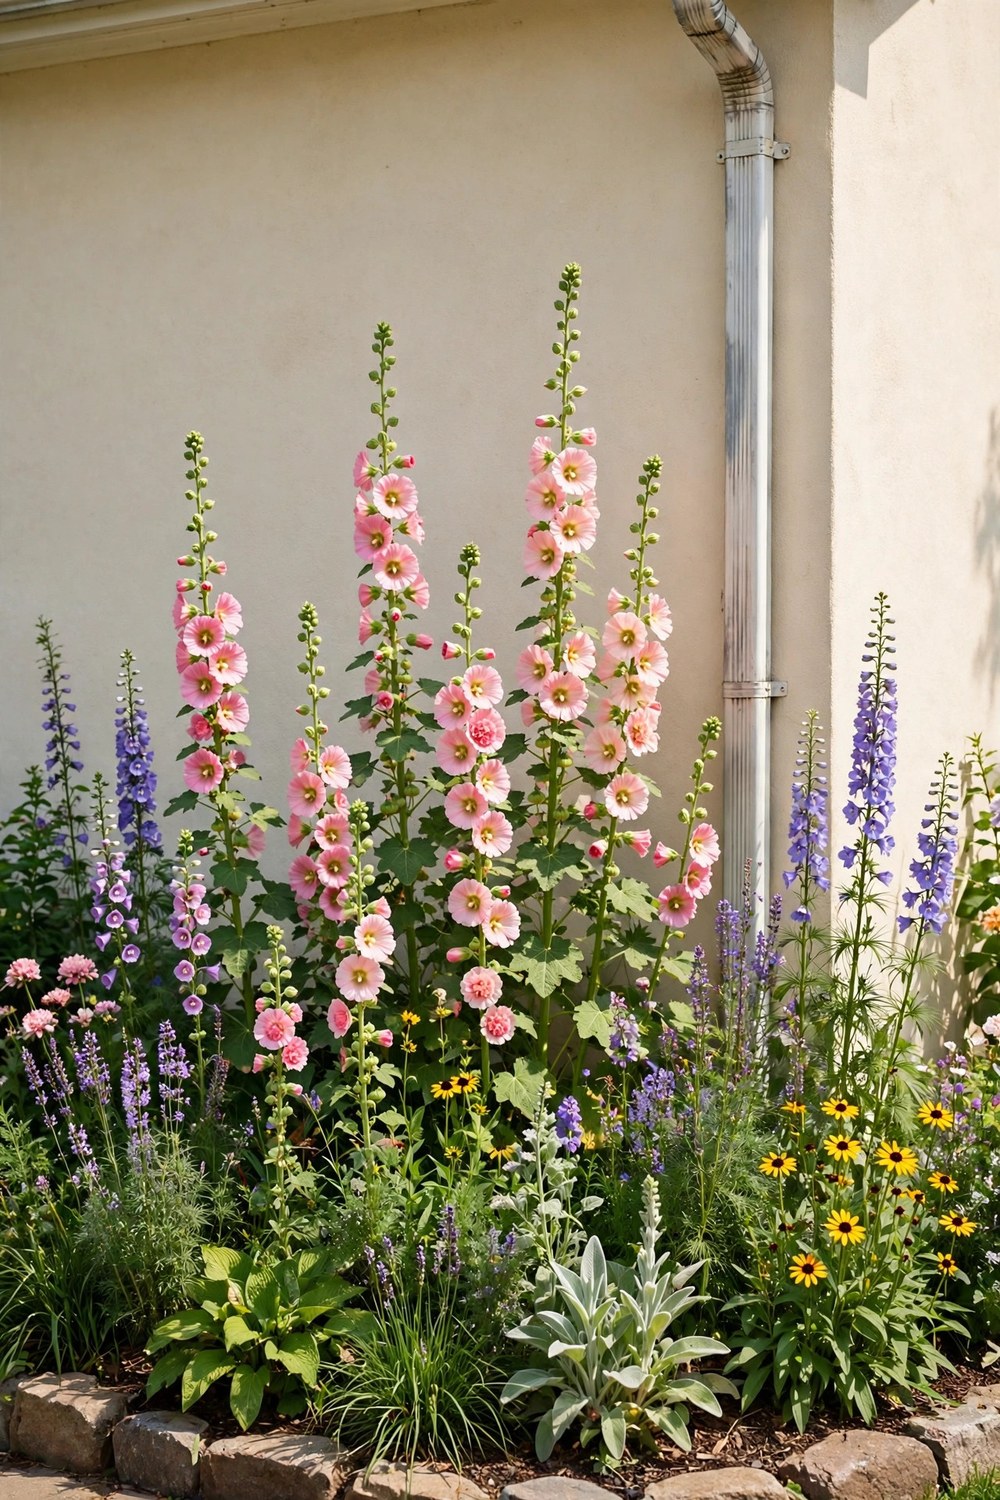
12. Flower Bed With Tall Blooms in Front
A flower bed planted in front of a downspout works in the same way as a shrub, only with color and scent as a bonus. Choose tall, sturdy blooms like sunflowers, hollyhocks, or tall zinnias for the back row, then step the heights down toward the lawn so the bed reads as a border rather than a screen. Plant in front of the pipe, not over the outlet, and keep a narrow path or mulched gap behind the tallest stems for maintenance access. This is a great choice if your corner gets sun most of the day, because the downspout gives you extra water on rainy weeks while the open soil drains between showers. Deadhead regularly through summer, stake tall stems before autumn winds arrive, and the bed will look lively and intentional right up to the first frost.
Paths, Beds, and Clever Ways to Move Water On
13. Climbing Vine on a Small Obelisk
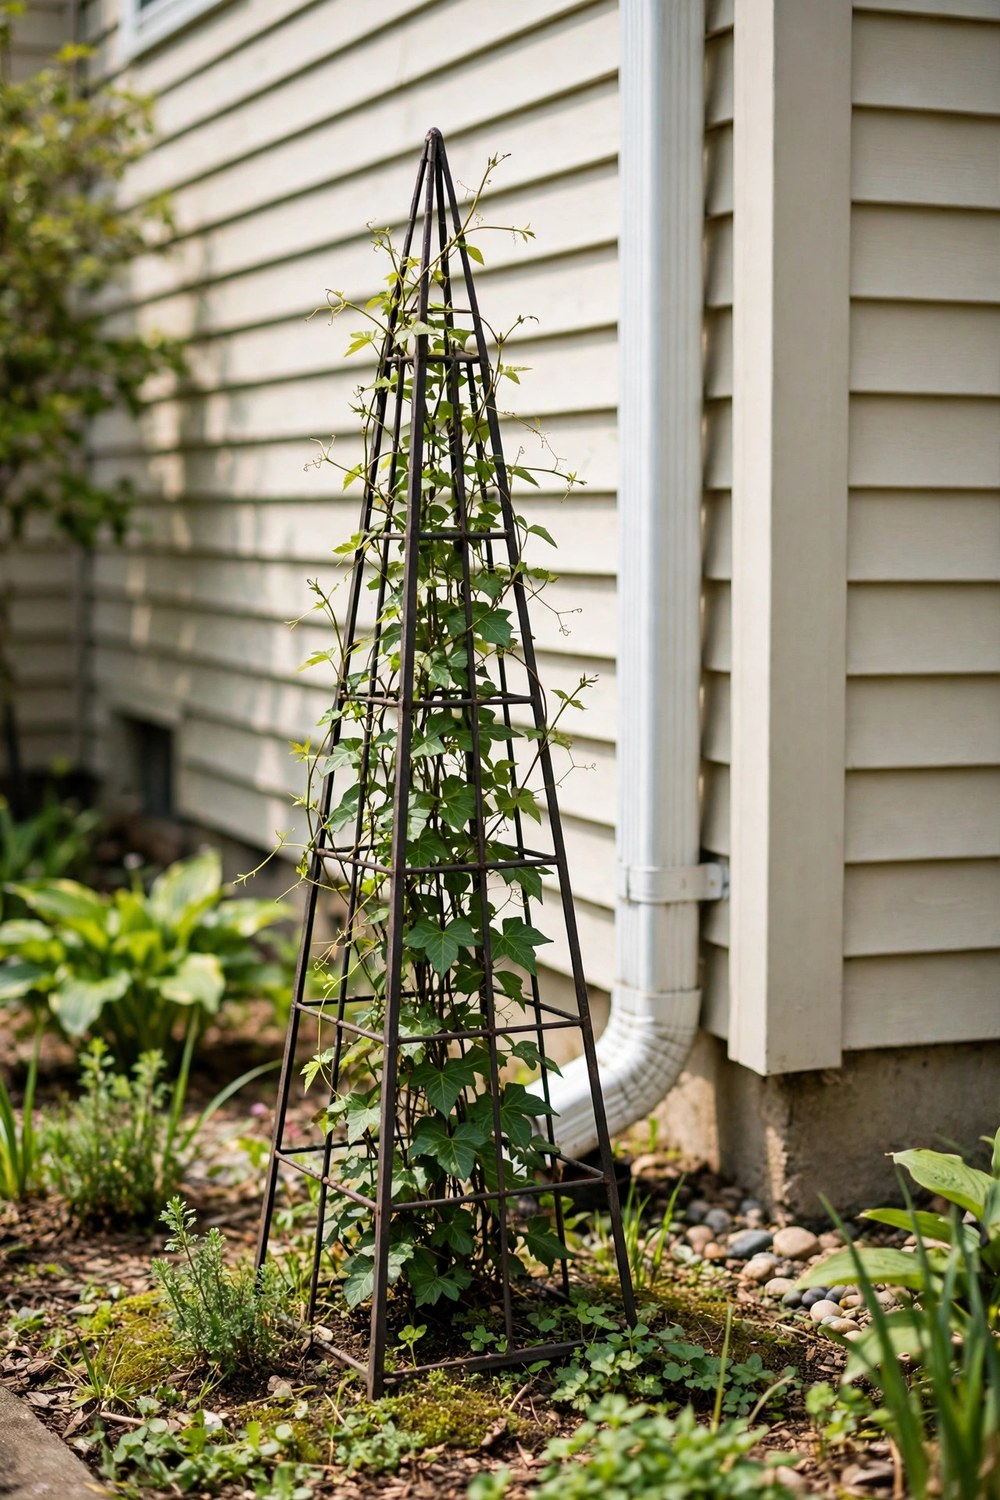
A garden obelisk gives you a vertical accent right where the downspout needs one, and a light vine does the rest of the hiding. Set the obelisk a few inches in front of the pipe, anchor its feet firmly, and train clematis, sweet pea, or a similar climber up its sides. The structure draws the eye upward in a way that feels decorative, not sneaky, and the foliage fills in the gap through summer without gripping the pipe itself. Choose a vine that suits your sun and frost conditions, and prune it after flowering so it does not spill onto gutters or siding. An obelisk also works well in a small bed where a trellis panel would feel too wide, and it pairs naturally with low planting around its base. Keep the base clear of mulch build up so water still drains freely after storms.
14. Underground Extension With a Pop Up Emitter
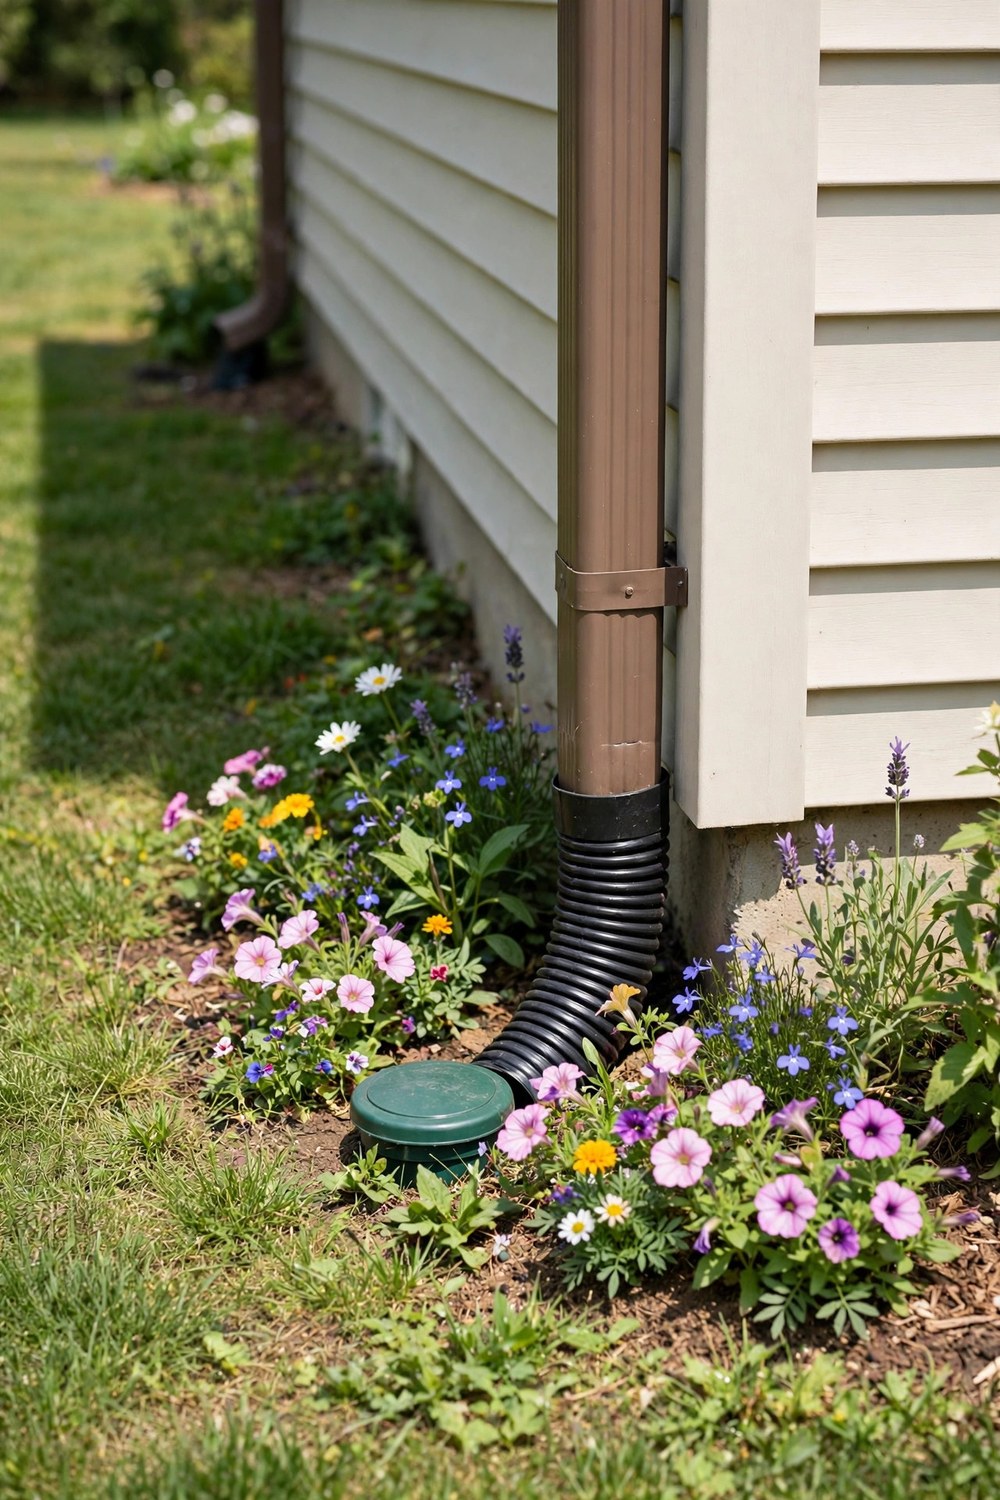
If you would rather move the water out of sight completely, bury an extension pipe from the downspout to a pop up emitter farther out in the lawn. The emitter stays closed when dry, then lifts during rain and releases water onto the grass where it can soak in. Dig the trench with a steady fall away from the house, use solid pipe rather than perforated pipe for the main run, and mark the route so future digging does not cut it. A small gravel bed under the emitter helps it drain between showers, and a grass friendly cover keeps it from becoming a trip hazard. This is one of the cleanest looking fixes, because nothing remains visible except a small round cap in the lawn, but it does mean you should check the outlet once or twice a year for blockages after leaves and soil have had time to settle.
15. Stepping Stone Path Over the Drain Line
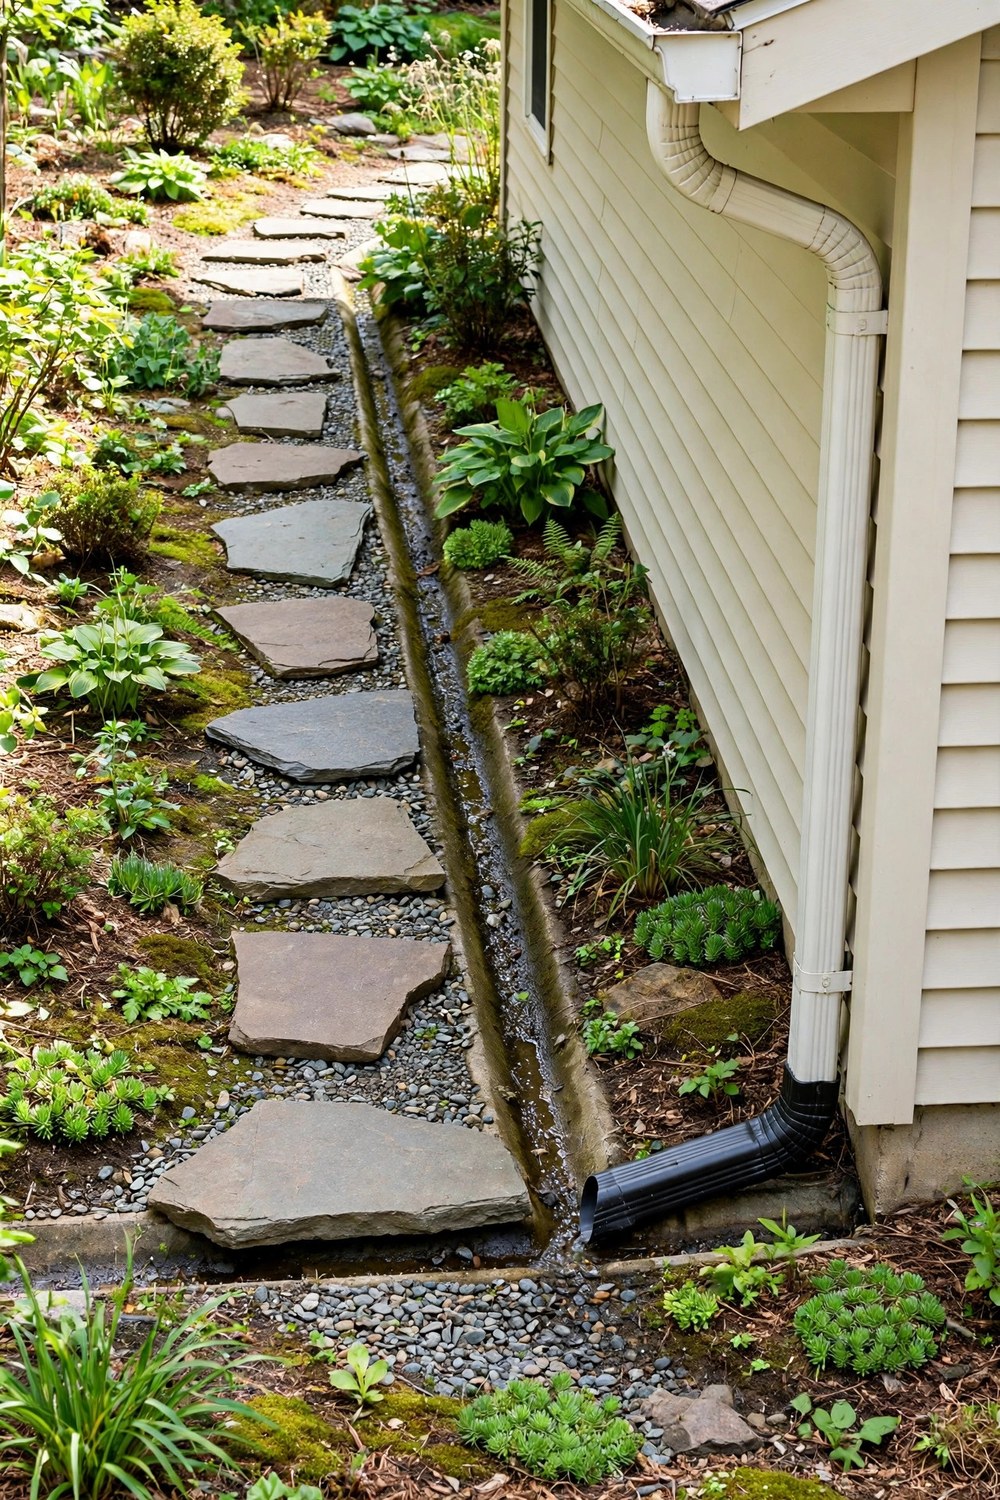
A short line of stepping stones over the drain route turns an awkward wet strip into a walkway you actually use. Lay wide, flat stones on a compacted gravel bed, spaced for a comfortable stride, and make sure the soil beneath still falls away from the house. The stones give you dry footing during rain and make the drainage line look like a path feature instead of a problem area. Plant low ground cover between the stones to soften their edges, and keep the joints clear of soil build up so water can still pass under them. After a storm, check for standing water around the stones, because a low spot under one stone usually means the bedding has washed out and needs topping up. A simple row of stones also signals to visitors where to walk, which protects the planting beside the route from being trampled.
16. Mulched Bed That Absorbs the Splash Zone
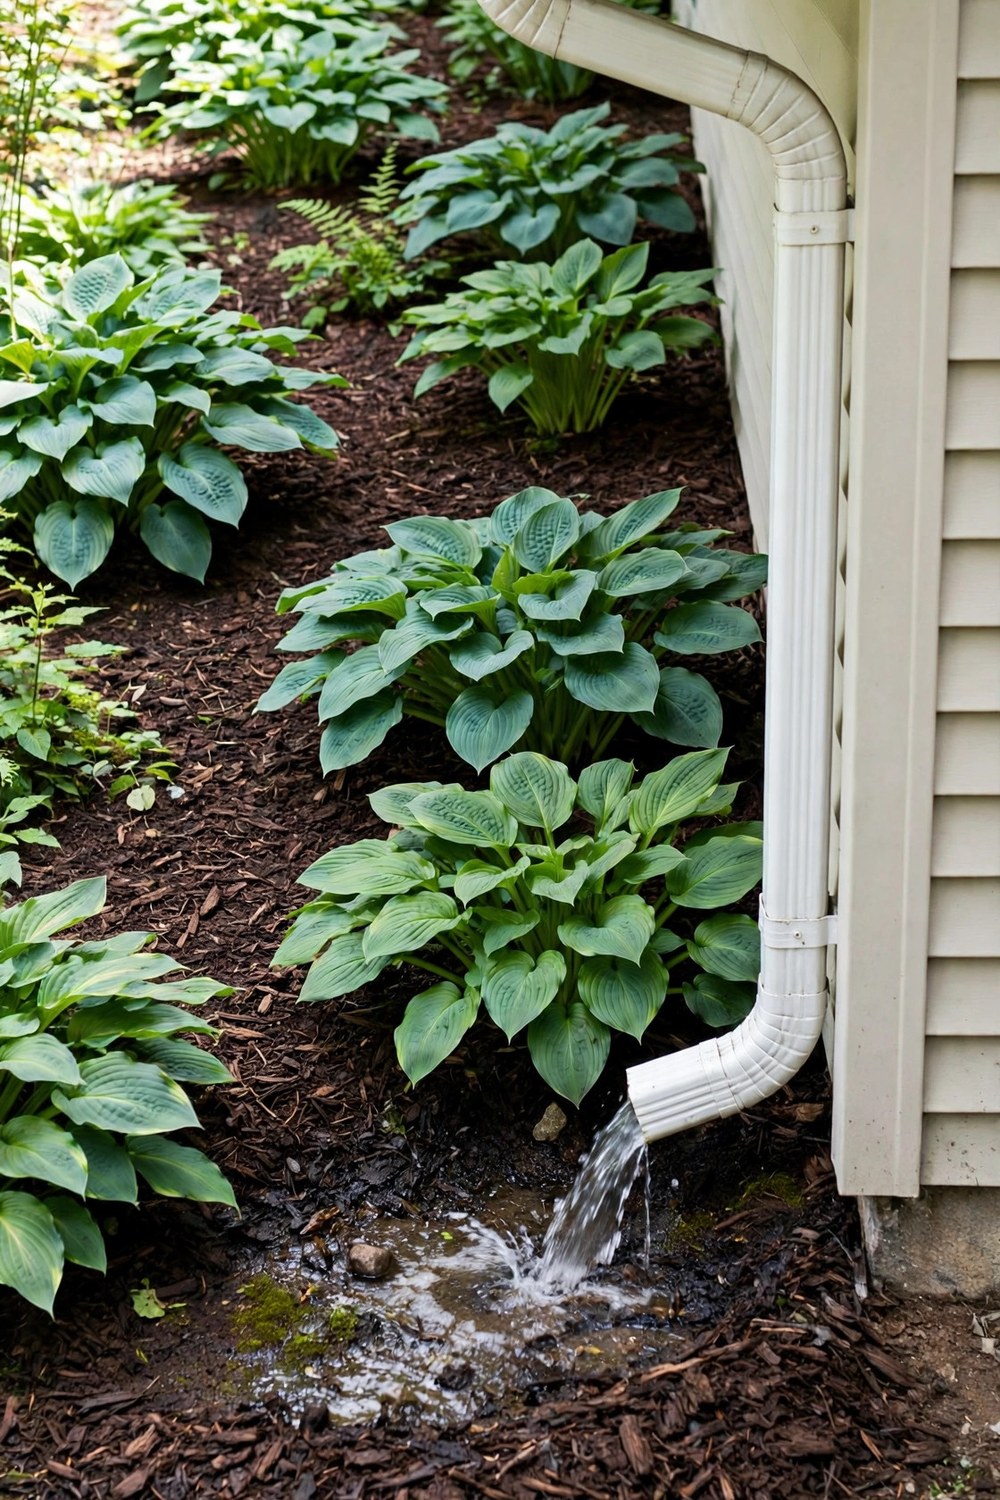
A deep mulched bed under a downspout looks simple, and when it is built right it does a lot of quiet work. Shape the bed so water spreads out instead of cutting a channel, then cover it with three to four inches of coarse bark mulch. Coarse mulch usually resists floating better than fine shreds, and it breaks down slowly enough to keep the soil protected through the season. Plant hostas, ferns, or other shade tolerant plants in the bed, choosing types that enjoy moist soil but not constant standing water. Keep mulch pulled back from stems and from the wall, and top it up once a year as it settles. If you notice mulch migrating after heavy rain, add a low edging stone or a wider splash pad at the outlet to calm the flow before it reaches the bed. That small fix saves you from re mulching after every storm.
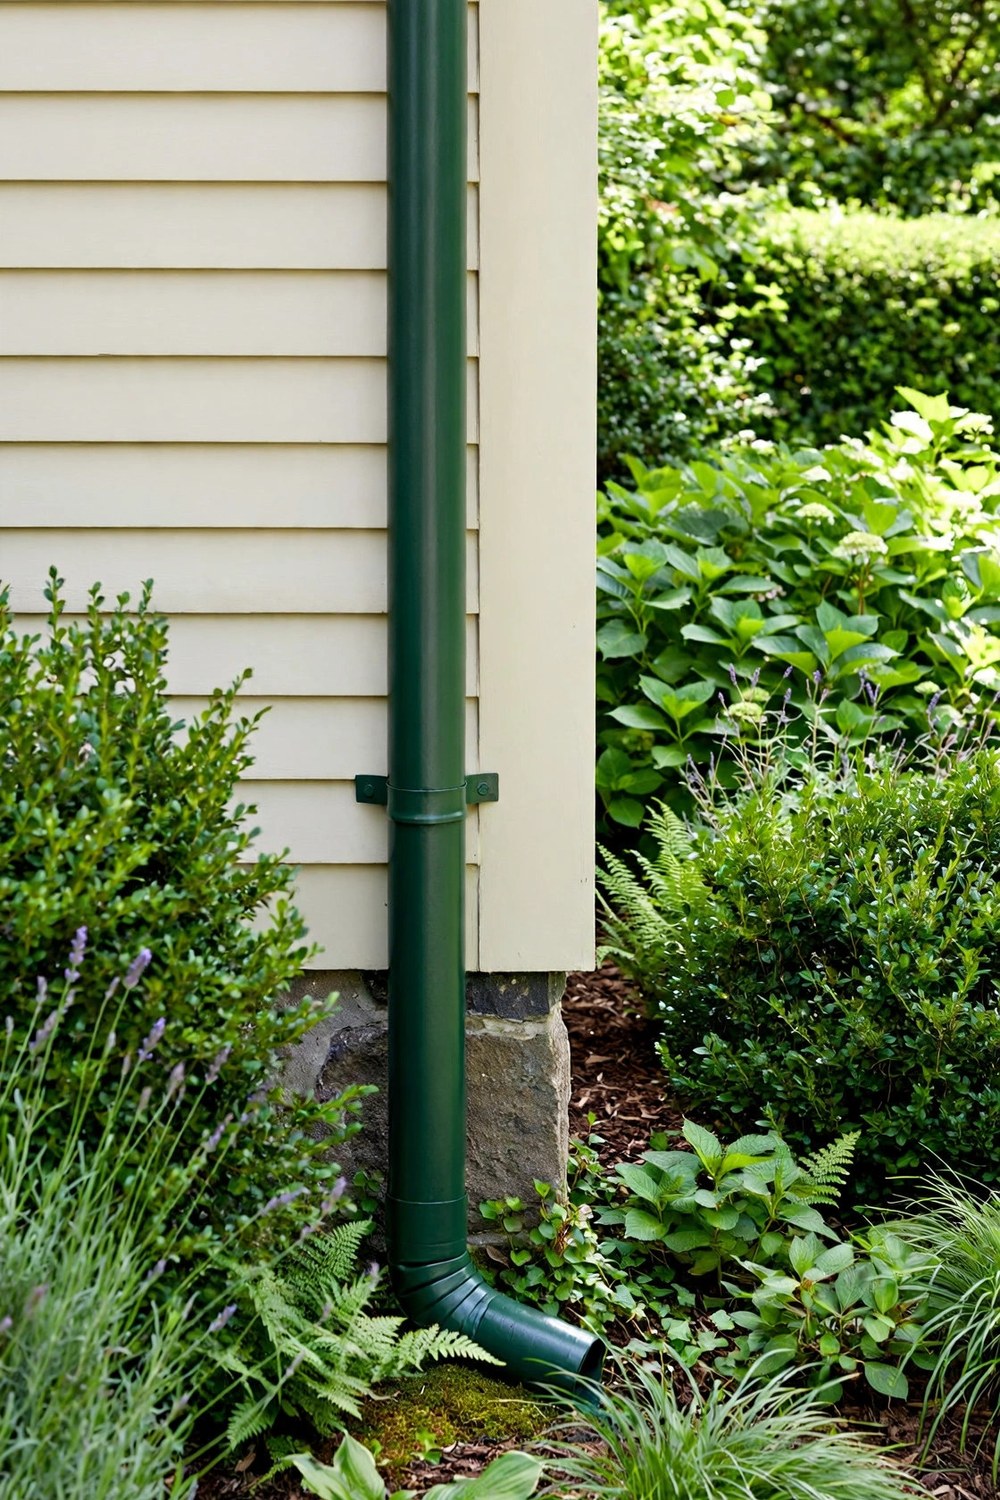
17. Painted Downspout That Blends With Planting
Paint is the cheapest camouflage of all, and it works surprisingly well when the color is chosen with care. Match the downspout to the siding if you want it to vanish, or pick a deep green, brown, or charcoal that blends with the planting behind it. Clean the metal thoroughly, scuff it lightly, and use an exterior metal paint so the finish holds up through seasons of rain. Avoid painting over rust or loose paint, because the new coat will peel right off with the old one. Two thin coats usually look better and last longer than one thick coat. The result will not fool anyone up close, but from the street the pipe stops shouting for attention and becomes just another vertical line in the garden. Touch up any chips each spring before they spread, and the finish will stay neat for years.
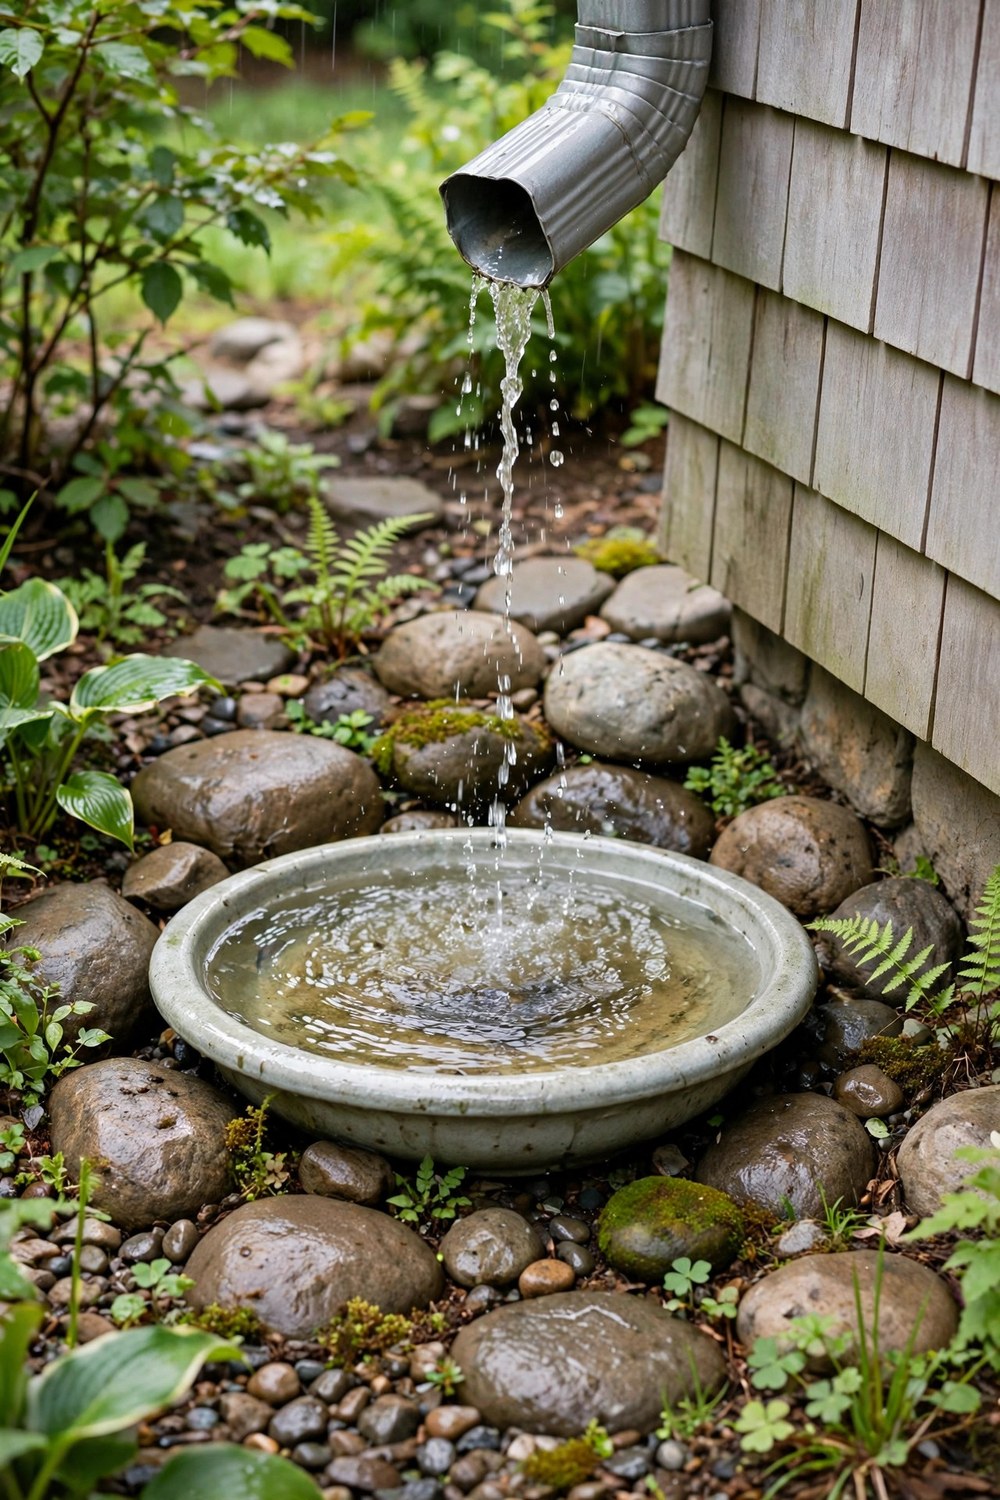
18. Birdbath Basin Where the Water Lands
A shallow birdbath basin under a downspout gives the splash zone a purpose and a focal point at the same time. Set the basin on a level stone base just beyond the outlet, so rain lands in it without flooding the surrounding soil. The basin will need cleaning fairly often, because roof runoff carries dust and debris, but that small chore is usually worth the charm of birds visiting the corner. Choose a sturdy stone or concrete basin that will not tip in wind, and keep the water shallow enough for small birds to use safely. In freezing weather, empty the basin so ice does not crack it, then refill it when temperatures rise. Surround the base with matching stones and a few low plants, and the downspout corner suddenly feels like a deliberate garden vignette rather than an afterthought.
A Prettier Corner, One Rain at a Time
Whichever idea you choose, the goal is not to pretend the downspout is not there. It is to give it a job in the garden, whether that job is feeding a rain chain, watering a bed, or simply disappearing behind a plant that suits the spot. Start with the outlet, make sure water still moves away from the house, and then add the cover or planting that makes the corner look like it was designed that way all along. Even a small change, like a pebble bed or a fresh coat of paint, can shift the whole feel of a house corner. Over a few seasons, as plants fill in and stone settles into place, you will probably forget the pipe was ever an eyesore, and that is exactly the point.
Before you start digging, take five minutes to watch your downspout in the next decent rain. Notice where the water lands, how far it splashes, and whether it pools anywhere near the foundation. That quick check will tell you whether a simple cover will do or whether you need a proper extension first, and it will save you from redoing the work later. Then pick one idea, gather your materials, and enjoy watching a plain pipe turn into one of the prettiest corners in the yard.






Leave a Reply