
22 Kitchen Island Ideas for Every Size and Style
Look, we get it. The kitchen island is supposed to solve everything, but choosing one can feel surprisingly stressful when your space, your budget, and your everyday life all seem to want something different. Maybe you are dreaming of a big gathering spot while cooking in a kitchen that barely fits two people at once, or maybe you have plenty of room and no idea where to start. If you have ever stood in the middle of your kitchen measuring air with your hands and second guessing yourself, you are definitely not alone. Most of us are just trying to cook dinner, help with homework, and find a clear bit of counter at the same time.
That is exactly why this list covers such a wide range, from narrow rolling carts for tiny kitchens to double islands for truly large ones. You will find surface ideas like waterfall edges, butcher block, and marble-look counters, color ideas like bold paint and two-tone finishes, and practical ideas like deep drawers, bookshelves, a second sink, and a low baking station. Some are weekend friendly swaps and some are plan ahead projects, and you certainly do not need all twenty two. One or two chosen well will typically change how your kitchen works every single day.
A good way to use this guide is to start with your space first, then think about how you actually live. If traffic feels tight, look at the slim and shaped ideas. If clutter is the problem, head straight for the storage section. If your kitchen works fine but feels a little plain, the color and finish ideas will usually give you the biggest lift. Take a photo of your kitchen as it is now, live with a short list for a few days, and let your real routines point you toward the island that fits.
In This Article
- Roll In a Narrow Cart Island for Tiny Kitchens
- Choose a Slim Work-Table Island for an Open Feel
- Add a Waterfall Edge for a Modern Line
- Paint the Island a Bold Color for Contrast
- Try a Two-Tone Island to Ground the Room
- Top It With Warm Butcher Block
- Build In a Second Sink for Easier Prep
- Extend the Counter Into a Breakfast Bar
- Leave a Generous Seating Overhang for Stools
- Give It Furniture-Style Legs for Vintage Charm
- Hide Storage in Deep Drawers and Cabinets
- Add Open Bookshelves for Cookbooks at the End
- Fit a Microwave Shelf Below the Counter
- Install Pendant Lights to Define the Island Zone
- Mix Open Shelving for Everyday Dishes
- Use a Marble-Look Counter for a Classic Finish
- Shape It as an L to Guide Traffic Flow
- Add a Built-In Wine Rack and Chilled Drawer
- Plan Double Islands for a Truly Large Kitchen
- Create a Low Baking Station at One End
- Add a Raised Bar Level for Casual Dining
- Finish With a Drop Leaf for Flexible Extra Space
Start Small With Islands That Fit Tight Spaces
Not every kitchen can hold a big built in island, and honestly, not every kitchen needs one. If your space is narrow, rented, or simply busy, a smaller and lighter island can give you the extra counter and storage you want without making the room feel crowded. These first ideas keep things flexible, open, and easy to move or rethink later.
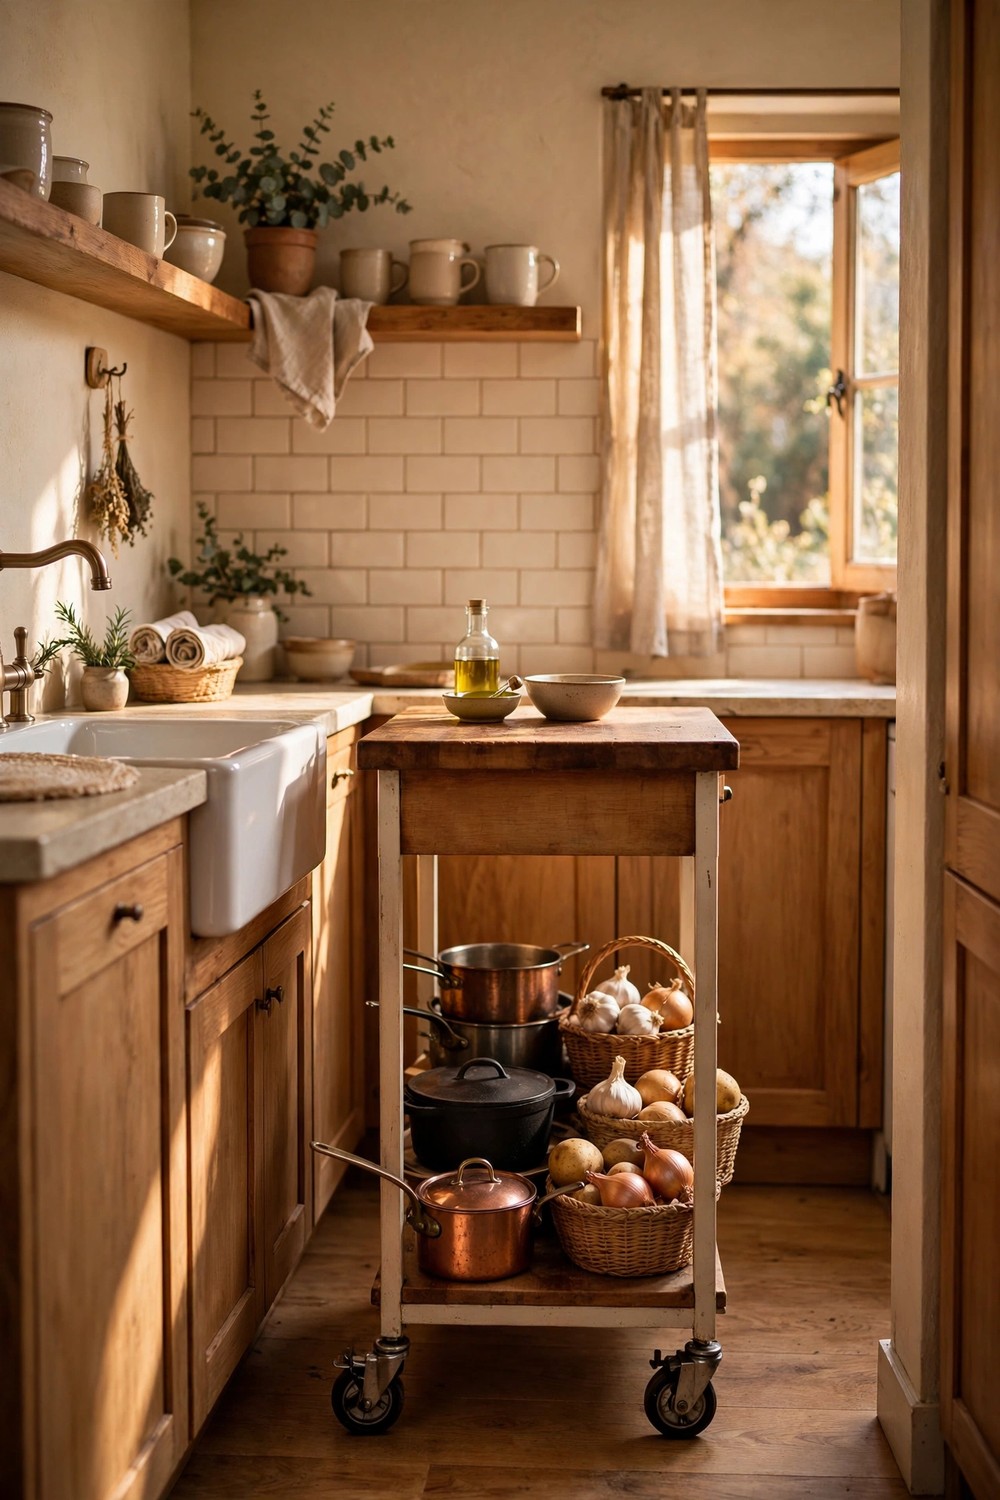
1. Roll In a Narrow Cart Island for Tiny Kitchens
A narrow rolling cart is usually the kindest first island for a tiny kitchen, because it gives you extra counter without asking you to commit to a permanent layout. Look for a cart with a sturdy top in wood or stone look finish, a lower shelf for pots or baskets, and locking wheels so it stays put while you chop. On busy cooking days you can pull it into the middle of the room, and when guests arrive or the floor needs cleaning, you can tuck it against a wall in seconds. That flexibility is hard to beat in a small or rented home. Choose a width that still leaves comfortable walking space on both sides when it is in use. A practical tip is to mark the footprint on your floor with painter tape for a few days before you buy, so you can feel how the room moves around it.
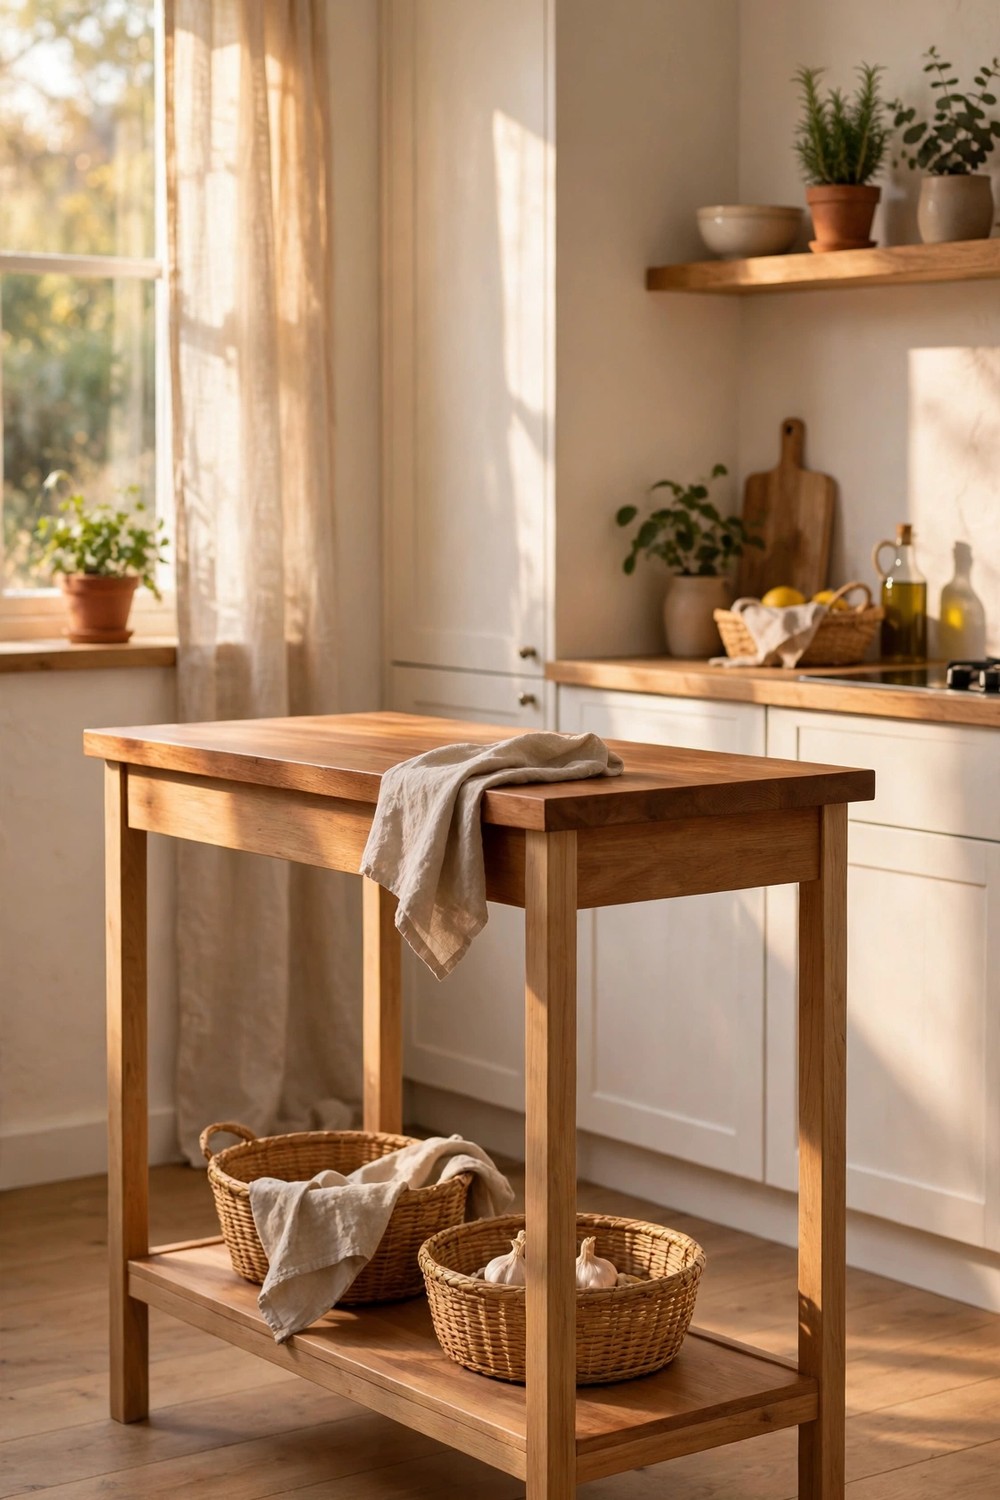
2. Choose a Slim Work-Table Island for an Open Feel
A slim work-table island gives you a real prep surface while keeping the kitchen feeling light and open underneath. Think of a simple table shape with four legs, a solid top, and maybe one low shelf, rather than a heavy block of cabinets. Because you can see the floor beneath it, the room usually feels bigger, and stools or bins can slide underneath when you need them out of the way. This style suits farmhouse, casual, and older kitchens especially well, where a bulky island might fight with the character of the house. Choose a top that can handle daily use and wipe it down promptly after messy jobs. If you like to bake or knead dough, check that the height feels comfortable for your arms over a longer session. A table island also moves easily if you ever rearrange the room.
Set the Style With Color, Edges, and Tops
Once the size feels right, the finish is what most people notice first. A waterfall edge, a confident color, a warm wood top, or a classic pale counter can set the tone for the whole kitchen, even when the cabinets stay exactly as they are. These ideas help you pick a look that feels like you and still works hard every day.
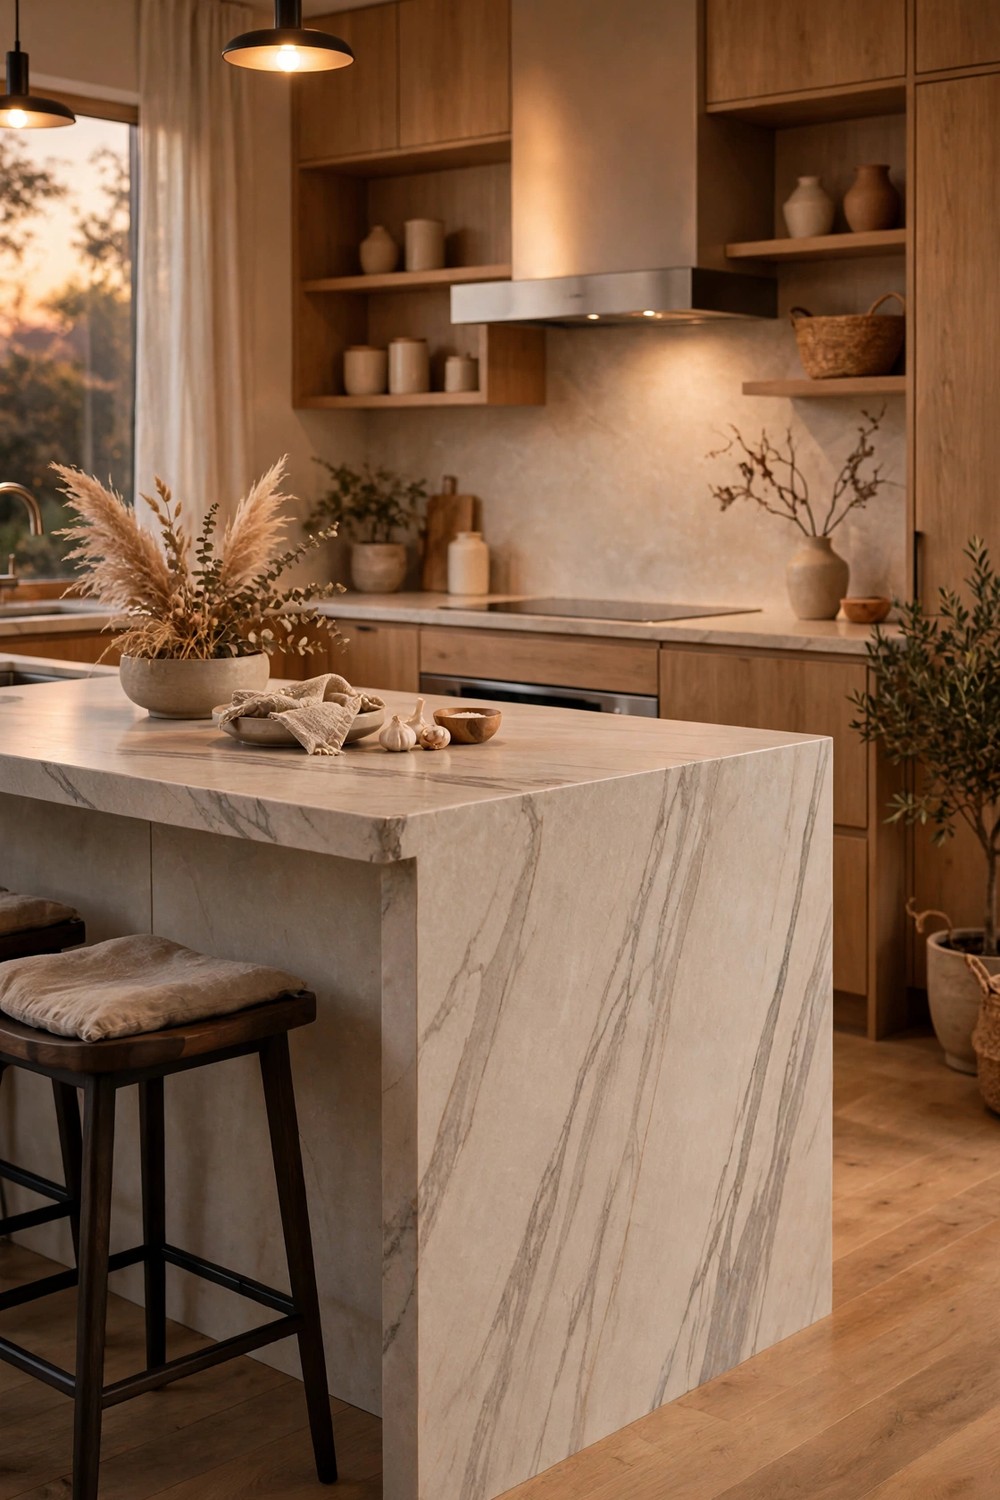
3. Add a Waterfall Edge for a Modern Line
A waterfall edge is where the counter material continues straight down the side of the island to the floor, and it creates a clean, modern line that instantly makes a kitchen feel considered. It works especially well with stone look counters that have gentle veining, because the pattern can flow over the edge in a calm, continuous way. The look is simple, but it does ask for careful measuring and a confident installer, since the corner joint is the whole feature. In return, you get a side panel that is easy to wipe and that protects the island ends from scuffs, chair bumps, and everyday kicks. Keep the rest of the island fairly plain so the edge stays the star. If a full waterfall feels like too much, a single waterfall end on the most visible side can give you a similar effect for typically a little less work and cost.
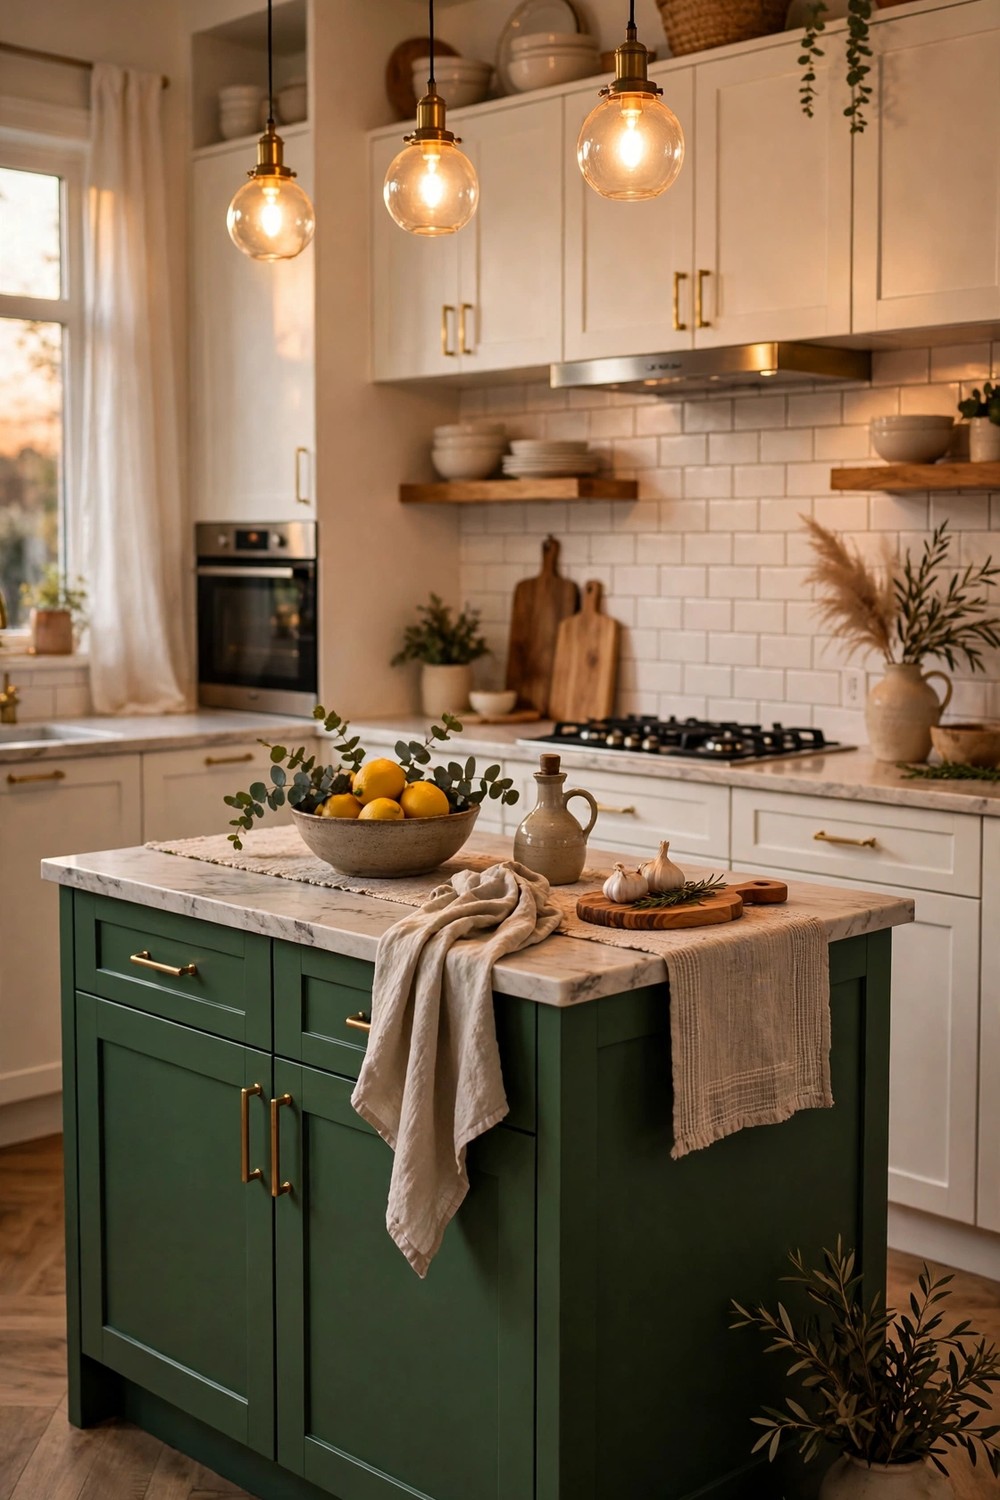
4. Paint the Island a Bold Color for Contrast
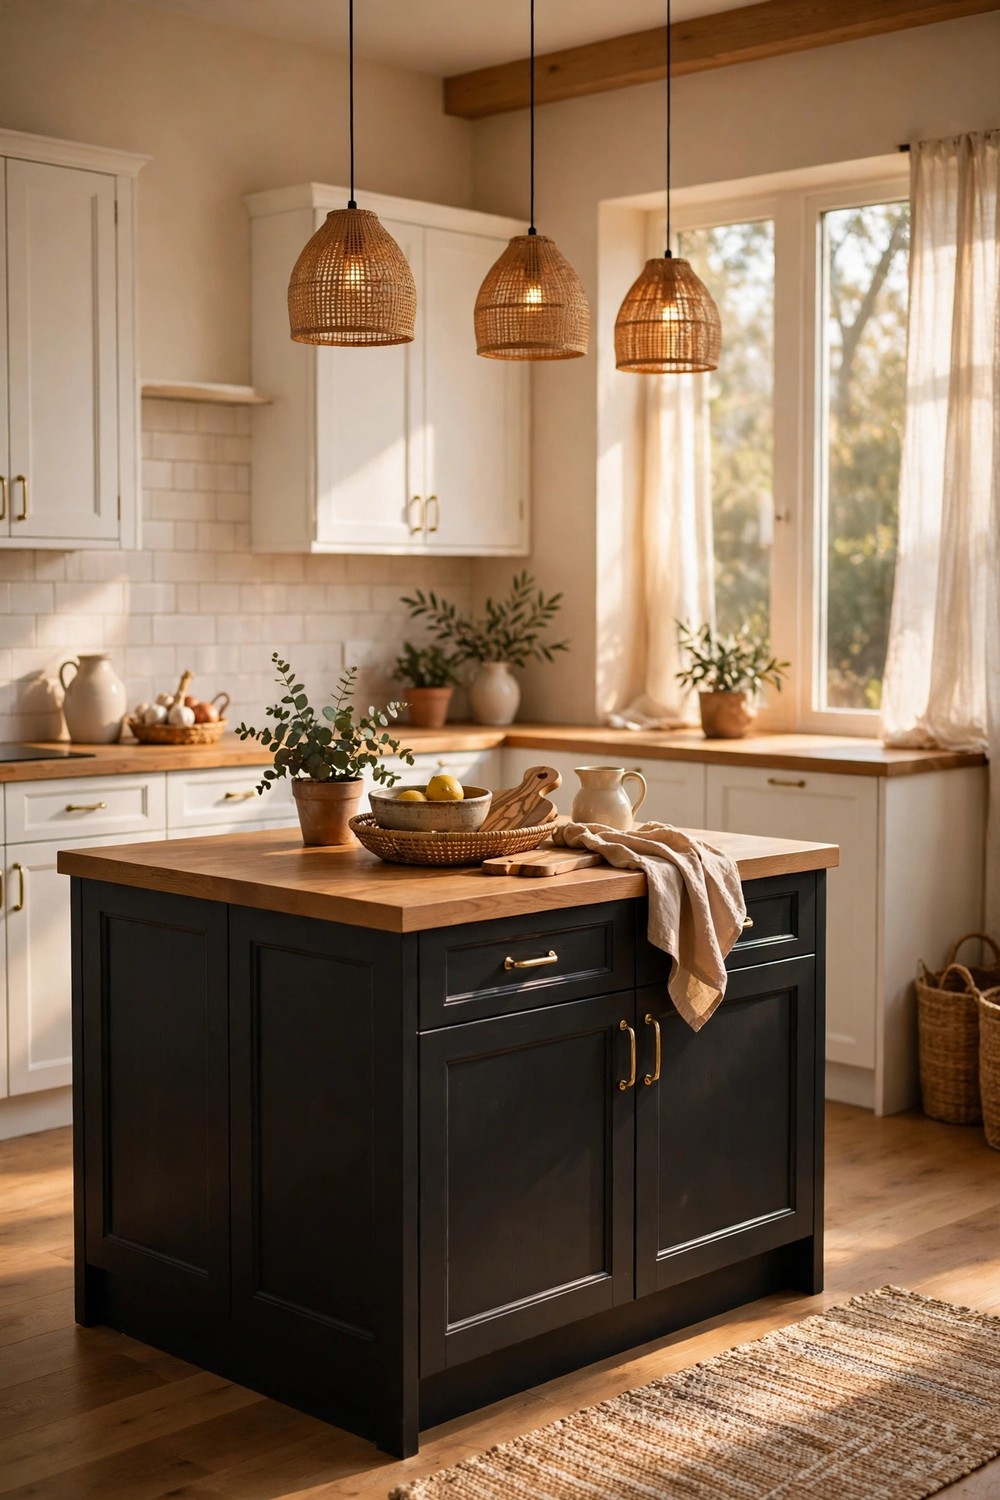
Painting just the island a bold color is a forgiving way to bring personality into a kitchen without repainting every cabinet. Deep green, navy, warm burgundy, and even a soft black can look beautiful against white, cream, or light wood cabinets, and the island becomes a natural focal point in the middle of the room. Because it is only one piece, repainting it in a few years feels far less daunting than redoing the whole kitchen. Test your color on a large board and move it around the island area through the day, since kitchen light can shift a shade quite a bit from morning to evening. A satin or semi gloss finish usually wipes clean more easily than a flat one. Pair the color with simple hardware in a warm metal or matte black so the finish feels finished rather than accidental.
5. Try a Two-Tone Island to Ground the Room
A two-tone island uses two finishes on one piece, perhaps painted cabinets below with a warm wood top, or a darker base with lighter open shelves at one end. The mix adds depth and helps a large island feel grounded without looking heavy or flat. It is also a helpful bridge when your kitchen already has mixed finishes, like wood floors, white cabinets, and dark hardware that need something to tie them together. Choose tones that already appear somewhere else in the room, even in a small way, so the island feels connected rather than random. Keep the combination to two main finishes and repeat each one at least twice if you can. A simple test is to hold samples of both finishes together beside your floor at midday. If they feel calm together there, they will typically feel calm on the island too.
6. Top It With Warm Butcher Block
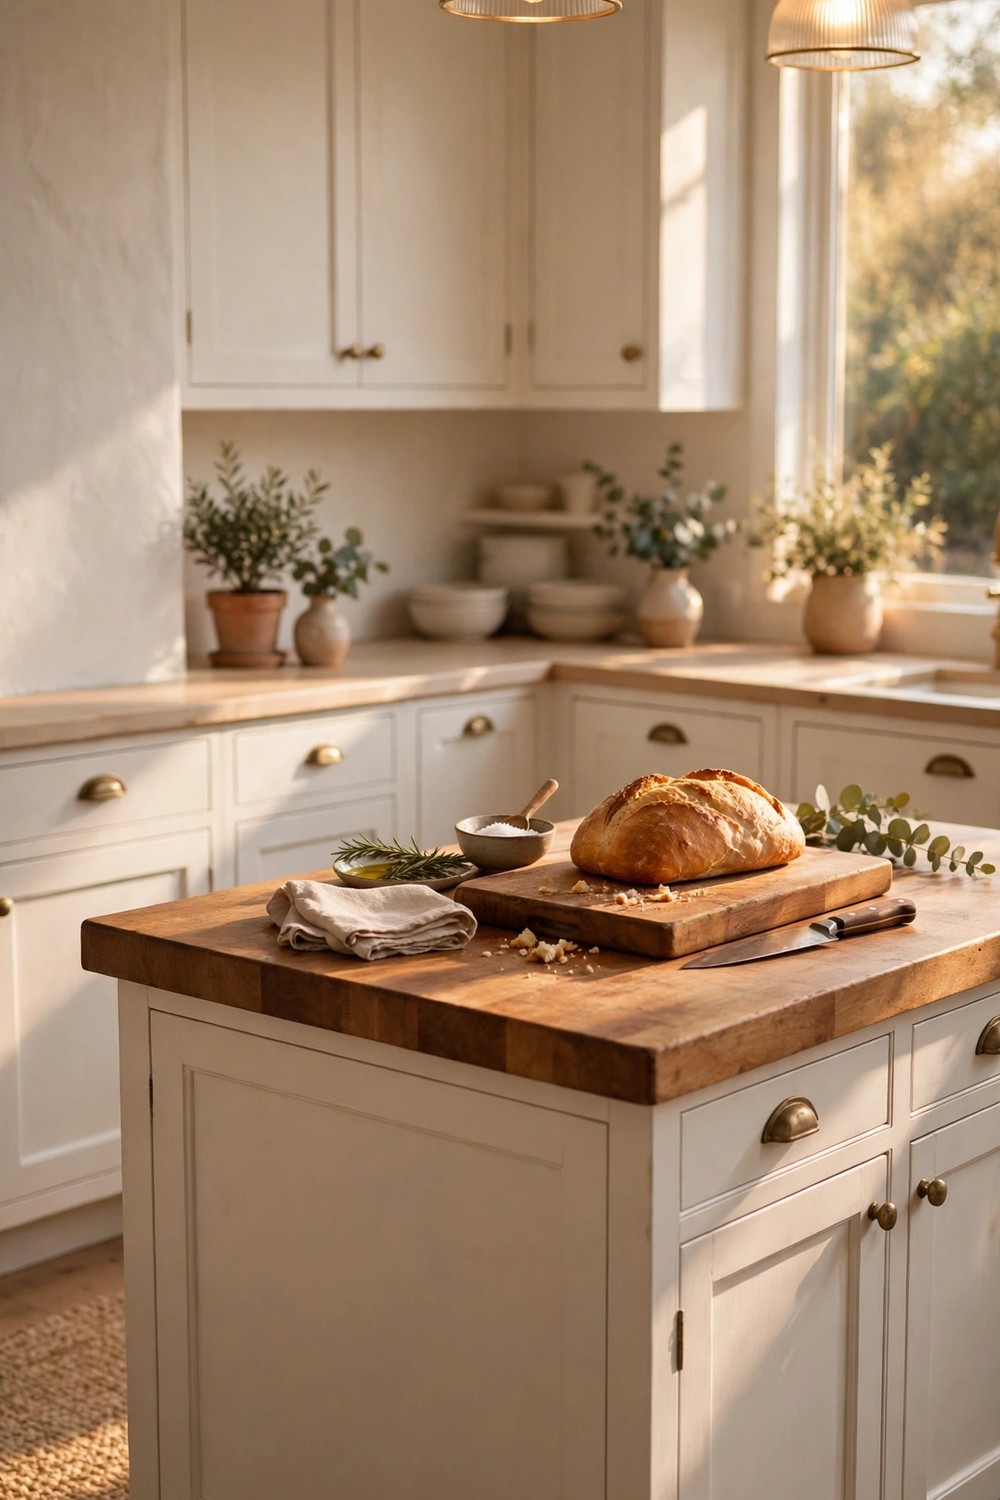
Butcher block brings a warmth to an island that stone and solid surfaces rarely match, and it suits kitchens where people gather as much as they cook. The natural grain softens white or painted cabinets, hides small crumbs and marks between cleans, and gives bakers and bread makers a friendly surface to work on. Real wood does ask for a little care. You will usually need to oil it now and then, wipe spills fairly promptly, and use boards for heavy chopping and hot pans. Many homeowners happily trade that small routine for the cozy feeling it adds. If you love the look but worry about upkeep around a sink, consider butcher block on the island only and a more water tolerant surface along the main counters. That split is practical, and the contrast between the two tops often looks intentional and charming.
Make It Work Harder With Sinks, Seating, and Storage
An island earns its place when it makes daily life easier, not just prettier. A second sink, a place to sit, deep drawers where the pans actually live, and shelves for the books and dishes you reach for most can quietly remove a dozen small frustrations from your day. These ideas focus on comfort, storage, and the little zones that help a busy kitchen run calmly.
7. Build In a Second Sink for Easier Prep
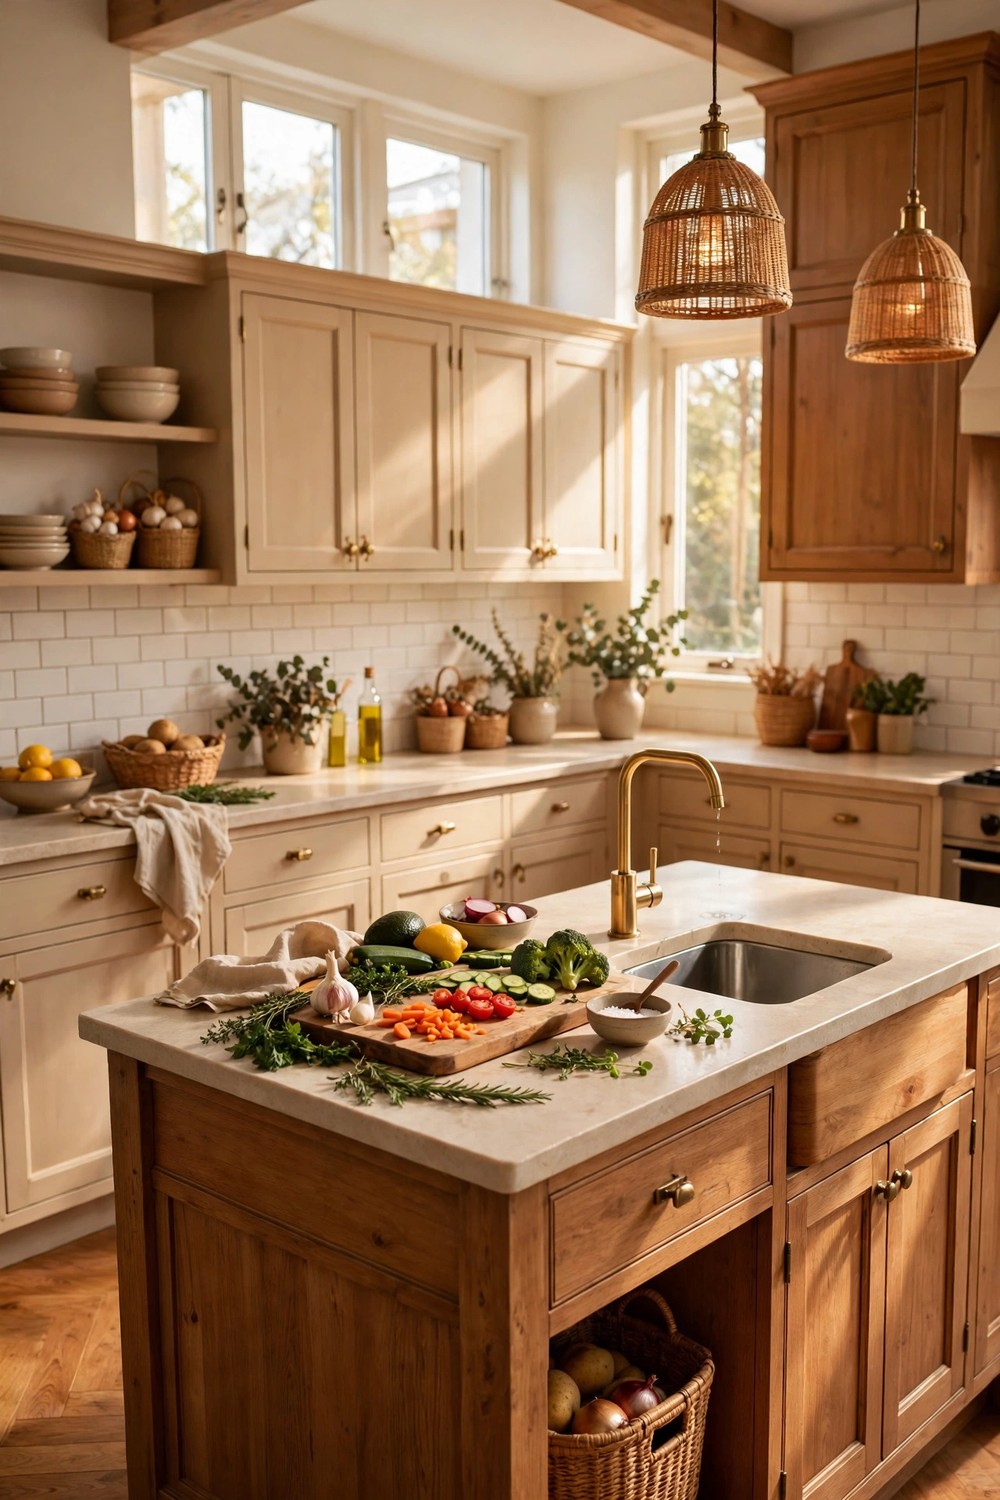
A second sink in the island can change how smoothly a kitchen runs, especially when two people cook together or when the main sink is often full. A smaller prep sink near your chopping zone lets you rinse vegetables, drain pasta water close by, and keep raw ingredients away from the washing up pile. It is also a kind spot for filling a kettle, watering herbs, or soaking a stubborn pan while the main sink stays free. This idea does need plumbing planned early, so it usually suits a renovation or a new island build better than a quick refresh. Keep the sink modest in size so you do not lose too much counter. A practical tip is to place it near one end of the island, leaving a long clear stretch beside it for boards, bowls, and the everyday sprawl of a real meal in progress.
8. Extend the Counter Into a Breakfast Bar
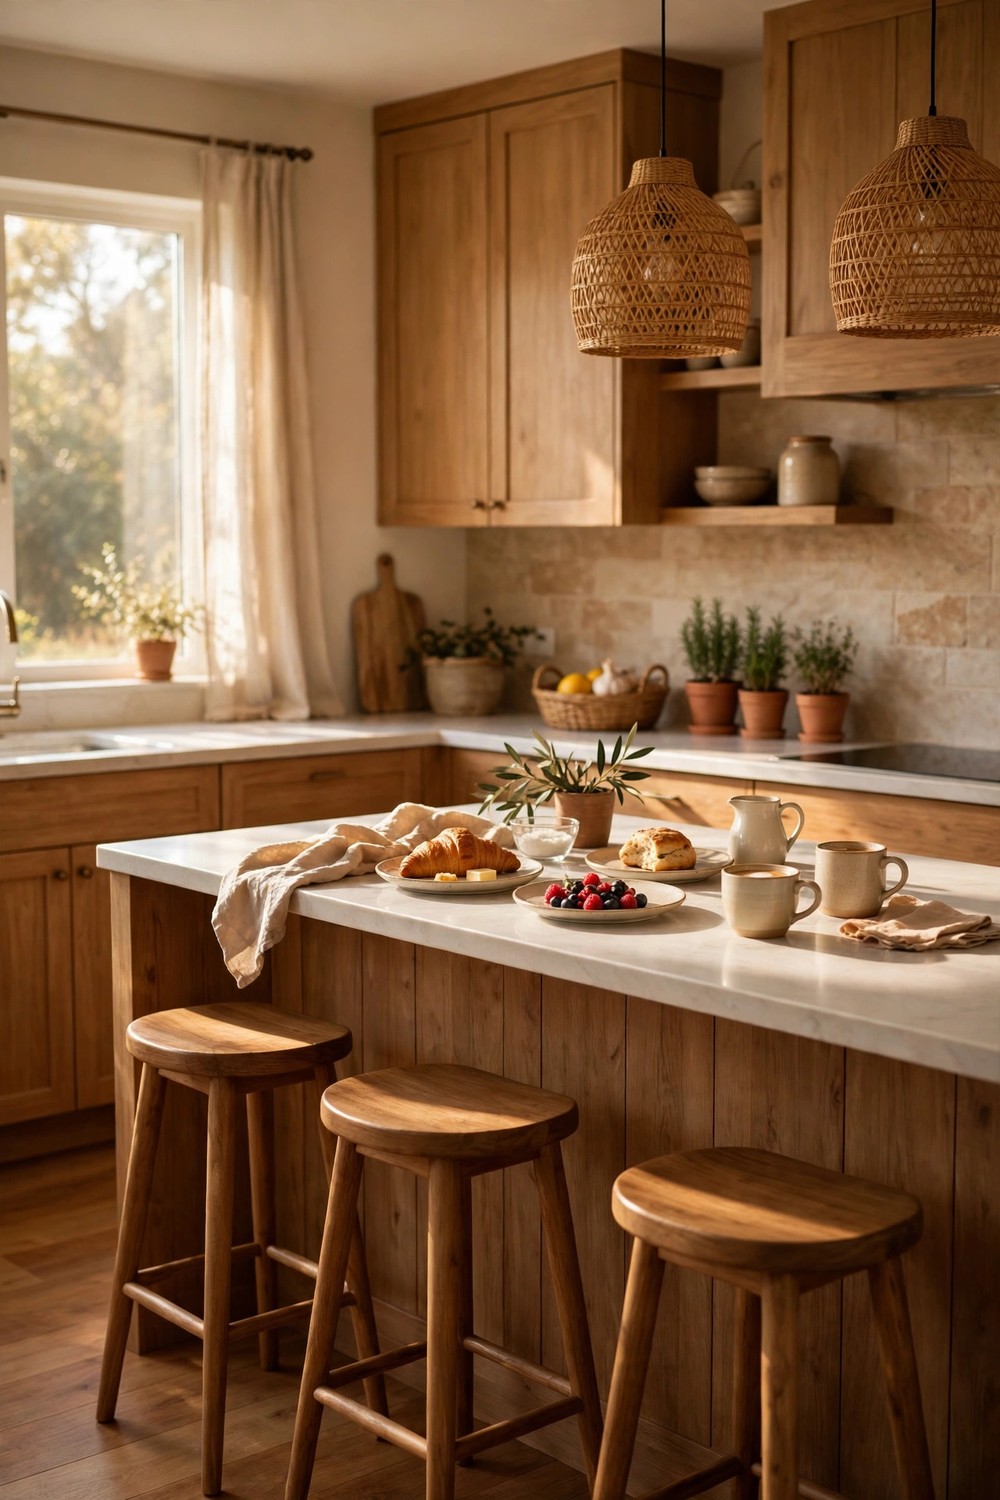
Extending the island counter into a breakfast bar gives your kitchen a relaxed place for morning coffee, quick lunches, and the kind of chats that tend to happen while dinner finishes in the oven. The extension can be a simple wider overhang on one side, or a slightly longer top that reaches toward a window or an adjoining room. Either way, it keeps eaters close to the cook without putting them in the middle of the work zone. Choose stools that tuck mostly under the counter so walkways stay clear, and leave enough knee space for adults to sit comfortably rather than perching. If your mornings are rushed, this spot often becomes homework central and list making headquarters too. Add a pendant or two above it if you can. That small pool of light makes even a weekday breakfast feel a little more intentional.
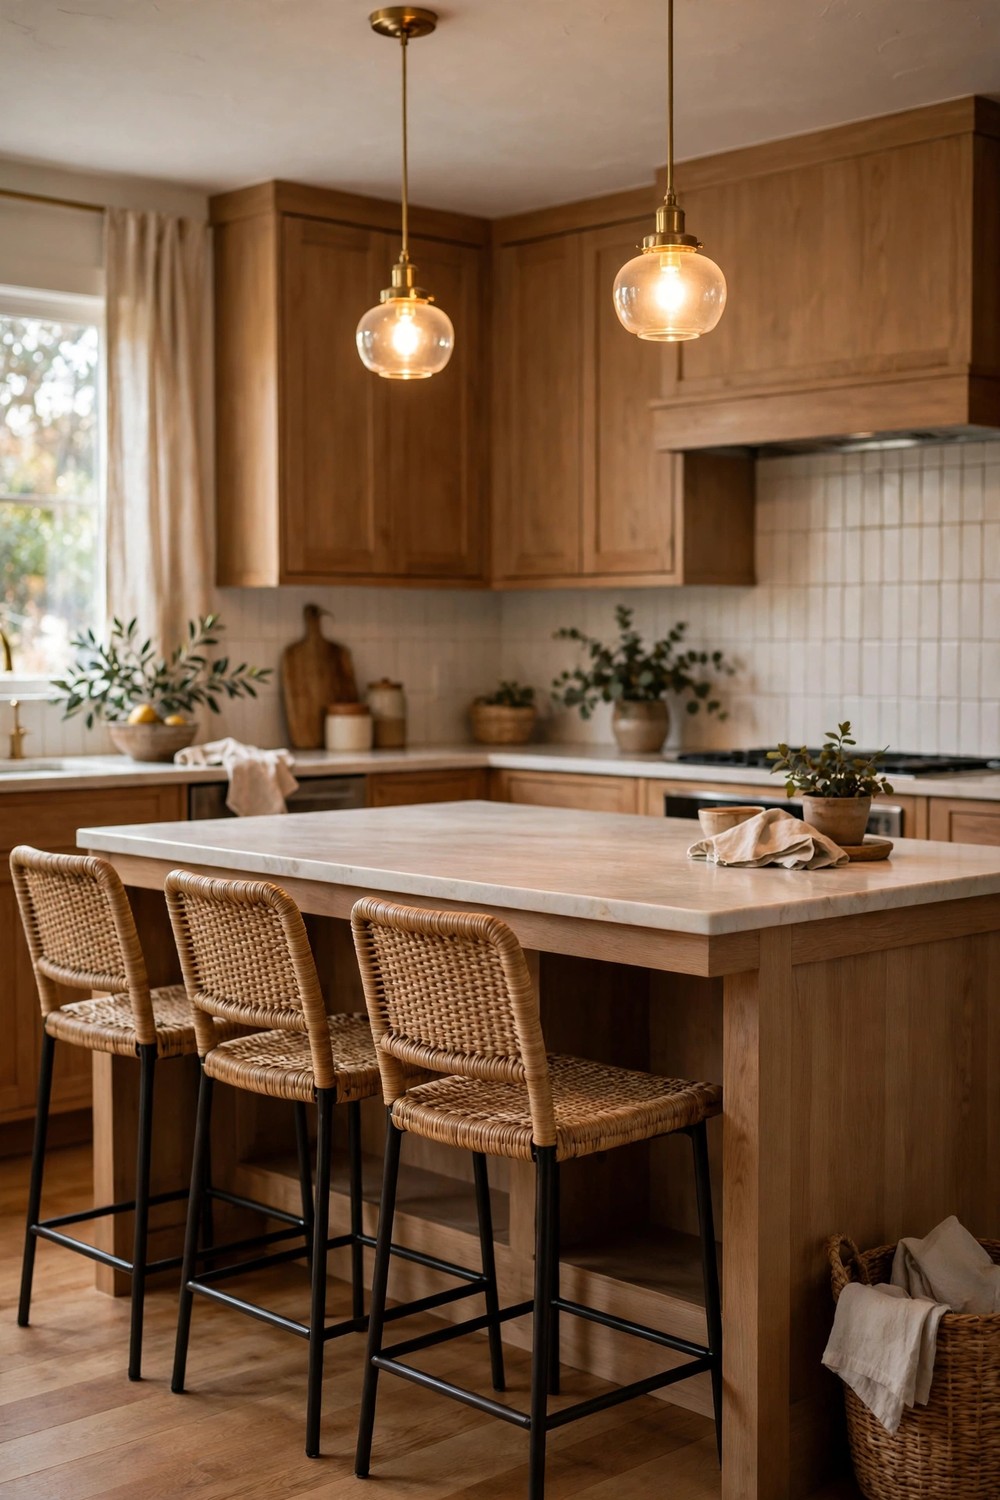
9. Leave a Generous Seating Overhang for Stools
A generous seating overhang sounds like a small detail, but it is usually the difference between stools that get used every day and stools that look nice while everyone stands. When the counter extends far enough beyond the cabinets, knees have room, feet can rest naturally, and sitting for a longer meal or a long homework session feels comfortable. Think about who will sit there most. Children manage happily with less depth, while taller adults typically appreciate a little more. Keep the area under the overhang clear of storage so legs are not negotiating doors and handles. Support matters too, since a longer overhang may need brackets or a panel depending on your counter material, and that is worth discussing early with your installer. Choose stools with a footrest if you can. It is a small kindness your guests will notice without ever knowing why.
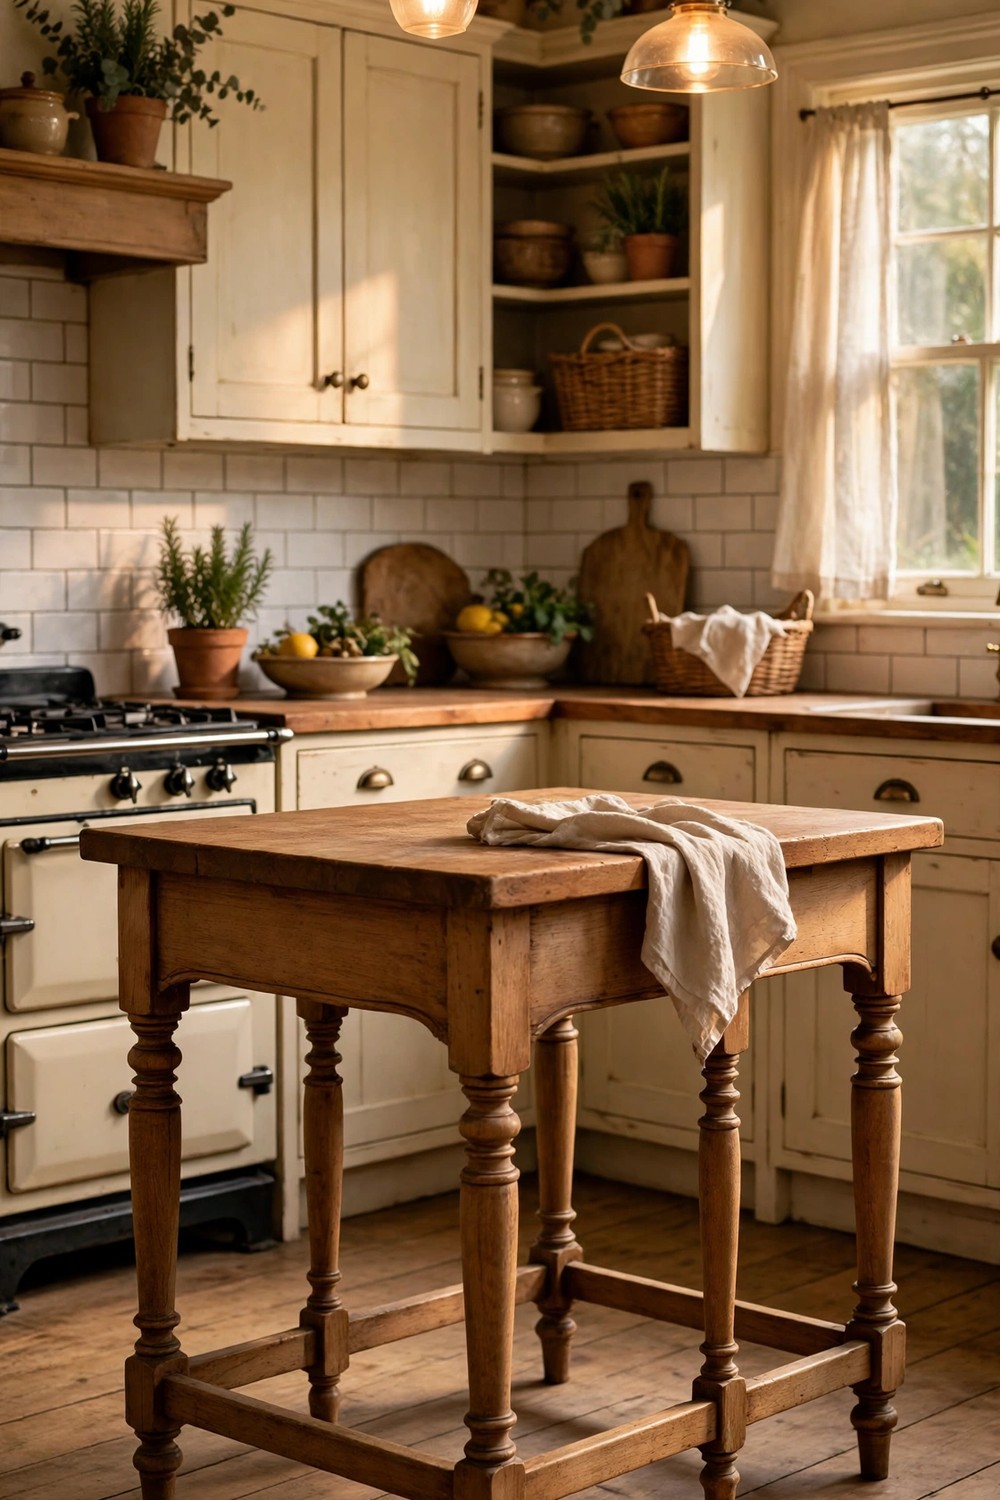
10. Give It Furniture-Style Legs for Vintage Charm
Furniture-style legs give an island the feeling of a beloved old table or dresser rather than a block of kitchen cabinets, and that charm suits cottages, traditional homes, and anyone who likes a kitchen to feel collected over time. Turned legs, simple tapered posts, or chunky farmhouse feet can support one end of an island or frame an open seating area underneath. The open space below keeps the room feeling airy and gives you a place for a basket, a stool, or even a sleeping pet away from foot traffic. Make sure the legs you choose are genuinely sturdy enough for a heavy counter, and match or gently contrast their finish with the island body so the look feels deliberate. A slightly darker leg on a painted island often reads as classic. Dust will gather underneath more visibly than with a closed base, so keep a quick sweep in your routine.
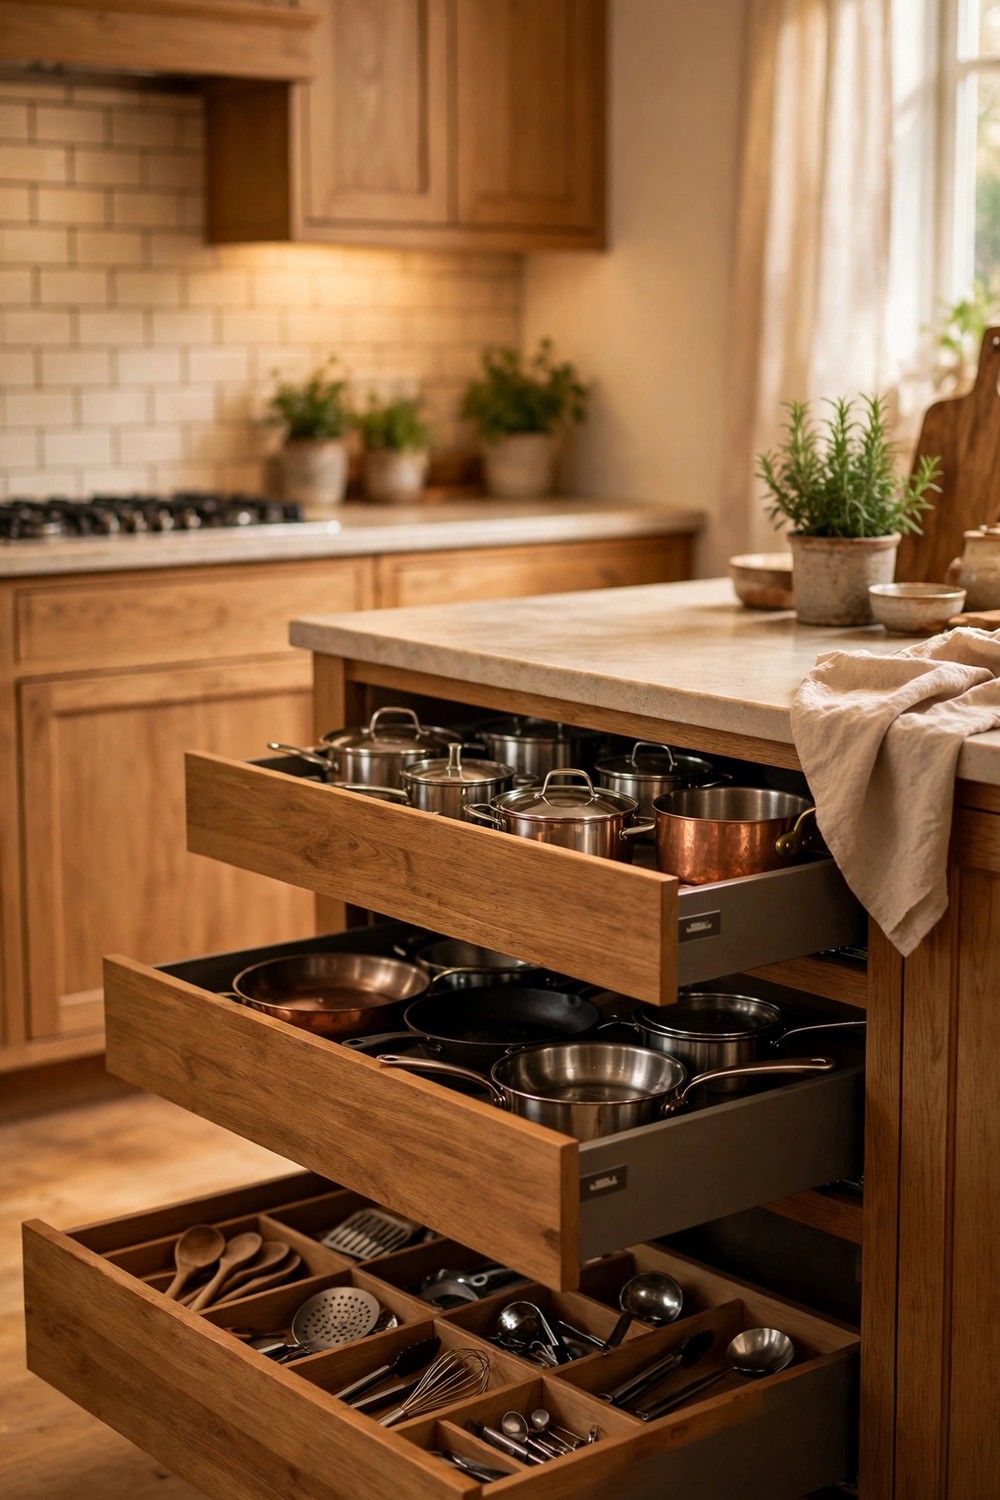
11. Hide Storage in Deep Drawers and Cabinets
Deep drawers and well planned cabinets are often the most loved part of an island once the novelty of the counter wears off, because they put heavy pans, mixing bowls, and small appliances right where you use them. Drawers usually beat low cupboards for everyday ease, since you can see everything from above instead of kneeling and reaching into a dark corner. Consider one very deep drawer for pots, a medium one for utensils and wraps, and a shallow one near your prep zone for knives, peelers, and the tools you grab without thinking. Add dividers only after you have lived with the drawers for a bit, so you organize around your real habits. Keep the heaviest items on the cooking side of the island if you can, close to the stove. That short distance, repeated daily, is where good storage quietly pays you back.
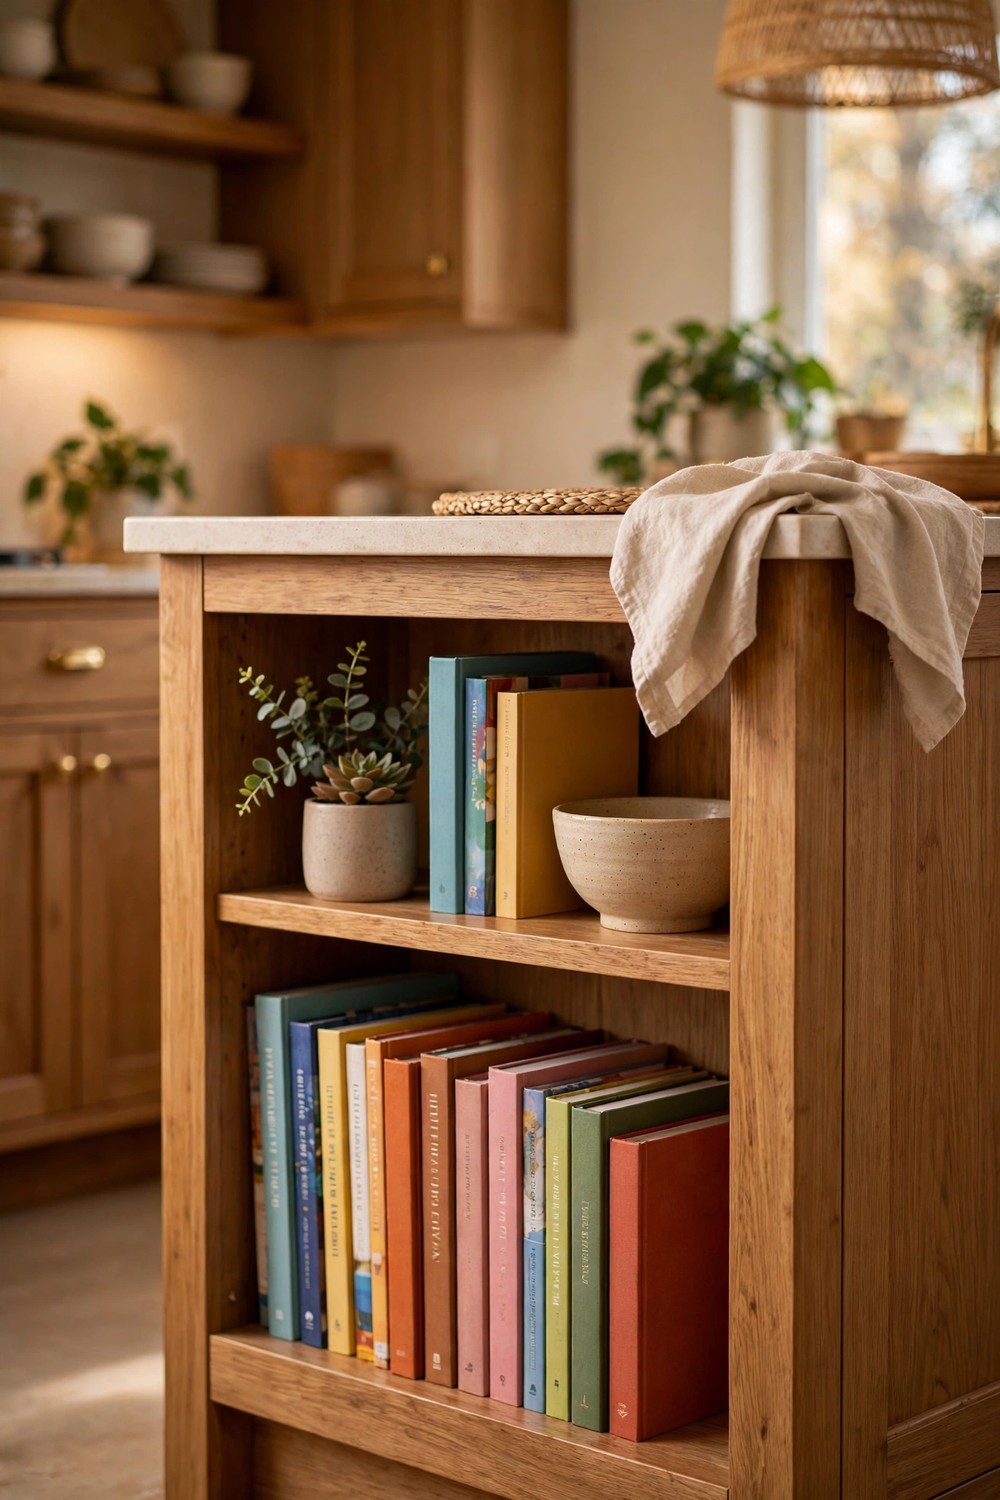
12. Add Open Bookshelves for Cookbooks at the End
Open bookshelves at the end of an island give your cookbooks a proper home and add a warm, personal layer to the kitchen at the same time. The end panel is often wasted space, while a shallow set of shelves there keeps favorite books upright, visible, and easy to grab with floury hands nearby. It also softens the look of a large island, because colorful spines and a small plant or bowl break up a long run of painted cabinetry. Keep the shelves shallow enough that books sit snugly and do not slide, and leave the lowest shelf for heavier volumes. If your collection is small, mix in a few stacked books, a ceramic jar, or a framed photo so the shelves feel styled rather than sparse. Dust them when you wipe the island. A quick pass keeps the display feeling fresh instead of forgotten.
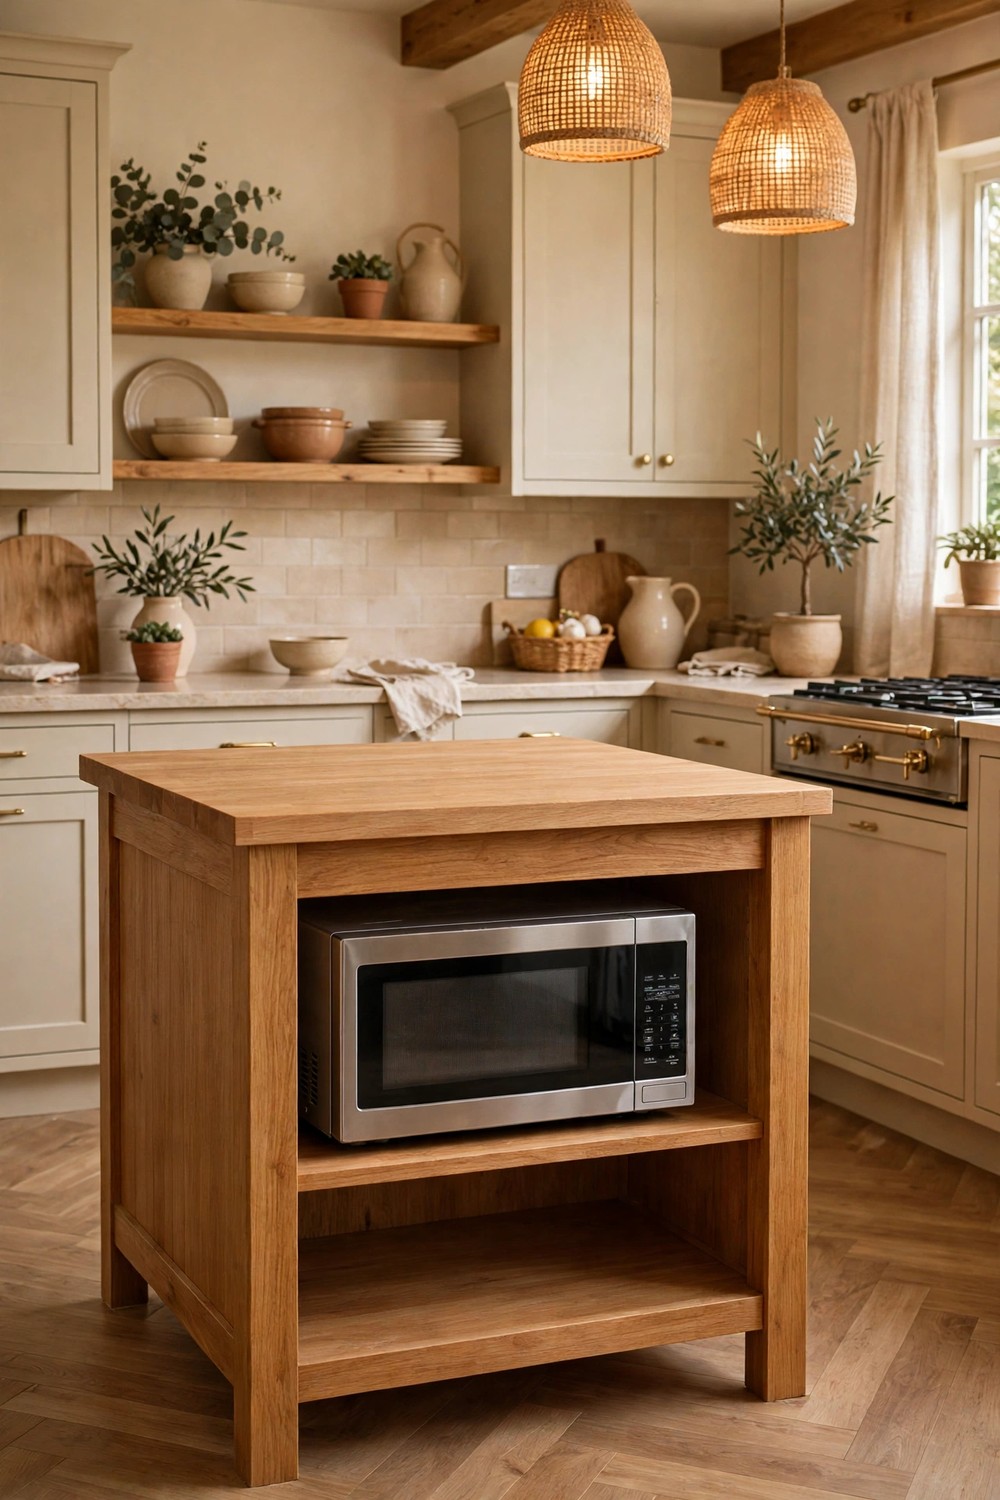
13. Fit a Microwave Shelf Below the Counter
A microwave shelf below the island counter frees up valuable worktop space and keeps a bulky appliance out of your main sight line, which can make a kitchen feel calmer at a glance. A simple open shelf suits a microwave you use and move rarely, while a purpose built drawer style unit gives a cleaner finish if your budget allows. Either way, placing it in the island often puts it within easy reach of the prep zone without crowding the counters where you actually cook. Think carefully about height, especially if children use it or if you often lift heavy, hot dishes. Leave the ventilation space the manufacturer recommends and plan the power point early, since adding one later is typically more disruptive. Keep a heatproof mat or trivet in a drawer just beside it. Hot bowls need a landing spot the moment they come out.
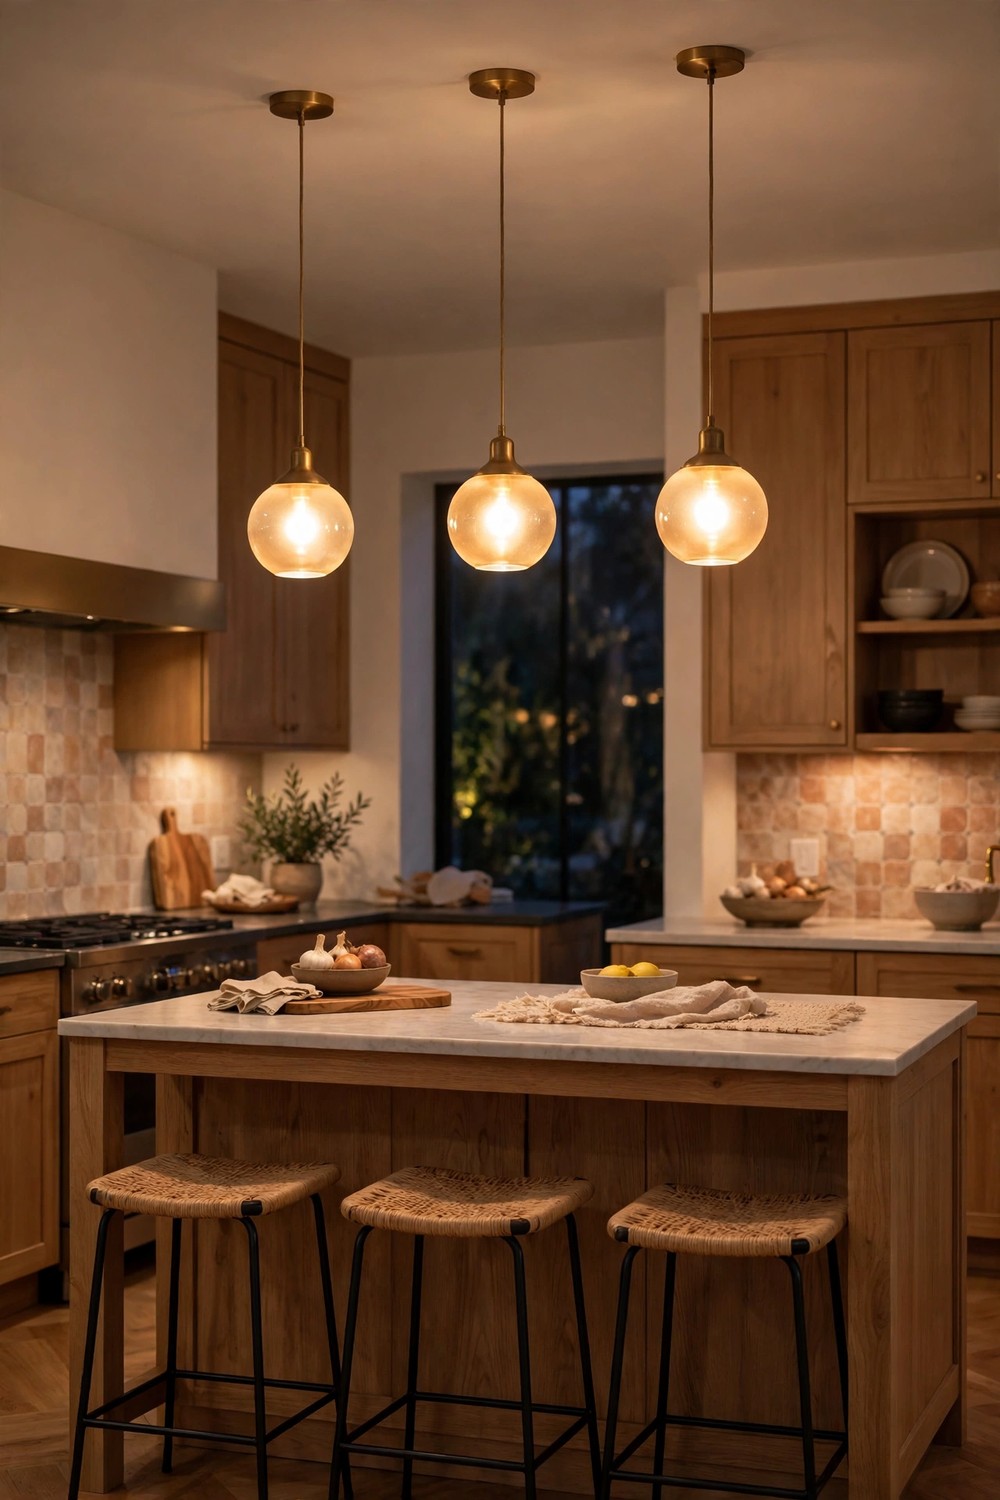
14. Install Pendant Lights to Define the Island Zone
Pendant lights do more than help you see the chopping board. They define the island as its own zone, add a layer of style at eye level, and give a large kitchen a sense of rhythm and scale. Two pendants usually suit a medium island and three can suit a longer one, spaced evenly so the light falls where people prep and sit. Choose shades that direct light down onto the counter while still giving a soft glow to the room, and hang them high enough that sight lines across the island stay open. Warm bulbs typically flatter wood, stone, and skin tones better than cool daylight ones, especially in the evening. If your ceilings are low, smaller and simpler pendants will feel more comfortable than oversized statement shades. A dimmer is worth adding if you can. Lower light turns the island into the coziest seat in the house after dinner.
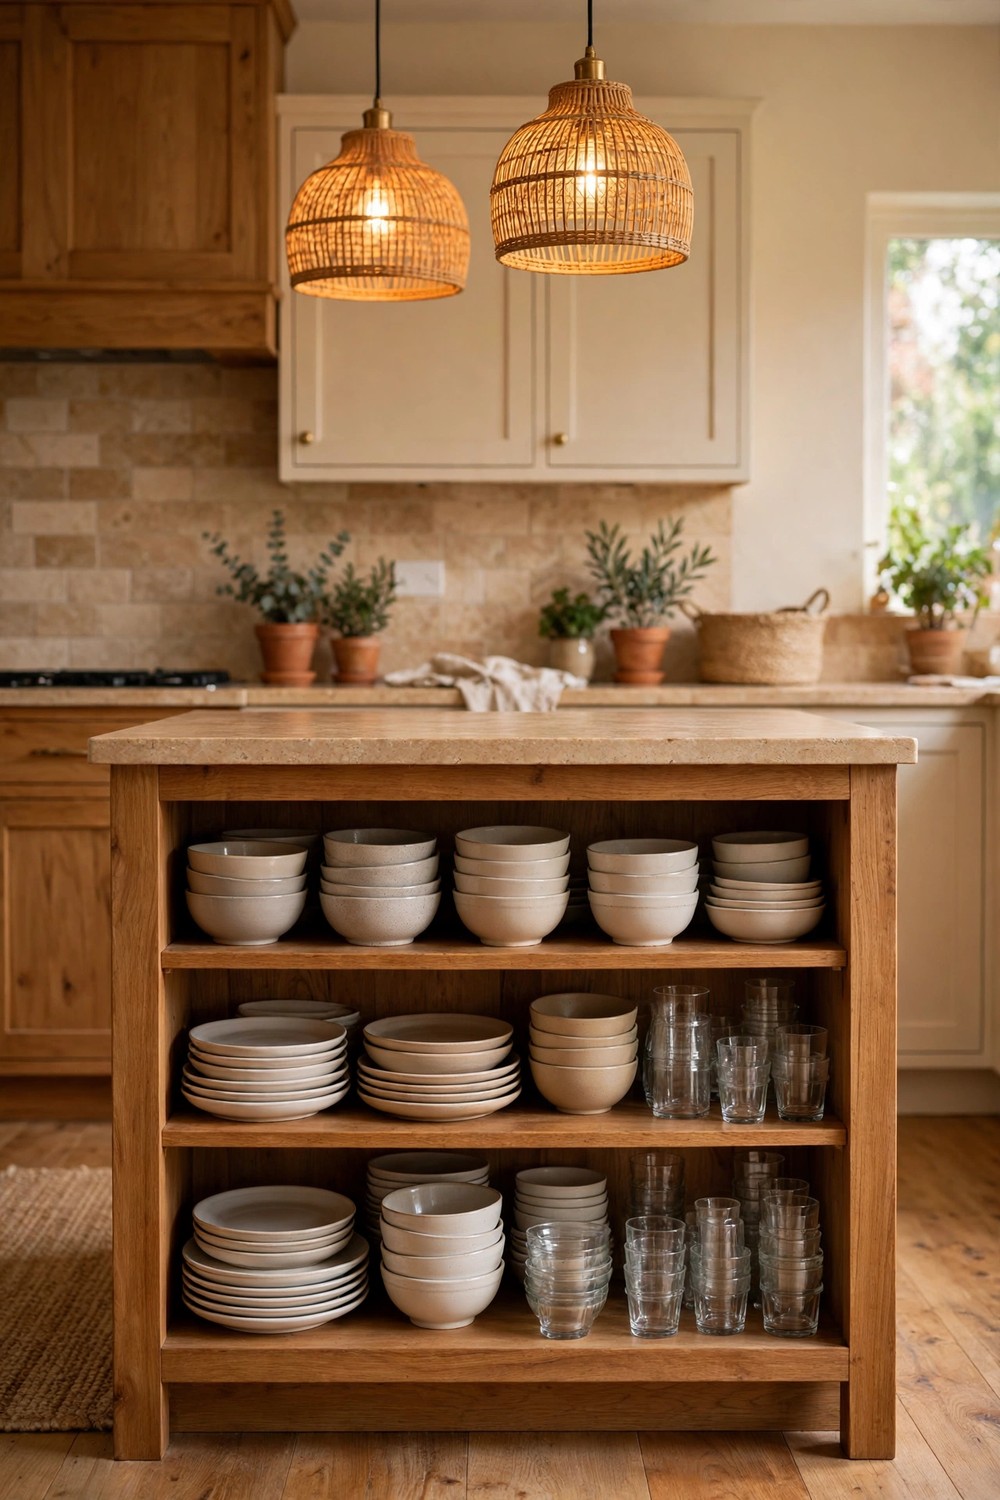
15. Mix Open Shelving for Everyday Dishes
Open shelving inside or at one end of the island keeps everyday dishes within easy reach and adds a relaxed, lived in feeling that closed cabinets cannot quite give. Stacked bowls, plain plates, and a row of everyday glasses look calm when they are similar in color and used often enough that dust never really settles. This is a good spot for the pieces guests can help themselves to, since nobody has to guess which cupboard to open. Keep the selection honest and small. Open shelves show everything, so a tight edit is what makes them look good rather than cluttered. Place heavier stacks low and leave a little breathing room between groups. If you are unsure, start with one open section and live with it for a month. Many people find they love the ease, while others happily return that section to a door. Both answers are useful to learn.
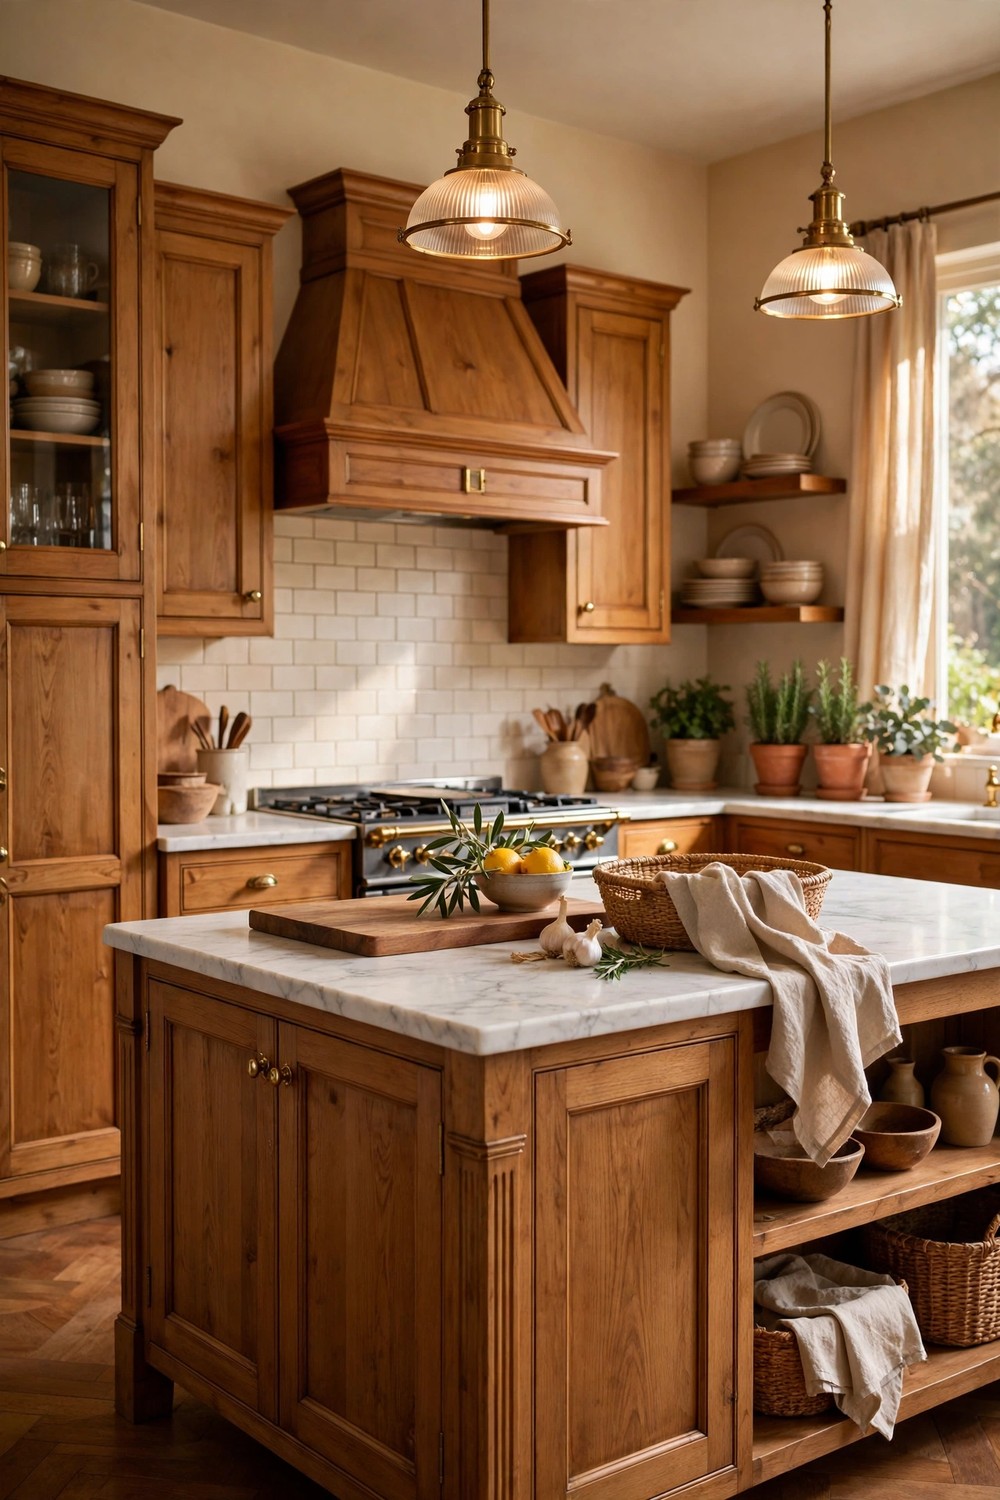
16. Use a Marble-Look Counter for a Classic Finish
A marble-look counter gives an island that classic, bright finish many people picture in a dream kitchen, with soft veining that pairs happily with white, wood, and painted cabinets alike. Real marble is beautiful but can mark with everyday acids and oils, so many homeowners choose a marble-look quartz or porcelain that offers a similar feeling with calmer upkeep. Whichever route you take, let the veining be gentle rather than dramatic if you want the room to feel timeless, and bring a sample home to see it beside your floor and cabinet colors. The pale surface bounces light around the room, which is especially welcome in a kitchen that faces away from the sun. It also gives bakers a cool feeling surface they often enjoy for pastry. Wipe spills as they happen and use trivets for hot pans, and this finish will typically stay a quiet, elegant backdrop for years.
Go Bigger With Statement Islands for Larger Kitchens
If you are lucky enough to have a larger kitchen, the island can become more than a counter. It can shape how people move, hold a baking station at just the right height, offer a raised spot for drinks and conversation, or even double up into two islands with different jobs. These final ideas make the most of generous space without letting it feel empty or echoing.
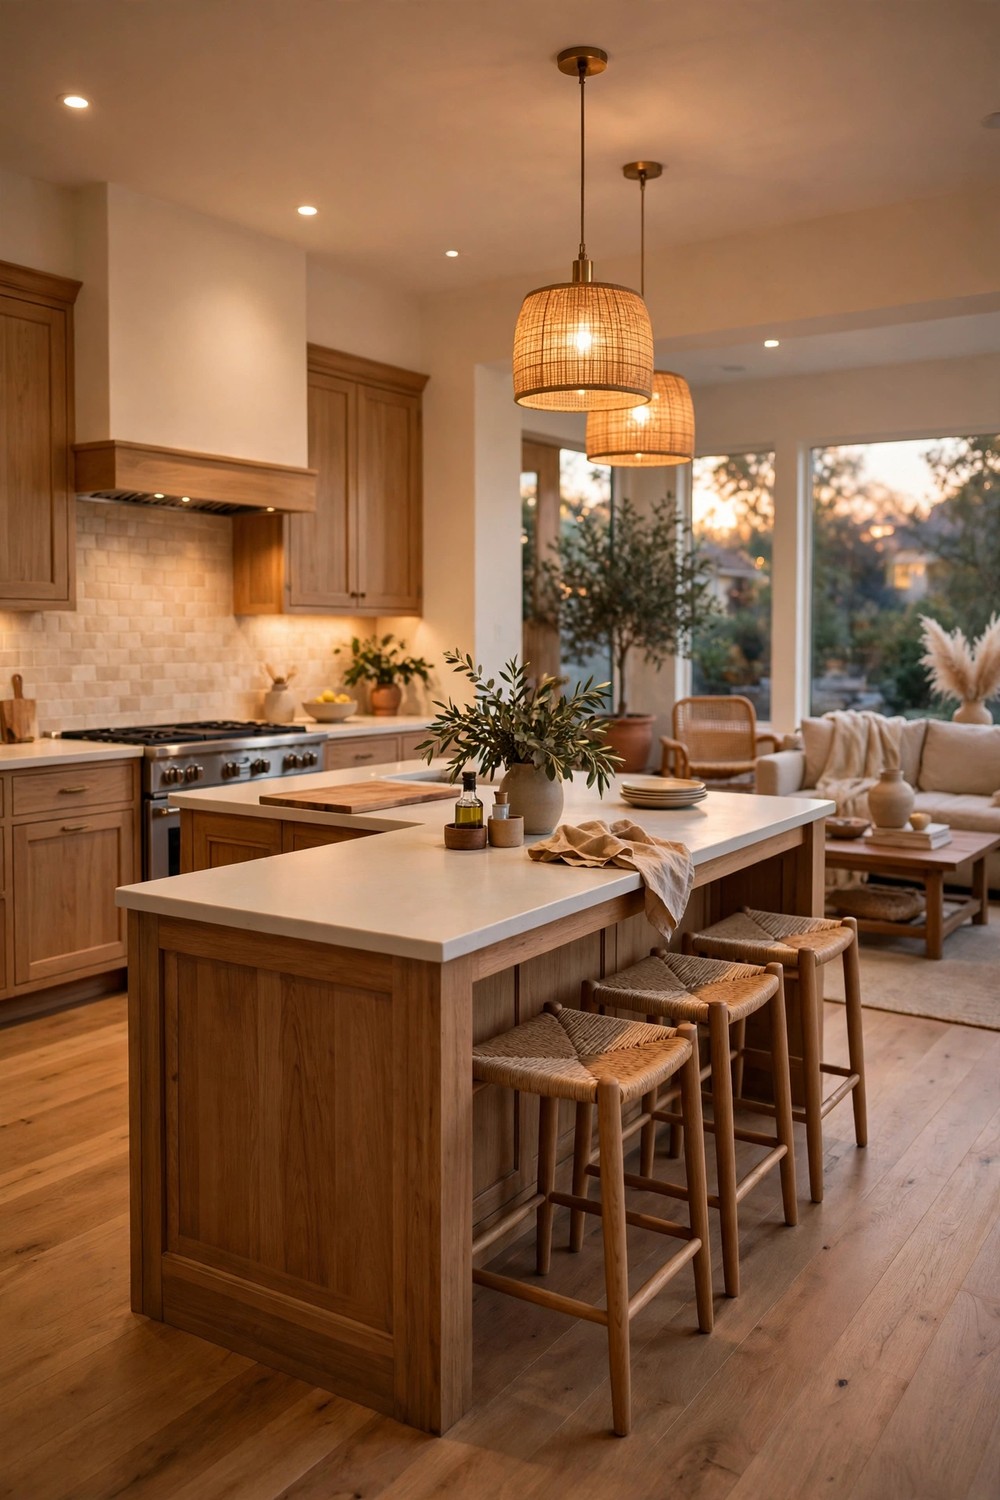
17. Shape It as an L to Guide Traffic Flow
An L-shaped island can guide traffic through a larger or open plan kitchen in a way a simple rectangle sometimes cannot. The shorter leg might hold seating or a bookshelf end, while the longer leg carries the main prep counter and storage, so people naturally move around the work zone instead of through it. This shape also creates a gentle sense of enclosure for the cook, which many people find surprisingly comforting in a big open room. Plan the inner corner with care, since deep corner storage can become awkward if it is not thought through. A wide drawer, an open shelf, or simply leaving that corner for less used items can all work. Walk your likely routes on the floor with tape before you commit, from fridge to sink to stove and out again. If those paths feel easy on paper and in tape, they will usually feel easy in daily life.
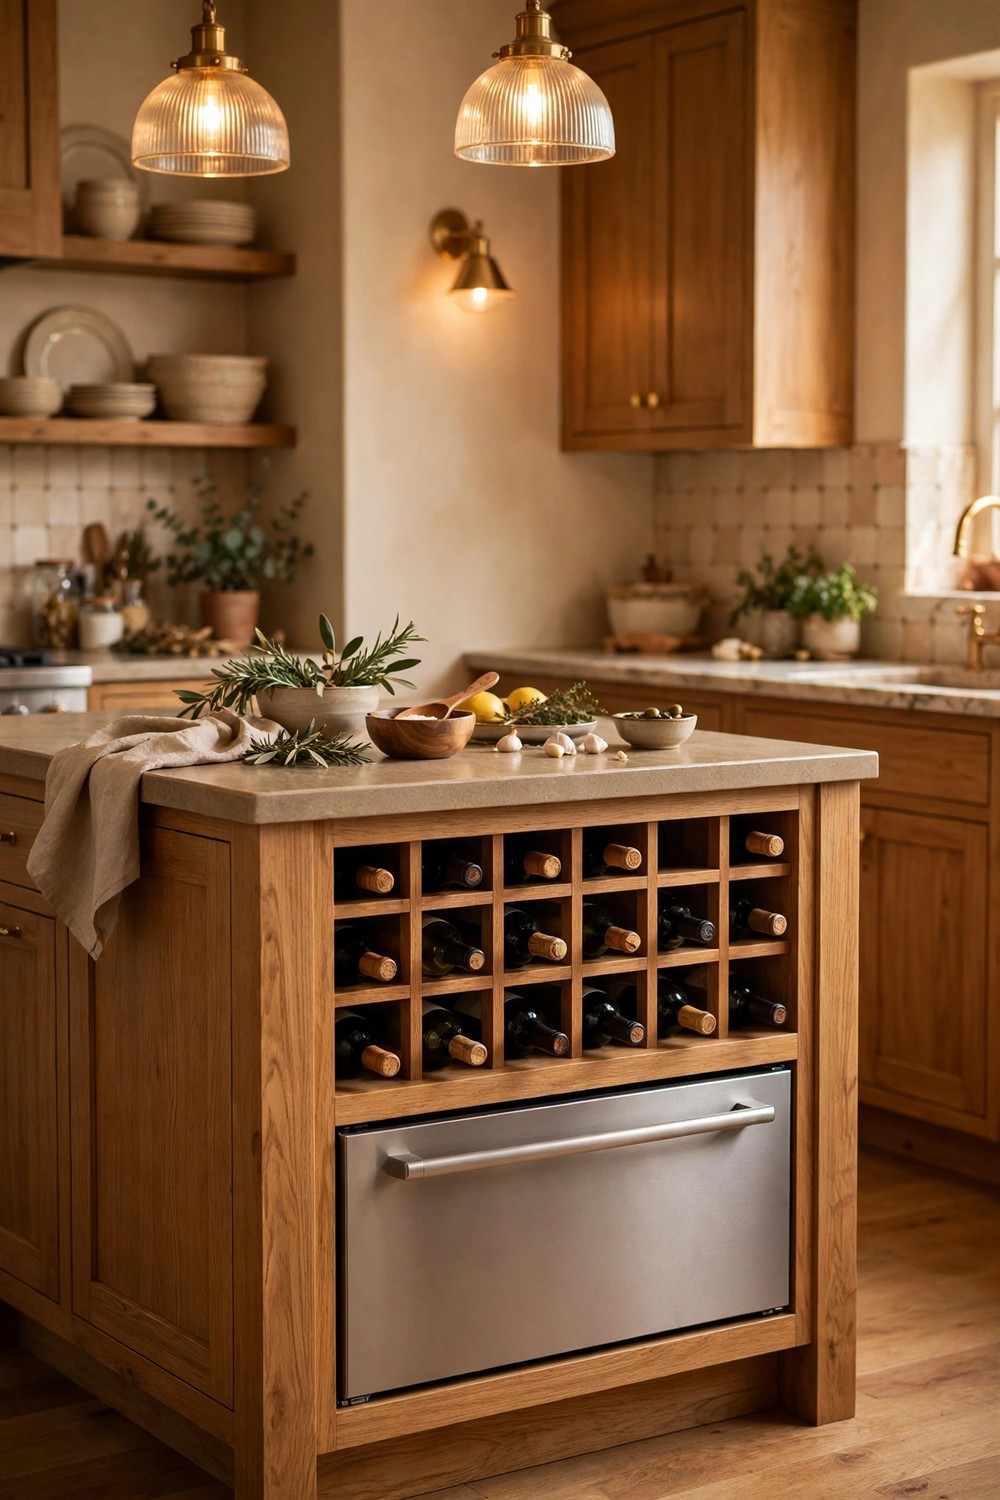
18. Add a Built-In Wine Rack and Chilled Drawer
A built-in wine rack and a small chilled drawer turn one end of the island into a quiet little entertaining station, keeping drinks close to guests and away from the busiest cooking space. The rack might be a simple grid for bottles you rotate often, a few angled shelves, or an open cubby section that adds pattern and shadow to the island side. A chilled drawer below keeps white wine, mixers, and snacks at a comfortable serving temperature without repeated trips to the main fridge. Place this zone on the outer side of the island if you can, facing the seating or the next room, so guests can help themselves without crossing behind the cook. Keep everyday wine storage away from heat sources like ovens and dishwashers, which can affect bottles over time. Even if wine is not your thing, the same setup suits sparkling water, juices, and party snacks beautifully.
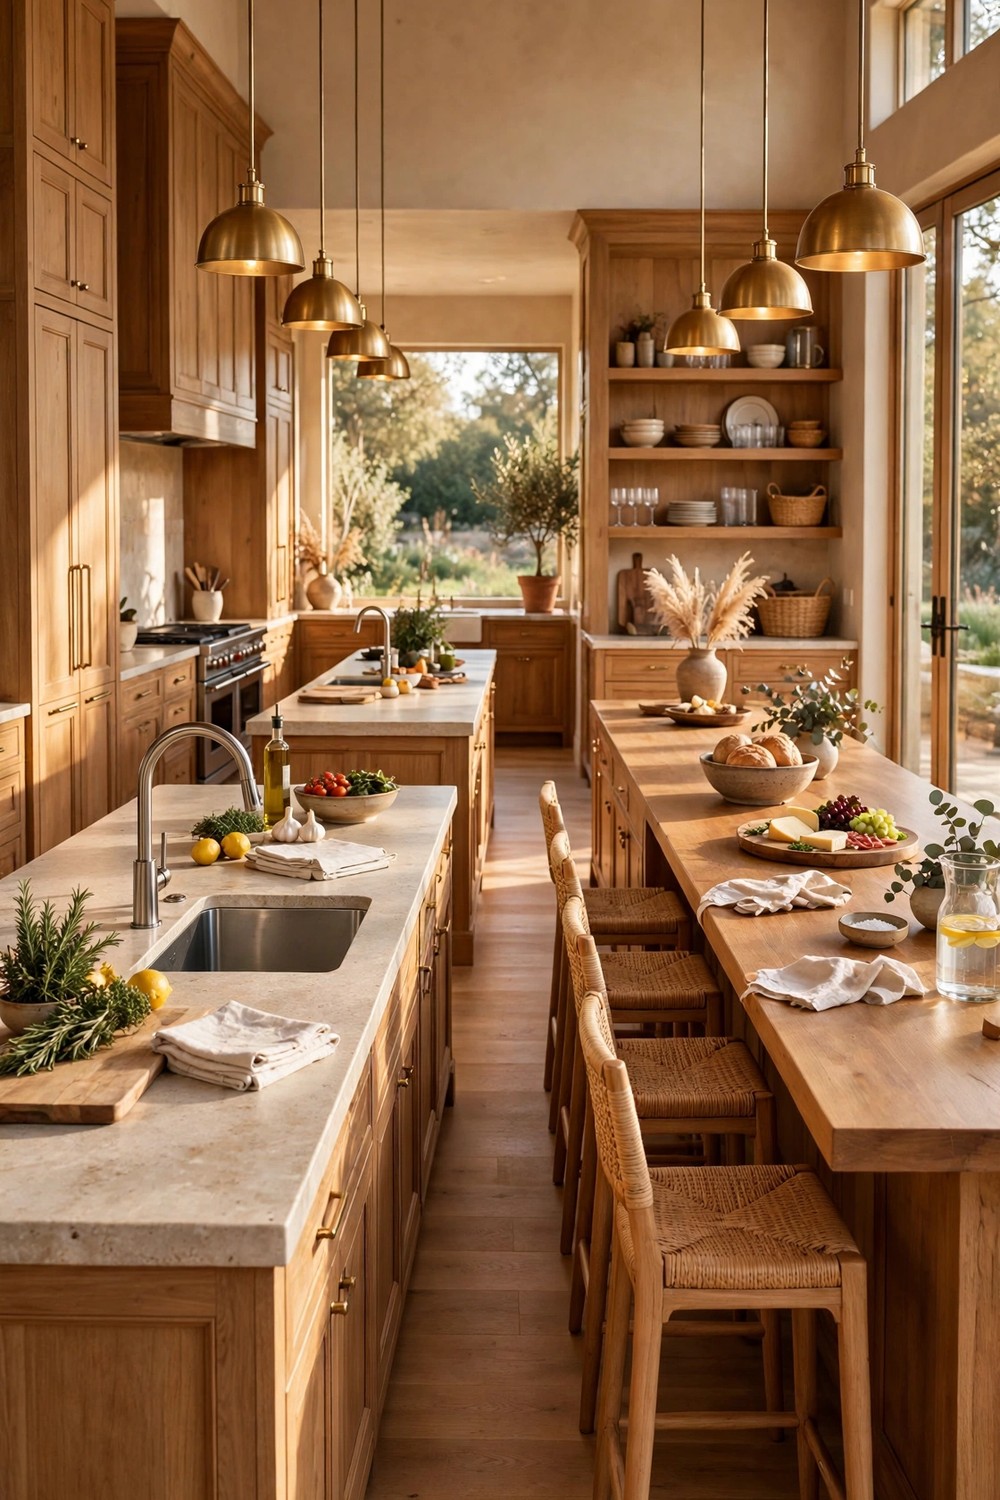
19. Plan Double Islands for a Truly Large Kitchen
Double islands sound grand, but in a truly large kitchen they are often the most practical choice of all, because one very long island can feel distant and awkward to walk around. Two islands let you give each one a clear job. The first might hold the sink, prep counter, and everyday storage close to the stove, while the second becomes the gathering island with seating, serving space, and a clear top for homework, puzzles, or a buffet. The walkway between them becomes a natural work aisle, so movement feels organized rather than wandering. Keep the two pieces visually related with the same counter or a deliberate two-tone pairing, so they read as a family rather than a mismatch. This layout usually belongs in a planned renovation, where plumbing, power, and lighting can be placed for both islands from the start. Done well, it feels generous without feeling showy.
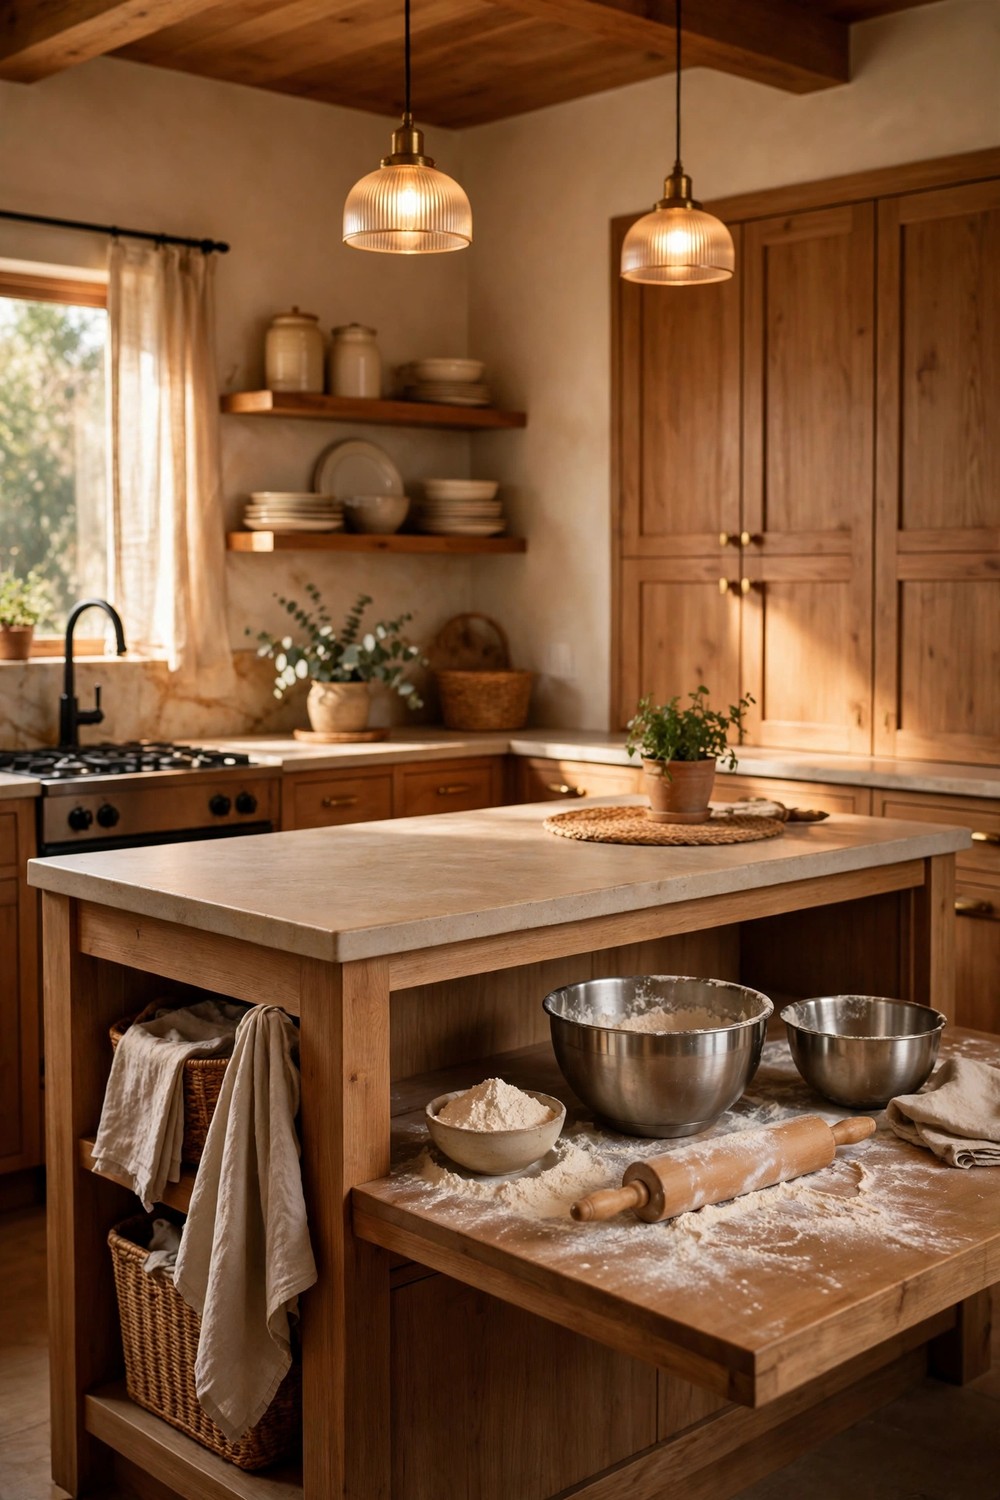
20. Create a Low Baking Station at One End
A low baking station at one end of the island is a thoughtful gift to anyone who rolls dough, decorates cakes, or cooks with children standing beside them. A counter set a little lower than standard height lets you put comfortable pressure through a rolling pin without hunching your shoulders, and it gives younger helpers a surface they can actually reach. Keep the zone supplied like a tiny bakery. A nearby drawer for flour, measures, and baking tools, a shelf below for heavy mixing bowls, and a smooth section of counter for rolling will make baking days feel calm instead of scattered. A stone or stone look insert is often appreciated here because it stays cool and releases dough more easily. If nobody bakes in your home, the same low end works kindly as a coffee station or a serving spot for a buffet. Flexible ideas age well.
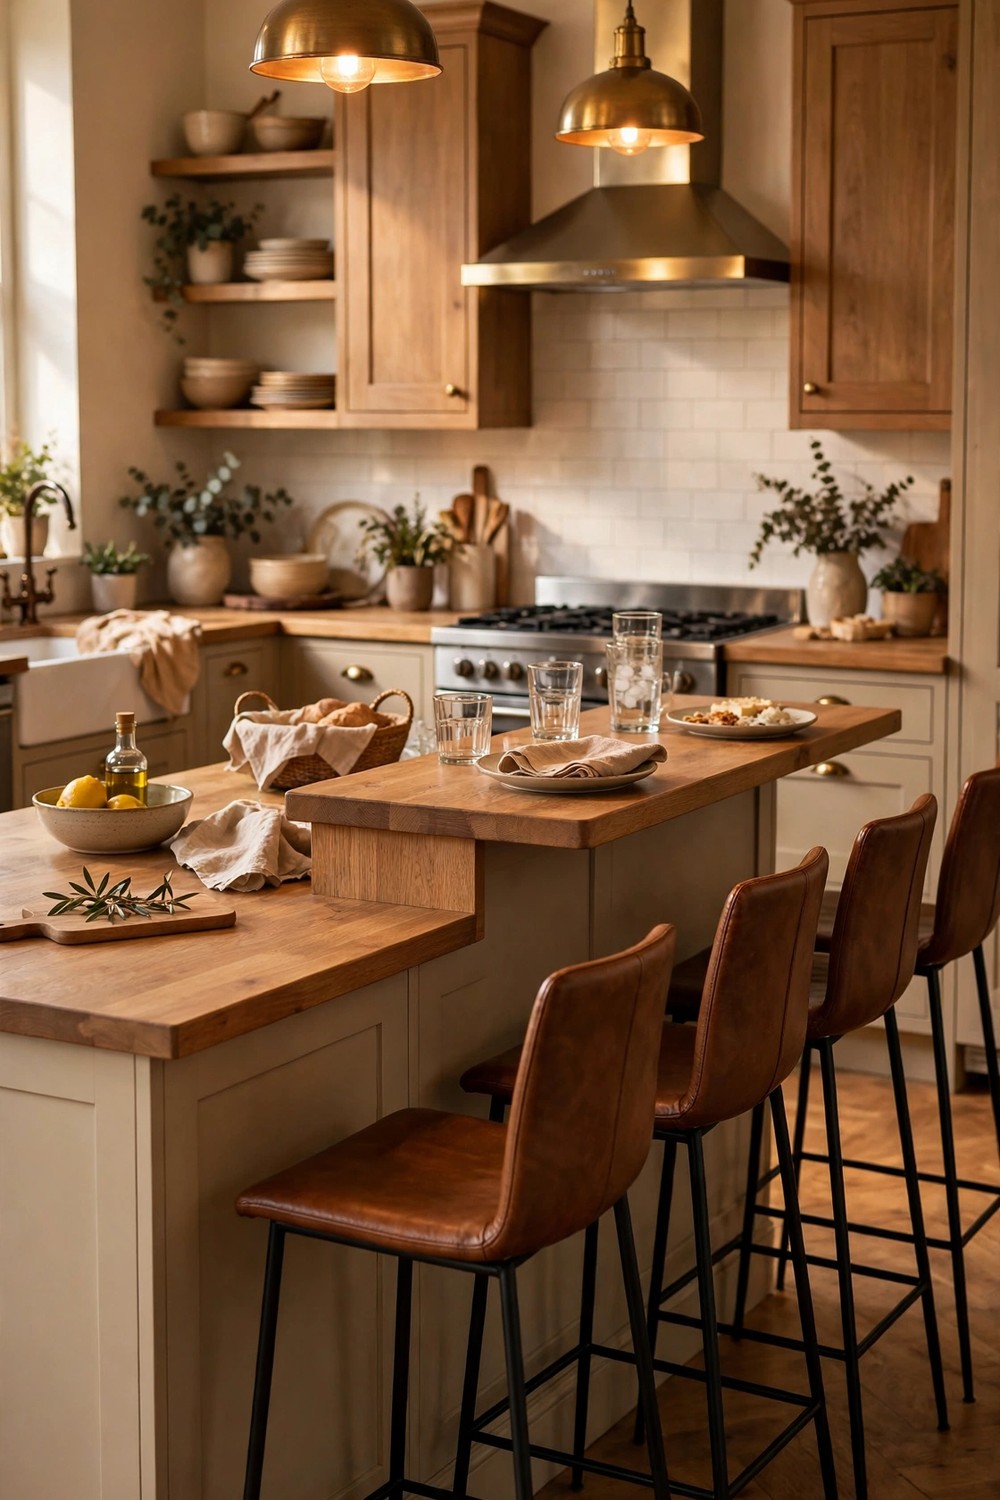
21. Add a Raised Bar Level for Casual Dining
A raised bar level adds a casual dining spot to the island while gently separating the eating side from the cooking side, which many families find helps a busy kitchen feel calmer. The higher surface gives seated guests a clear place for drinks, laptops, and plates, and it can hide a little of the prep mess from anyone sitting on the other side. That small visual break is often the reason people choose this layout for open plan rooms. Choose stools that suit the higher height and check that knees and footrests feel comfortable before you buy a full set. The raised section might run the full length of the island or just part of it, leaving the rest lower for prep and serving. Match the bar top to the main counter for a seamless look, or use warm wood there to mark the gathering zone and soften the room.
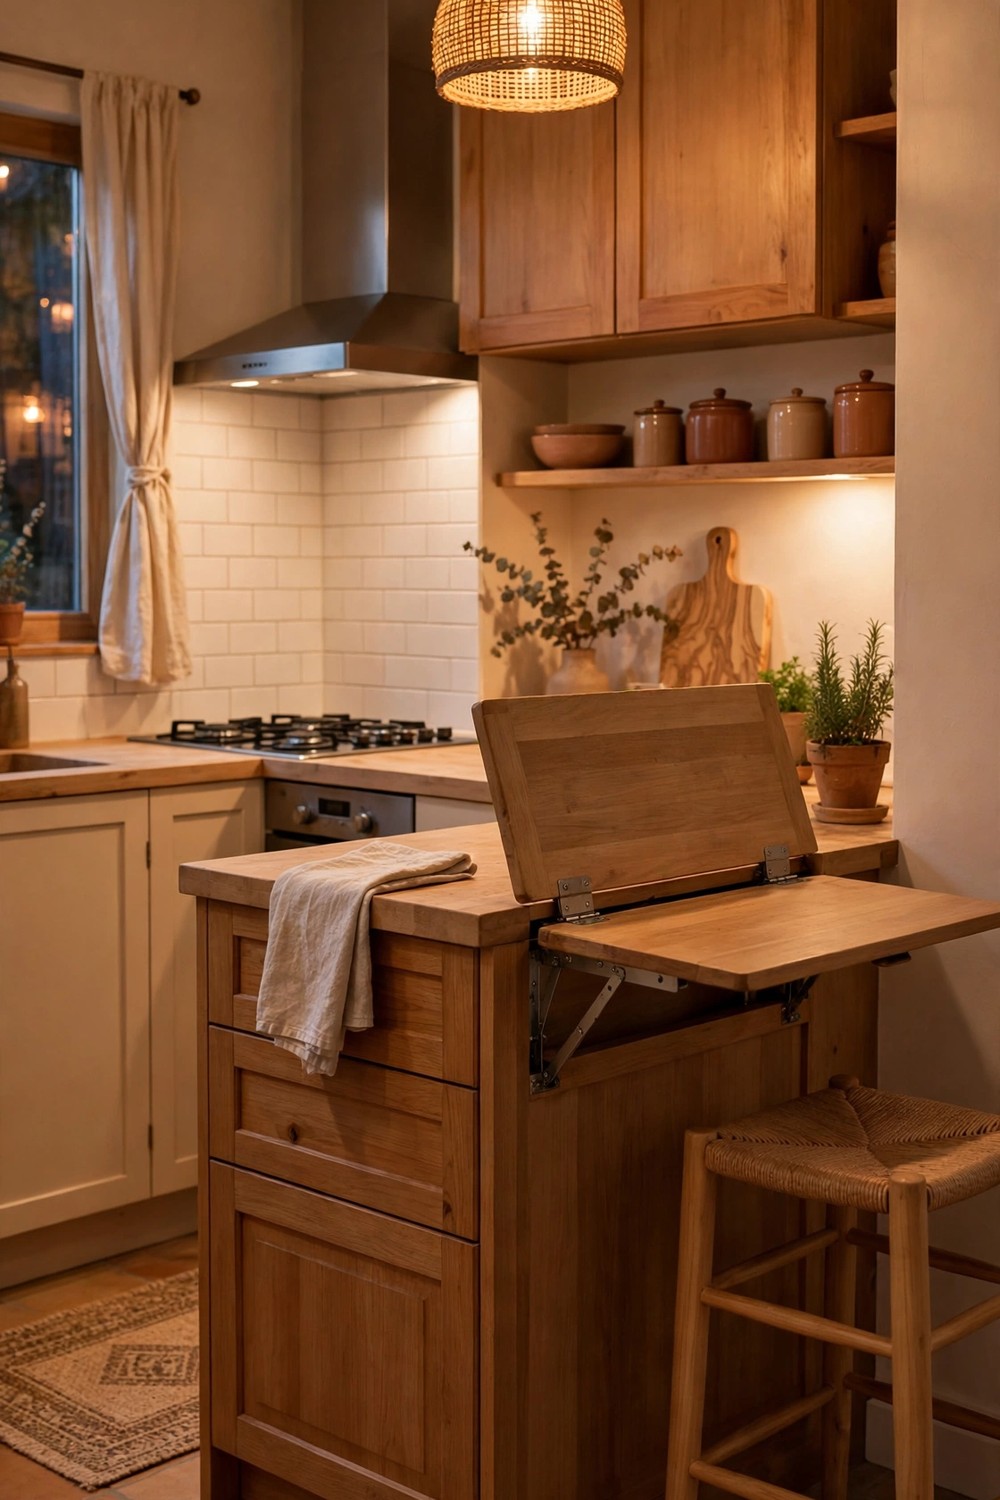
22. Finish With a Drop Leaf for Flexible Extra Space
A drop leaf is a hinged section of counter that folds down when you do not need it and lifts up when you do, and it is a clever finishing idea for kitchens that swing between quiet weekdays and fuller weekends. Folded down, your island stays slim and traffic moves easily. Lifted up, you gain serving space for a holiday meal, room for a baking project, or an extra seat or two for guests who happily pull up a stool. Look for strong hinges and a support that locks securely, since a wobbly leaf will quickly stop feeling clever. Match the leaf material to your main counter if you can, so the island looks whole in both positions. Test the folded clearance against nearby stools, bins, and open dishwasher or oven doors before you finalize the size. Flexible space like this often suits real life better than a bigger fixed island ever could.
Choose the Island That Fits Your Real Life
When you step back, the best island is rarely the biggest one or the one that copies a photo most closely. It is the one that gives you a clear counter where you prep, a comfortable seat where people actually linger, and storage that matches the way your household really cooks and gathers. If space is tight, a cart, a slim table, or a drop leaf can still give you most of that feeling. If space is generous, zoning a larger island into prep, seating, and serving areas will typically make it feel useful rather than vast.
So start with one honest change this season. Measure your walkways, tape an outline on the floor, and try living around it for a few days before you spend anything serious. Notice where you naturally chop, chat, and set things down, and let those small observations guide the bigger choices. Before long, your island will not feel like a design decision anymore. It will feel like the natural center of your kitchen, ready for ordinary breakfasts, busy weeknights, and the longer, slower gatherings you hope for.

Leave a Reply